
Pruning
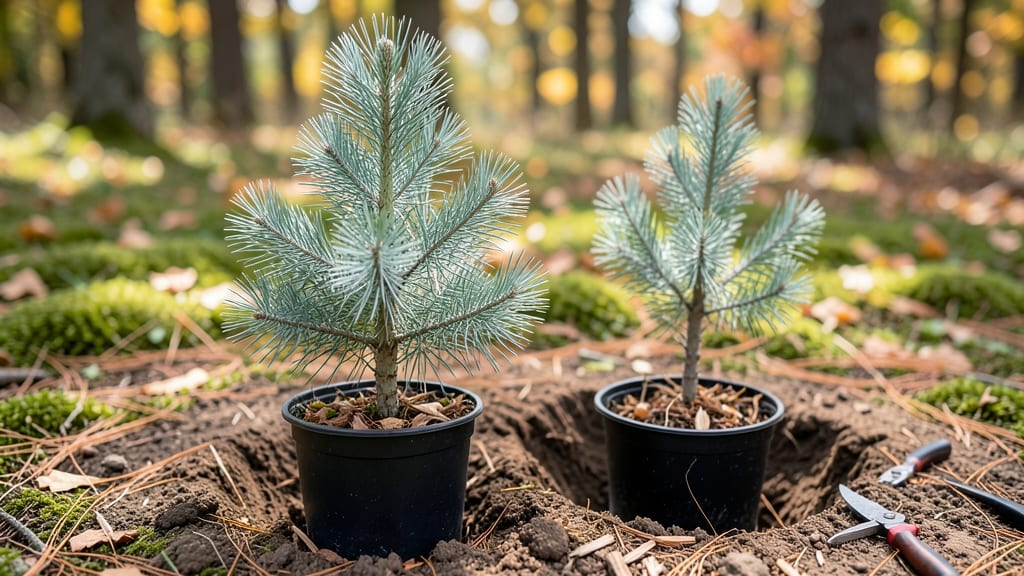
Growing a spruce tree seedling from scratch starts with a simple but powerful trick: the layered chill method, which mimics nature’s way of strengthening young roots. I learned this technique after my first batch of seedlings grew leggy and weak—until I replicated the natural cold stratification process.
The key isn’t just planting; it’s preparing the seedling to thrive in its new home by building resilience before it even hits the soil.
You’ll need just a few supplies: a well-draining potting mix, a small container with drainage holes, and a plastic bag or clear wrap to create a mini greenhouse effect.
The process takes about 6-8 weeks of careful monitoring, but the payoff is a seedling with a stronger root system that establishes faster in the ground.
Spruces prefer partial shade to full sun, so choose a spot that gets morning light but afternoon relief from harsh rays—especially in hotter climates.
Once planted, keep the soil consistently moist but not soggy, and avoid fertilizing for the first 3 months—young roots need time to adapt. Watch for signs of stress like yellowing needles or wilting, which often mean overwatering or poor drainage.
With patience, your seedling will develop into a compact, vibrant tree ready for long-term care in just a few years.
This method works for blue spruce, white spruce, and Colorado blue spruce seedlings, and it’s perfect for beginners who want to skip the nursery and grow their own. The layered chill approach isn’t just about survival—it’s about setting your young tree up for a lifetime of healthy growth.
📚 In This Guide
- What you need
- Instructions
- Tips and common mistakes
- Wrapping up and next steps
What you need
- ● Spruce tree seeds: 10–20 fresh, viable seeds (preferably from a Picea species like Colorado blue spruce or Norway spruce).
- ● Seed-starting mix: 1–2 bags (2–3 cubic feet) of sterile, well-draining potting soil (look for a blend labeled for conifer seedlings or seed starting).
- ● Seedling trays or pots: Option 1: 72-cell seedling trays (for precision) or
- ● Option 2: 4–6-inch diameter pots (for larger seedlings).
- ● Clear plastic dome or humidity tent: 1 (to retain moisture during germination).
- ● Spray bottle: 1 (for gentle watering).
- ● Grow lights or sunny windowsill: Access to 12–16 hours of light daily (LED grow lights are ideal).
- ● Plant labels: 20+ (to track seed varieties).
- ● Small hand trowel: 1 (for transplanting seedlings).
- ● Thermometer: 1 (to monitor soil temps—ideal range: 65–75°F during germination).
- ● Refrigerator or cold frame: Access to a space that can maintain 34–40°F for the layered chill phase (4–8 weeks).
- ○ Misting nozzle (optional): 1 (for even moisture distribution).
- ● Fungicide (e.g., mycorrhizal inoculant): 1 bottle (to prevent damping-off disease).
- ● Heat mat: 1 (speeds up germination if your space is cool).
- ● pH testing kit: 1 (ensure soil pH is 5.0–6.0, ideal for spruce).
- ● Garden journal: 1 (to log growth stages and conditions).
Instructions for cultivating spruce tree seedlings using layered chill
This method mimics natural stratification, ensuring robust root development before transplanting.
Collect and Prepare the Seeds
Harvest spruce cones when they open naturally in late summer or early fall. Place them in a paper bag and store in a warm, dry location for 4-6 weeks to complete natural drying. Once fully dried, extract the seeds by gently crushing the cones over a tray—spruce seeds are tiny, so avoid excessive force to prevent damage.
Separate viable seeds from debris by floating them in water. Viable seeds sink while empty or damaged seeds float. Pat the remaining seeds dry with a paper towel and store them in a sealed container in the refrigerator for 3 months. This cold stratification mimics winter conditions, breaking seed dormancy for more reliable germination.
Stratify and Plant the Seeds
Fill a 4-inch deep container with sterile seed-starting mix, moistening it until damp but not soggy. Sprinkle the stratified seeds evenly over the surface, spacing them ½ inch apart. Press them lightly into the soil—spruce seeds need light to germinate, so avoid covering them with additional mix.
Place the container in a plastic bag and seal it loosely to retain humidity. Store it in a cool, dark location (around 40-50°F) for 4-6 weeks. Check weekly for moisture, misting lightly if the soil feels dry to the touch. This extended cold treatment ensures synchronized germination and stronger seedlings.
Transition to Light and Warmth
Once seeds sprout, move the container to a bright, indirect light source, such as a north-facing window or under grow lights positioned 6 inches above. Maintain soil moisture by watering gently from the bottom—place the container in a shallow tray of water for 10-15 minutes, allowing the mix to absorb moisture evenly.
After 4-6 weeks, when seedlings reach 2-3 inches tall, gradually introduce them to direct sunlight for 1-2 hours daily, increasing exposure by 30 minutes each week. This hardening process prevents shock when transitioning to outdoor conditions. Keep the soil consistently moist but never waterlogged—spruce seedlings are prone to root rot in saturated conditions.
Transplant and Establish Seedlings
Choose a partially shaded outdoor location with well-draining soil and transplant seedlings when they are 6-8 inches tall, typically in early spring after the last frost. Dig a hole twice as wide as the root ball but only as deep as the container’s base. Gently remove the seedling, loosening any tangled roots before placing it in the hole.
Backfill with soil, firming it lightly around the base to eliminate air pockets. Water deeply to settle the soil and encourage root spread. Mulch with 2-3 inches of organic mulch (like pine needles or shredded bark) to retain moisture and regulate soil temperature. Monitor seedlings closely for wilting or yellowing leaves, which may indicate overwatering or poor drainage.
Maintain Growth Through the First Year
Water seedlings once weekly during dry spells, ensuring the soil remains evenly moist but not soggy. Spruce trees thrive in acidic soil (pH 4.5-6.0), so test your soil annually and amend with sulfur or peat moss if needed. Fertilize lightly in early spring with a balanced, slow-release fertilizer to support steady growth without encouraging leggy stems.
Prune any dead, damaged, or crossing branches in late winter to maintain a strong structure. Avoid heavy pruning in the first year—focus on shaping rather than reducing foliage. By the end of the first growing season, your seedlings should develop a sturdy root system and compact, bushy growth, setting the stage for healthy maturity.
Tips & tricks for perfect spruce tree seedling cultivation
Mastering the layered chill method for spruce seedlings transforms a delicate process into a reliable one—here's how to optimize each critical stage for success.
Seed Selection and Preparation: The 4-6 week drying period for cones is non-negotiable—this ensures seeds are fully mature and ready for stratification. I've found that storing cones in a paper bag with small air holes prevents mold while maintaining airflow. When extracting seeds, work over a dark surface (like black construction paper) to easily spot the tiny, brown seeds against the lighter debris. The water float test is foolproof, but work quickly to prevent viable seeds from absorbing too much moisture during the process.
Stratification Environment: Maintaining that 40-50°F range during the 4-6 week cold stratification is where many growers stumble. I recommend using a refrigerator's crisper drawer for more stable temperatures than a standard shelf. The plastic bag creates a humid microclimate, but leave it slightly open—condensation dripping onto seeds can cause rot. Check weekly by lifting the bag and feeling the soil; it should be damp like a wrung-out sponge, not soggy.
Light Transition Strategy: The gradual hardening process in Step 3 is what prevents transplant shock. Start with just 1-2 hours of direct sunlight and increase by 30 minutes weekly—I've seen seedlings that went straight to full sun wilt dramatically within days. For indoor grow lights, position them 6 inches above the seedlings and adjust height as they grow. The bottom-watering technique prevents overwatering while ensuring even moisture distribution throughout the root zone.
Transplanting Technique: When your seedlings reach 6-8 inches, the root ball should be firm but not rock-hard. Gently squeeze the container—if roots resist coming out, it's not ready. The hole should be twice as wide but only as deep as the container's base; this encourages horizontal root growth rather than forcing roots upward. After transplanting, give a thorough watering to eliminate air pockets, then mulch immediately to lock in moisture and regulate soil temperature.
Pro Tips for Spruce Tree Seedling
- Mastering the layered chill method for spruce seedlings transforms a delicate process into a reliable one—here's how to optimize each critical stage for success.
- Seed Selection and Preparation: The 4-6 week drying period for cones is non-negotiable—this ensures seeds are fully mature and ready for stratification.
- Stratification Environment: Maintaining that 40-50°F range during the 4-6 week cold stratification is where many growers stumble.
Frequently asked questions
Got questions about growing spruce tree seedlings using the layered chill method? You’re not alone! Here are some of the most common concerns—and their answers—to help you grow a sturdy, thriving sapling.
When is the best time to plant a spruce tree seedling?
The ideal time to plant is early spring or fall when soil temperatures are cool (50–60°F). Avoid planting in extreme heat or frost—seedlings need time to establish roots without stress. If you must plant in summer, do it in the early morning or late evening to reduce transplant shock.
How does the layered chill method work for spruce seedlings?
This method mimics nature by exposing seedlings to cold stratification (40–50°F for 30–90 days) to break dormancy. Layer them in moist peat moss or sawdust in a container, then refrigerate. After chilling, plant outdoors or in pots with well-draining soil. Patience pays off!
Why is my spruce seedling turning yellow or dropping needles?
Yellowing needles or needle drop often signal overwatering, poor drainage, or nutrient deficiency. Check soil moisture—it should stay evenly damp, not soggy. If roots are waterlogged, repot in a mix of peat, perlite, and sand. Yellowing at the tips? It might need fertilizer (use a balanced 10-10-10 formula lightly).
Can I grow a spruce tree from seed instead of a seedling?
Yes, but it’s far slower and less reliable than using seedlings. Spruce seeds require stratification (cold treatment) and may take 2–5 years to mature. Seedlings give you a head start with established roots. If you’re committed, soak seeds in water for 24 hours, then chill them for 30–60 days before planting.
How often should I water a young spruce seedling?
Water deeply 1–2 times per week, ensuring the top 2–3 inches of soil stay moist but not waterlogged. Mulch around the base (2–3 inches of pine straw or wood chips) to retain moisture and protect roots. In hot weather, check soil daily—wilting needles mean it’s thirsty!
What’s the fastest way to encourage root growth?
For a root boost, use rooting hormone when transplanting and keep the seedling in partial shade for the first few weeks. Mist leaves daily to increase humidity, and avoid fertilizing until new growth appears (wait 4–6 weeks). A mycorrhizal fungus (available at nurseries) can also supercharge root development!
Wrapping up and next steps
Growing a spruce tree seedling using the layered chill method is a rewarding way to nurture strong, resilient roots and a thriving tree.
By following these steps—from selecting the right container to mastering the cold stratification process—you’re setting your seedling up for long-term success. Now’s the time to roll up your sleeves and give your spruce the care it deserves!
Ready to take the next step? Plant your seedling outdoors in a suitable spot once the last frost has passed, and keep an eye on its progress. With patience and dedication, you’ll soon enjoy a lush, healthy spruce tree that stands tall for years to come! 🌲✨