
Transplanting
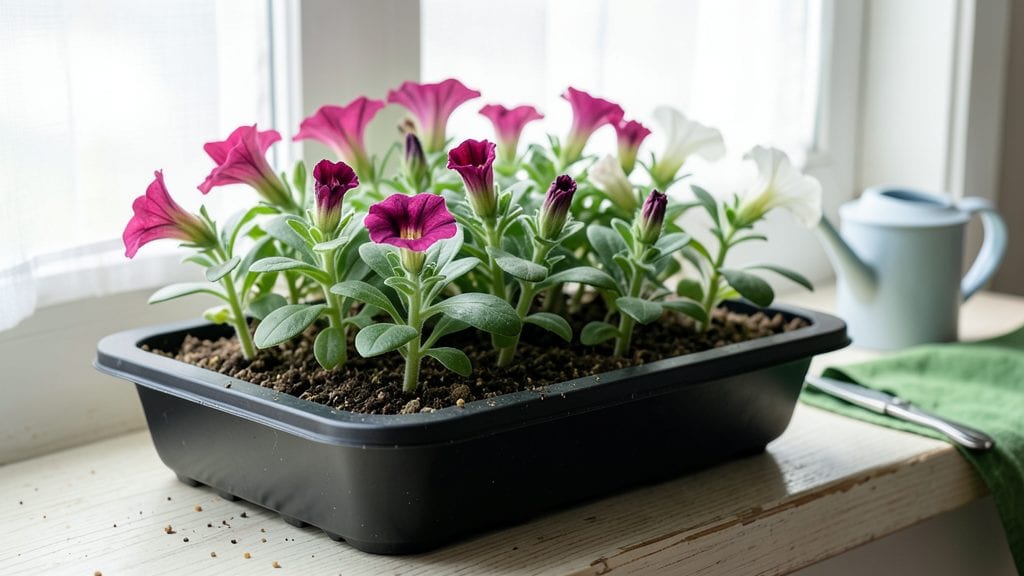
Seeing the right petunia seedlings images can make all the difference—those tiny sprouts look delicate, but a few days of legginess or yellowing can spell disaster before you even transplant. The right timing and care make all the difference between thriving blooms and sad, stunted plants.
First leaves are delicate, but true leaves signal real progress. Healthy seedlings stand firm, not stretched thin, with vibrant green color—not pale or spotted. If you notice black stems or mold, act fast—damping-off is a silent killer.
The key is balance: enough light to prevent stretching, but not so much it scorches tender shoots.
By the time they’re ready to transplant, your seedlings should be sturdy enough to handle outdoor conditions. Pinch leggy stems to encourage bushier growth, and harden them off gradually. Within weeks, you’ll see compact, robust plants bursting with potential—just like the ones in your dream garden.
This works for both indoor starts and direct-sown seeds, whether you’re growing in trays or small pots. Let’s get those seedlings thriving so you can enjoy petunias that steal the show all season.
📚 In This Guide
- What you need
- Instructions
- Tips and common mistakes
- Wrapping up and next steps
What you need
- ● Petunia seeds: Choose high-quality, disease-resistant varieties (e.g., Petunia × hybrida) for best results.
- ● Seed-starting mix: 10–15 lbs of sterile, well-draining potting soil (avoid garden soil—it can harbor pathogens!).
- ● Seed trays or pots: 2–4 inch deep containers (cell packs or small pots work well).
- ● Grow lights or sunny windowsill: A full-spectrum LED grow light (12–16 hours/day) or a south-facing window with bright, indirect light.
- ● Spray bottle: For gentle watering (avoid over-saturating seeds!).
- ● Plastic wrap or humidity dome: To retain moisture while seeds germinate.
- ● Tweezers or seed starter tool: For precise seed placement (especially for tiny petunia seeds!).
- ○ Heating mat (optional): Speeds up germination (70–75°F is ideal).
- ● Fertilizer: A balanced, water-soluble fertilizer (5-10-5 or 10-10-10) for seedlings once they sprout.
- ● Labels & markers: To track seed varieties and planting dates.
- ● Pruning shears: For trimming leggy seedlings later.
Instructions for identifying healthy petunia seedlings at key growth stages
Recognizing strong petunia seedlings early prevents weak transplants and ensures vibrant blooms later.
Examine Germination and First True Leaves
Healthy petunia seedlings first emerge with cotyledons—those initial round leaves that appear 5-14 days after sowing. These should be bright green, plump, and evenly spaced around a sturdy stem, not yellowed or shriveled. If cotyledons look pale or translucent, the seedlings need more light or warmer temperatures. I always check the undersides for tiny black spots—early signs of damping-off disease.
Wait until first true leaves (the smaller, jagged-edged leaves that follow) appear before thinning. These leaves indicate the seedling has established its photosynthetic system. At this stage, healthy seedlings should have compact stems with leaves clustered close together, not stretched thin and leggy. If you see this, your seedlings are reaching for light—adjust your grow lights within 2-3 inches of the tray immediately.
Assess Stem Strength and Root Development
Gently grasp a seedling by its cotyledons (not the stem) to test strength. A healthy petunia seedling will have a thick, firm stem that doesn’t snap or bend easily. If stems feel hollow or mushy, the seedlings are overwatered or root-bound. I often tap the bottom of the tray to loosen roots slightly—this helps identify if roots have filled the container.
For container-grown seedlings, check the root mass by carefully lifting a plant. Healthy roots should be white or pale yellow, not brown or black. If roots are circling the pot tightly, it’s time to transplant into slightly larger containers. Petunias hate root disturbance, so I always water 24 hours before repotting to reduce shock.
Evaluate Leaf Color and Pest Presence
Vibrant dark green leaves with no yellowing or browning signal a thriving seedling. Petunias are particularly prone to powdery mildew on older leaves, so inspect the undersides regularly. If you spot white, powdery patches, isolate the plant immediately and increase air circulation. Healthy seedlings also have smooth leaf edges—any jagged or curled leaves may indicate aphid infestations or underwatering.
Look for new growth at the stem tips—this is where future blooms develop. If growth has stalled, the seedlings may need fertilizer (use a balanced 10-10-10 solution at half-strength). I avoid fertilizing before the first true leaves stage, as young seedlings are sensitive to salt buildup from nutrients.
Prepare for Transplanting with Hardening Checks
Two weeks before transplanting outdoors, start hardening off seedlings by placing them in partial shade for 1-2 hours daily. Healthy seedlings will show minimal wilting and recover quickly when moved back inside. If leaves droop severely or turn crispy, they’re not ready—extend the outdoor time by 30 minutes every 2-3 days until they tolerate 6+ hours of sun.
At transplant time, petunias should have 4-6 true leaves and a robust root system. Avoid transplanting in direct afternoon sun—choose an overcast day or transplant in the early morning. Water deeply before and after moving seedlings to minimize stress. The goal is to mimic their container environment as closely as possible in the garden bed.
Tips & tricks for identifying healthy petunia seedlings
Mastering these visual cues will transform your seedling assessment from guesswork to confident gardening.
Lighting Insight: The 5-14 day window for cotyledon emergence is your first critical benchmark. Position seedlings under grow lights within 2-3 inches to prevent leggy growth—this distance ensures proper light intensity without scorching tender leaves. I've found that using a simple LED grow light on a timer (14-16 hours daily) creates ideal conditions for even development. The key is consistency: seedlings reaching for light will develop stretched stems and weak connections between leaves.
Root Examination Technique: When checking root mass after the 24-hour pre-repotting watering, gently squeeze the container sides to release roots from the tray walls. Healthy roots should feel springy, not brittle. If you notice roots growing in tight circles, it's a clear sign to upgrade container size immediately—petunias develop root-bound stress quickly, which manifests as stunted growth above ground. I recommend using clear plastic cell packs for easy root inspection without disturbing the seedlings.
Pest Prevention Strategy: The first true leaves stage is when petunias become most vulnerable to aphid infestations. I've developed a simple preventive routine: spray seedlings with a 1% neem oil solution every 7 days starting at the first true leaves stage. The oil creates a protective barrier while being safe for young plants. For existing infestations, isolate affected seedlings immediately and treat with insecticidal soap—aphids multiply rapidly, and early intervention prevents systemic damage to your entire crop.
Hardening Off Timeline: The 1-2 hour daily hardening off period should begin gradually. Start with just 30 minutes on day one, then increase by 30 minutes every 2-3 days as specified. I've noticed that seedlings acclimated this way show significantly better transplant shock recovery. The critical test comes when they can handle 6+ hours of sun without wilting—this resilience translates directly to stronger established plants in your garden.
Pro Tips for Petunia Seedlings Images
- Mastering these visual cues will transform your seedling assessment from guesswork to confident gardening.
- Lighting Insight: The 5-14 day window for cotyledon emergence is your first critical benchmark.
- Root Examination Technique: When checking root mass after the 24-hour pre-repotting watering, gently squeeze the container sides to release roots from the tray walls.
Frequently asked questions
How do I know if my petunia seedlings are ready for transplanting?
Seedlings are ready when they’ve developed 2-3 sets of true leaves (not just the initial seed leaves) and are about 2-3 inches tall. Look for sturdy stems and vibrant leaves—if they’re leggy or weak, harden them off first (gradually expose to outdoor conditions for 5-7 days).
How long does it take for petunia seeds to sprout?
Most petunia seeds sprout in 7-21 days, depending on temperature (ideal is 70-75°F) and moisture. Keep soil consistently damp (not soggy) and avoid moving trays until sprouts appear. Patience is key! Some slow starters may take up to 3 weeks.
Why are my petunia seedlings turning yellow or wilting?
Yellowing leaves often signal overwatering (root rot) or underwatering (dry soil). Wilting can also mean heat stress or nutrient deficiency. Check soil moisture with your finger—it should feel damp but not muddy. If roots look mushy, repot in fresh, well-draining soil.
Can I transplant petunia seedlings too early?
Yes! Transplanting too soon risks shock or stunted growth. Wait until seedlings have true leaves and nighttime temps stay above 50°F. If frost is possible, delay until after the last frost date. Hardening off (acclimating to outdoor conditions) for 1 week before transplanting helps.
What’s a good alternative if my petunia seeds won’t germinate?
Try bought seedlings from a nursery (choose compact varieties like ‘Wave’ or ‘Supertunia’). For DIY options, cuttings from mature petunias (root in water or soil) work too. If seeds fail, check for freshness—petunia seeds lose viability after 1-2 years.
Wrapping up and next steps
Growing petunia seedlings into vibrant, thriving plants is all about observing the right cues—from sturdy stems to lush foliage—and acting at the perfect time. By using petunia seedlings images as your guide, you’ll confidently spot healthy stages and avoid common pitfalls like leggy growth or weak roots.
Your green thumb is closer than you think! 🌱
Ready to take the next step? Transplant your seedlings into larger pots or your garden when they’ve developed 3-4 sets of true leaves and sturdy stems. With patience and care, you’ll soon be rewarded with a burst of colorful blooms that brighten up any space!