Picking
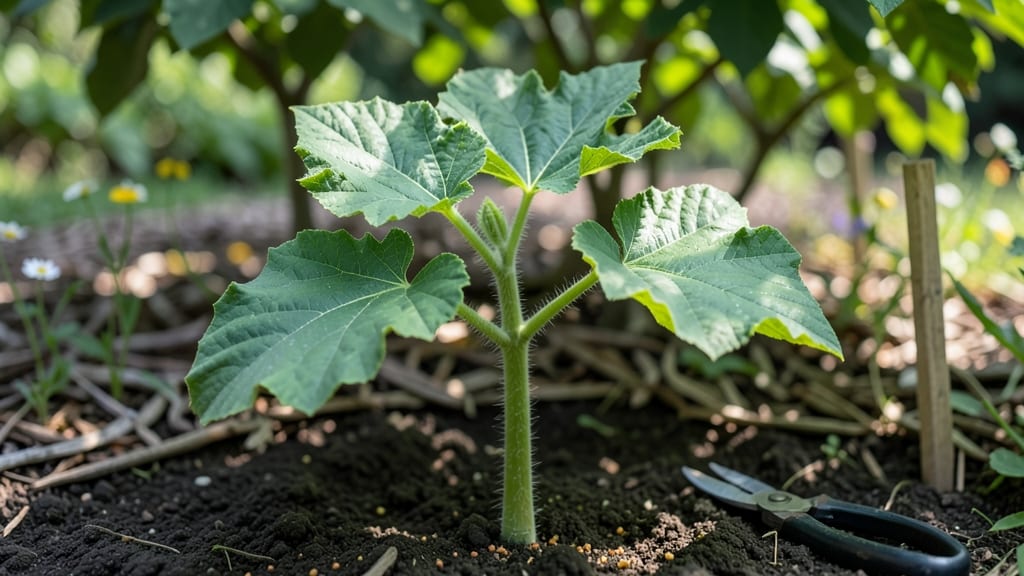
Planting summer squash seedlings is the fastest way to a garden overflowing with zucchini and pattypan—if you get the early care right. I’ve learned the hard way that skipping soil prep or overwatering leads to floppy, disease-prone plants, but with the right start, you’ll harvest within 60 days.
The secret isn’t complicated: warm soil, proper spacing, and a little patience to let those vines establish strong roots before they take off.
Most gardeners focus on transplanting but overlook the first two weeks after planting, when seedlings are most vulnerable. Use a 5-10-10 fertilizer at planting to give them a boost, then switch to compost tea every two weeks to avoid burning tender roots.
Yellowing leaves? Often a sign of overwatering—let the top inch of soil dry out between waterings, especially in humid summers. And watch for cucumber beetles; a row cover for the first month saves you from losing plants before they even produce.
By mid-summer, you’ll be snipping squash from vines that stretch 3-5 feet wide, producing 10+ pounds of harvestable fruit per plant. The key is consistency: keep the soil moist (not soggy), mulch heavily to retain moisture, and prune suckers to focus energy on fruit production.
Even in small spaces, bush varieties like ‘Eight Ball’ or ‘Patio Star’ deliver without sprawling. Here’s how to set them up for success from day one.
This method works in zones 3-10, though heat-loving squash appreciate afternoon shade in the Deep South. For container growers, choose compact varieties and use 5-gallon pots—they’ll still produce, just on a smaller scale.
The biggest mistake? Rushing transplanting; wait until nighttime temps stay above 55°F and soil warms to 60°F before setting those seedlings out. Patience here means fewer wilted plants and more harvests.
📚 In This Guide
- What you need
- Instructions
- Tips and common mistakes
- Wrapping up and next steps
What you need
- ● Summer squash seeds: Choose heirloom or hybrid varieties like Yellow Crookneck, Zucchini, or Patio Star. Buy 5–10 seeds per plant (or 20–30 for a small garden).
- ● Seed-starting containers: 3–4 inch pots (biodegradable or plastic) or seed trays with cells. You’ll need 1 container per seedling.
- ● Seed-starting mix: Lightweight, sterile potting soil (avoid garden soil—it’s too dense!). A 10–20 lb bag covers multiple starts.
- ● Grow lights or sunny windowsill: A full-spectrum LED grow light (12–16 hours/day) or a south-facing window with 6+ hours of sunlight.
- ● Watering can or spray bottle: A gentle spray keeps seeds moist without disturbing them.
- ● Fertilizer: A balanced, water-soluble fertilizer (5-5-5 or 10-10-10) or organic options like fish emulsion.
- ● Transplanting tools (later stage): Small hand trowel, garden gloves, and a bucket of water for post-transplant care.
- ● Heat mat ($15–$30) to speed up germination in cooler climates.
- ● Humidity dome or plastic wrap to retain moisture while seeds sprout.
- ● Epsom salt (1 tbsp per gallon of water) for magnesium boost during early growth.
- ● Row covers or shade cloth if your seedlings get too much direct sun.
- ● Treasure tags or labels to track varieties and planting dates.
Step-by-step instructions for growing healthy summer squash seedlings
Here’s how to transform delicate seedlings into vigorous, productive plants ready for transplanting.
Prepare the Growing Environment
Summer squash seedlings thrive when started in a warm, well-draining environment. Use a seed-starting mix in clean, 2-3 inch deep containers—biodegradable pots work best to avoid root disturbance later. Fill each container with the seed-starting mix, leaving ½ inch of space below the rim for watering. Press the soil gently to remove air pockets, then moisten it until evenly damp but not soggy.
Place the containers in a warm spot with a seedling heat mat set to 75-85°F. This consistent warmth encourages rapid, even germination. Without a heat mat, place the trays on top of the refrigerator or near a sunny window where ambient temperatures stay above 65°F. The goal is to mimic summer soil warmth, which speeds up germination from 5-10 days to just 3-7 days. Cover the trays with a humidity dome or plastic wrap to retain moisture and warmth until germination begins.
Sow Seeds at the Correct Depth and Depth
Plant 1-2 seeds per container at a depth of ½ inch, which is roughly the width of a dime. Pressing the seeds too deep slows germination, while planting too shallowly risks drying them out. Use your finger to create a small hole, place the seeds inside, and cover them lightly with the remaining mix. Avoid pressing down—just a gentle pat to secure the seeds.
Label each container immediately with the variety and date, as seedlings can look identical in their early stages. Mist the soil surface with a spray bottle until evenly moist, but avoid oversaturating. The soil should feel like a damp sponge—never allow it to pool at the bottom of the container. Place the trays back under the humidity dome and maintain warmth until the first signs of sprouting appear.
Provide Optimal Light and Prevent Legginess
As soon as the first true leaves appear—these are the second set after the initial cotyledons—remove the humidity dome immediately. Leggy seedlings (thin, stretched stems) are a red flag that your light source is insufficient. Position seedlings under a full-spectrum LED grow light or within 2-4 inches of a south-facing window. If using natural light, rotate the trays ¼ turn daily to ensure even growth.
Leggy seedlings won’t recover their strength, so act fast. If you notice stems bending or leaves spaced more than 1 inch apart, raise the light closer or supplement with a grow light. Aim for 14-16 hours of light daily. Strong seedlings will have thick stems, deep green leaves, and a compact, bushy shape. Avoid fertilizing at this stage—young seedlings are sensitive to nutrient overload, which can burn their delicate roots.
Harden Off Seedlings Before Transplanting
Two weeks before your last frost date, begin the hardening-off process to acclimate seedlings to outdoor conditions. On the first day, place the trays in a sheltered, shaded spot outside for 1-2 hours. Gradually increase exposure by 1 hour daily, moving them to a sunnier location over 7-10 days. This slow transition prevents shock and allows seedlings to adjust to wind, temperature fluctuations, and brighter light.
Watch for signs of stress, such as wilting or yellowing leaves, which indicate the process is moving too quickly. If you notice these symptoms, reduce outdoor time and reintroduce shade. Once seedlings can tolerate 6+ hours of direct sun without wilting, they’re ready for transplanting. Choose an overcast day or transplant in the late afternoon to minimize transplant shock. Water deeply at the base to settle the soil around the roots.
Tips & tricks for growing healthy summer squash seedlings
Mastering summer squash seedlings requires attention to detail—here’s how to avoid the most common pitfalls and set your plants up for success from the very beginning.
Container Selection: While biodegradable pots are ideal, you can also use plastic cell packs or even repurposed egg cartons for the initial stages. The key is ensuring containers are at least 2-3 inches deep to accommodate root growth without crowding. If using plastic, make sure they have drainage holes—summer squash roots are sensitive to waterlogging, which can lead to rot. I’ve found that starting with slightly larger containers than necessary actually reduces transplant shock later, as the roots have more space to establish before moving outdoors.
Germination Temperature: Maintaining that 75-85°F range is critical for consistent germination, but don’t let the heat mat run continuously once sprouts appear. After germination (typically within 3-7 days), reduce the heat mat to 65-70°F to prevent overstressing the delicate seedlings. I’ve seen germination rates drop by 30% when temperatures exceed 85°F—seedlings can become leggy or fail to emerge entirely. A simple solution is to use a thermometer to monitor soil temperature and adjust accordingly.
Light Management: The 14-16 hours of daily light requirement can be challenging without grow lights, especially in cloudy conditions. If natural light is insufficient, supplement with a basic LED bulb placed 2-4 inches above the seedlings. Rotating trays quarter-turn daily isn’t just about even growth—it’s also a way to identify which direction your seedlings are leaning. If you notice all seedlings bending toward one window, it’s a clear sign you need to adjust their position or add supplemental lighting immediately.
Harden-Off Gradually: The 1-2 hour initial outdoor exposure in Step 4 might seem minimal, but this gradual approach is what prevents transplant shock. I’ve learned the hard way that rushing this process—even by an extra hour—can cause seedlings to wilt dramatically or even die. Start with just 30 minutes on the first day if your seedlings look particularly delicate, then increase by 30 minutes each subsequent day. Watch for subtle signs of stress like curled leaves or slightly drooping stems, which indicate you’re moving too quickly.
Pro Tips for Summer Squash Seedling
- Mastering summer squash seedlings requires attention to detail—here’s how to avoid the most common pitfalls and set your plants up for success from the very beginning.
- Container Selection: While biodegradable pots are ideal, you can also use plastic cell packs or even repurposed egg cartons for the initial stages.
- Germination Temperature: Maintaining that 75-85°F range is critical for consistent germination, but don’t let the heat mat run continuously once sprouts appear.
Frequently asked questions
Got questions about growing summer squash seedlings? You’re not alone! Here are answers to the most common concerns—from timing to troubleshooting—to help you grow like a pro.
When is the best time to plant summer squash seedlings?
Plant seedlings after the last frost when soil temps hit 60°F (15°C). For most regions, this means late spring (May–June). Use a soil thermometer to check—cool soil slows growth! If nights are still chilly, opt for cold-hardy varieties like ‘Early Prolific’.
How long does it take for summer squash seedlings to mature?
From seedling to harvest, count 45–55 days for bush types (like zucchini) and 50–60 days for vining varieties (e.g., yellow squash). Warm weather speeds things up—soak up those summer sun rays! Pro tip: Thin seedlings to 2–3 feet apart to avoid overcrowding, which delays fruit.
Why are my summer squash seedlings wilting or turning yellow?
Wilting often means underwatering or overwatering—squash loves consistent moisture but hates soggy roots. Yellow leaves? Check for fungal diseases (like powdery mildew) or nutrient deficiencies (add compost or a balanced fertilizer). Fix it: Water at the base in the morning and space plants for airflow.
Can I grow summer squash from store-bought squash seeds?
Yes! Save seeds from organic, heirloom squash (avoid hybrid labels like “F1”). Scoop out seeds, rinse, dry, and store in a cool, dark place. Note: Store-bought seeds may not be disease-resistant. For reliability, buy from seed companies—your future harvest will thank you!
Do summer squash seedlings need special care in hot weather?
Heat stress? Shade cloth (30–50%) helps during scorching afternoons. Mulch with straw to retain moisture and cool roots. Water deeply 1–2 inches per week—drip irrigation works best. Watch for blossom end rot (calcium deficiency) in extreme heat; side-dress with crushed eggshells or lime.
Wrapping up and next steps
Growing summer squash seedlings is a rewarding journey that even busy gardeners can master with the right tools and techniques! 🌱 From selecting healthy seeds to nurturing your plants through transplanting and pest control, each step brings you closer to a bountiful harvest.
With patience and care, you’ll soon be enjoying fresh, homegrown zucchini, yellow squash, and more—straight from your garden to your plate.
Ready to dive in? Start by gathering your supplies, then follow our step-by-step guide to get your seedlings off to a strong start. Happy planting—and may your garden be as productive as it is beautiful! 🌞