Pruning
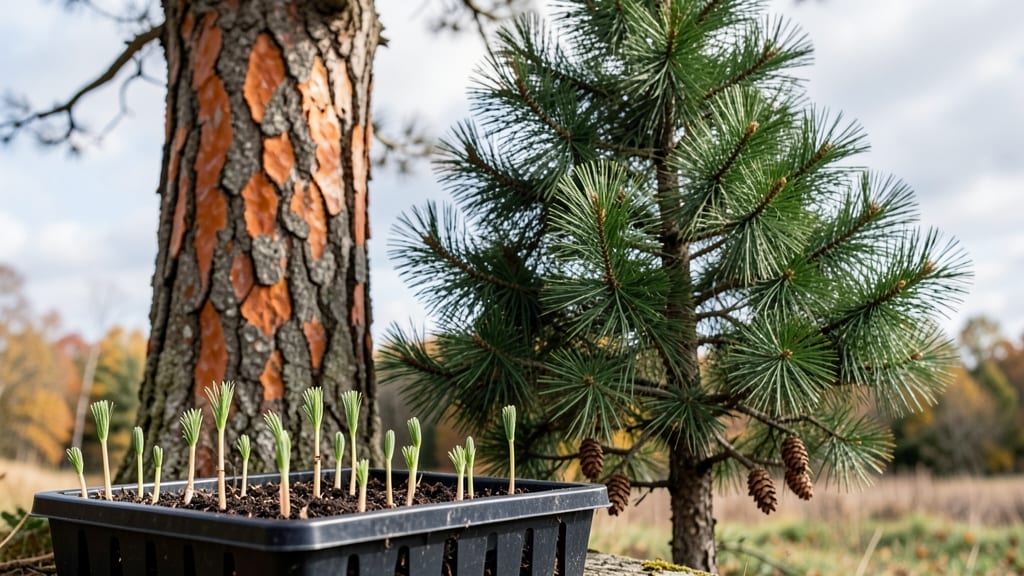
Growing evergreen tree seeds from scratch starts with understanding their stubborn nature—most need a winter chill to wake up. 🌲 I’ve learned the hard way that skipping cold stratification means months of waiting for seeds that’ll never sprout.
The secret lies in mimicking nature’s timing, whether you’re working with pine, spruce, or cedar.
You’ll need a few simple supplies: a sealed plastic bag, a handful of damp sand or peat moss, and patience. The process mimics what happens underground during winter—seeds get chilled for weeks before spring warmth triggers growth.
For pines, this means 8-12 weeks in the fridge; spruces and cedars often need 4-6 weeks of cooler treatment.
Once stratified, you’ll plant them in well-draining soil, barely covering the seeds—just enough to keep them in place. Keep the soil moist (not soggy) and place the pot in bright, indirect light. Within 4-8 weeks, you’ll see tiny green needles pushing through, signaling success.
This method works for backyard growers and forestry projects alike. The key is consistency—evergreens don’t forgive neglect. With the right approach, you’ll have sturdy young trees ready for transplanting by next spring.
📚 In This Guide
- What you need
- Instructions
- Tips and common mistakes
- Wrapping up and next steps
What you need
- ● Evergreen tree seeds: Choose high-quality, fresh seeds (e.g., pine, spruce, or fir). Aim for 10–20 seeds per container for experimentation.
- ● Well-draining potting mix: A blend of peat moss, perlite, and coarse sand (2:1:1 ratio) works best—avoid heavy garden soil.
- ● Seed-starting containers: Small pots (3–4 inches deep) or
- ● A shallow tray with drainage holes (e.g., seedling flats)
- ● Plastic bags or clear lids: For creating a mini greenhouse effect during stratification (e.g., quart-sized zip-top bags).
- ● Spray bottle: With water to keep the mix moist without over-saturating.
- ● Refrigerator or cold stratification setup: A standard fridge set to 34–40°F (1–4°C), or
- ● A dedicated cold stratification box (e.g., DIY options with ice packs)
- ● Labels & marker: To track seed types and stratification dates.
- ○ Grow lights or sunny windowsill: For post-stratification germination (optional but helpful).
- ● Humidity dome: A clear plastic cover to retain moisture during early stages.
- ○ Heat mat (optional): For seeds needing warmth post-stratification (e.g., 70–75°F / 21–24°C).
- ● Thermometer/hygrometer: To monitor temperature and humidity levels in your setup.
Instructions for cold stratifying evergreen tree seeds
Cold stratification tricks evergreen seeds into breaking dormancy—here's how to do it right.
🌱 Step 1: Collect and Prepare the Seeds
Harvest seeds from healthy, mature evergreen cones when they're fully open but haven't released their seeds yet. Spread the seeds on a paper towel to dry for 24-48 hours—this prevents mold during stratification. I like to work in a well-ventilated area because evergreen seeds contain natural oils that can smell strong when fresh.
Once dry, mix the seeds with equal parts damp peat moss or coconut coir in a sealed container. The moisture should feel like a wrung-out sponge—damp but not dripping. Add 1 tablespoon of horticultural sand per cup of mix to improve aeration. This ensures roots won't suffocate during the cold treatment.
❄️ Step 2: Apply Cold Treatment for Dormancy Break
Place the sealed container in a refrigerator set to 34-40°F for 6-12 weeks. I use a plastic bag with small air holes or a breathable fabric pouch to keep moisture stable. Check the mix every 2-3 weeks—if it feels dry, spritz lightly with water and reseal.
This cold period mimics winter conditions, tricking seeds into thinking spring has arrived. Some species like spruce or pine may need the full 12 weeks, while firs often break dormancy in 6-8 weeks. Watch for the first signs of root growth through the container walls—that's your cue to proceed.
🌿 Step 3: Plant in Germination Medium
After stratification, sow seeds ¼ inch deep in a sterilized peat-perlite mix (equal parts). Use individual 2-inch pots or a seed tray with cells to prevent overcrowding. Press the soil gently around each seed—evergreen seeds need good soil contact to germinate.
Place the pots in a warm, shaded area (around 65-70°F) with indirect light. A seedling heat mat set to 70°F speeds germination by keeping roots cozy. Keep the soil consistently moist—never soggy—using a spray bottle to avoid disturbing seeds.
☀️ Step 4: Provide Optimal Light and Humidity
Once seedlings emerge (usually 4-12 weeks after planting), move them to bright, indirect light. A south-facing window works, but supplement with a grow light if seedlings look leggy or pale. Keep the light 3-4 inches above the plants and adjust as they grow.
Maintain high humidity by grouping pots together or using a humidity dome. You'll know conditions are right when condensation forms on the dome's underside during the day. Reduce humidity gradually over 2 weeks as seedlings harden off for outdoor transplanting.
⏰ Step 5: Transplant and Establish Outdoors
Wait until seedlings develop 3-4 true needles and are at least 2-3 inches tall before transplanting. Choose a partially shaded, sheltered spot with well-draining soil. Dig holes twice as wide as the root ball but only as deep as the container.
Water deeply after planting to settle the soil and remove the container. Mulch with 2 inches of pine needles or bark to mimic the forest floor and retain moisture. Evergreen seedlings are delicate—avoid full sun for the first 2 weeks to prevent leaf scorch, then gradually introduce more light.
Tips & tricks for perfect evergreen seed stratification
Cold stratification might seem like a waiting game, but these pro techniques ensure your evergreen seeds break dormancy reliably every time.
The Drying Factor: Those 24-48 hours of drying on paper towels are non-negotiable—this critical step prevents mold from forming during the cold treatment. I've learned the hard way that skipping this can turn your stratification mix into a science experiment gone wrong. Spread seeds in a single layer and rotate the paper towel halfway through to ensure even drying. Work in a well-ventilated space, as evergreen seeds contain natural oils that can get quite pungent when fresh.
Moisture Management: When mixing seeds with damp peat moss or coconut coir, aim for that "wrung-out sponge" consistency—any wetter and you risk anaerobic conditions that suffocate seeds, any drier and stratification fails. I like to use a spray bottle to adjust moisture levels if needed, but always check by squeezing a small handful. The mix should hold together briefly but not drip when pressed. Adding 1 tablespoon of horticultural sand per cup improves aeration without compromising moisture retention.
Temperature Precision: Your refrigerator's temperature matters more than you might think. Aim for the 34-40°F range—most home fridges run around 40°F in the crisper drawer, which is perfect. If your fridge runs cooler, consider using a dedicated seed stratification fridge or moving the container to a slightly warmer spot. I've found that placing the container on a shelf near the back (where temps are most stable) gives the most consistent results. Monitor with a small thermometer if possible—evergreen seeds are particularly sensitive to temperature fluctuations.
Species-Specific Timing: While the general guideline is 6-12 weeks, don't be afraid to adjust based on seed type. Spruce and pine seeds often need the full 12 weeks to fully break dormancy, while fir seeds may be ready in as little as 6-8 weeks. Check for root growth through the container walls every 2-3 weeks—this visual cue is more reliable than guessing by time alone. When you see those first white root tips, it's time to move to germination medium.
Pro Tips for Evergreen Tree Seeds
- Cold stratification might seem like a waiting game, but these pro techniques ensure your evergreen seeds break dormancy reliably every time.
- The Drying Factor: Those 24-48 hours of drying on paper towels are non-negotiable—this critical step prevents mold from forming during the cold treatment.
- I like to use a spray bottle to adjust moisture levels if needed, but always check by squeezing a small handful.
Frequently asked questions
Got questions about growing evergreen tree seeds?
You’re not alone! Here are answers to the most common queries—from timing to troubleshooting—to help you succeed with cold stratification.
What’s the best time to start cold stratification for evergreen seeds?
Start cold stratification in early fall (September–October) for most evergreen seeds. This mimics natural winter conditions, breaking dormancy just in time for spring planting. If you’re using store-bought seeds, check the packet for species-specific timing—some, like spruce, need 3–4 months of cold treatment!
Do I need a fridge for cold stratification, or can I use outdoor methods?
Both work! For outdoor stratification, bury seeds in a moist, well-draining mix in a pot and place it in a shady, frost-protected spot (like a cold frame). For indoor methods, a fridge (33–41°F) with a damp paper towel or peat moss works perfectly. Just avoid freezing temps—evergreens hate extreme cold!
What if my evergreen seeds don’t sprout after stratification?
Don’t panic! Try these fixes:
- Check moisture: Overly dry or soggy mediums can kill seeds. Keep the mix evenly damp (not wet).
- Test viability: Soak seeds in water overnight—if they sink, they’re likely viable.
- Adjust light: Some evergreens need bright, indirect light post-stratification. A sunny windowsill or grow light helps.
- Be patient: Some species (like pine) take 6–12 months to germinate!
Can I use cold stratification for all evergreen seeds, or are there exceptions?
Most coniferous evergreens (pines, spruces, firs) need cold stratification, but broadleaf evergreens (like holly or magnolia) often don’t. Always research your specific seed type—some, like arborvitae, benefit from a short cold period (4–6 weeks), while others need months.
Where can I buy evergreen tree seeds that guarantee good stratification results?
Opt for reputable nurseries or seed suppliers like Fast-Growing-Trees.com, Arbor Day Foundation, or Local native plant nurseries. Look for seeds labeled “cold-hardy” or “stratification-ready”, and avoid wild-collected seeds unless you’ve tested their viability.
Pro Tip:
Label your stratification containers with the seed type and start date! Evergreens vary wildly in needs—keeping track saves guesswork and heartache. Plus, it’s a great way to experiment with different species!
Wrapping up and next steps
Growing evergreen tree seeds with cold stratification isn’t just a gardening hack—it’s your secret weapon for thriving spring growth! 🌱 By mastering the right mix of moisture, chill, and patience, you’ll unlock the potential for hardy, long-lasting trees that bring year-round beauty to your landscape.
Whether you’re a seasoned gardener or just starting, this method makes success achievable with the right steps.
Ready to take the next leap? Start small—try cold-stratifying a few seeds this fall and track their progress. Before you know it, you’ll be expanding your evergreen collection with confidence! Grab your supplies and get planting today!