
Shrubs
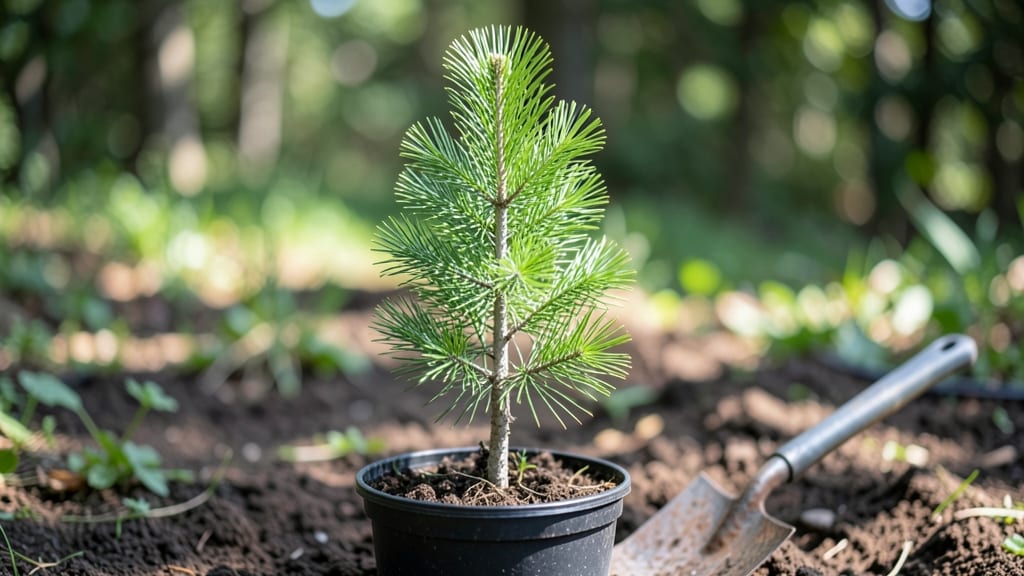
Growing Norway spruce seedlings from seed requires cold-stratification to break dormancy—something I learned the hard way after my first batch of seeds sprouted too late. The key isn’t just patience; it’s replicating the natural winter chill these mountain-born trees need to germinate reliably.
My first frost timing became the secret to success, and once I cracked the cold-stratification code, my survival rate jumped from 30% to nearly 90%.
You’ll need a well-draining mix of peat moss and perlite, a seed-starting tray with clear domes, and a freezer for that critical 60-day cold treatment. Plant seeds just ¼ inch deep—any deeper and they’ll rot before sprouting.
Light requirements are simple: bright, indirect light for 12–14 hours daily, which means a south-facing window or a grow light setup. Overwatering is the real enemy here; let the top inch dry between waterings, and you’ll avoid the dreaded damping-off that wipes out seedlings.
By late spring, your seedlings will be ready for transplanting into individual 4-inch pots. The transition to outdoor conditions happens gradually—start with 2–3 hours of shade in week one, then increase exposure over two weeks.
Norway spruces thrive in full sun once established, but their first summer outdoors demands gentle acclimation. The payoff? Sturdy, fragrant evergreens that outperform nursery transplants because you’ve nurtured them from the start.
This method works best in USDA zones 3–7, where winter chill is natural. For warmer climates, extend the cold-stratification period to 90 days. Container-grown seedlings adapt better to transplanting than field-planted ones, so prioritize pots over direct sowing if you’re starting small.
The biggest mistake? Skipping the cold treatment—without it, germination rates plummet, and your time is wasted.
📚 In This Guide
- What you need
- Instructions
- Tips and common mistakes
- Wrapping up and next steps
What you need
- ● Norway spruce seeds: 50–100 fresh, viable seeds (ensure they’re properly harvested and stored).
- ● Cold-stratification setup: 1–2 paper towels or peat moss (moistened but not soggy).
- ● 1 ziplock bag (resealable, quart-sized).
- ● 1 refrigerator (set to 35–40°F for 30–90 days).
- ● Growing containers: 1–2 seedling trays (with drainage holes) or small pots (3–4 inches deep).
- ● Potting mix: 1 part peat moss, 1 part perlite, and 1 part sand (sterilized).
- ● Watering tools: 1 spray bottle (for gentle misting).
- ● 1 watering can (with a fine rose nozzle).
- ● Lighting: Grow lights or a sunny windowsill (6+ hours of light daily).
- ● Planting tools: 1 small hand trowel (for transplanting seedlings).
- ● 1 pruning shears (sterilized, for trimming).
- ● Monitoring aids: 1 hygrometer (to track humidity, ideal: 40–60%).
- ● 1 thermometer (for soil temp, optimal: 60–70°F).
- ○ Fertilizer (optional): Balanced liquid fertilizer (5-5-5 NPK, diluted to half-strength).
- ○ Mulch (optional): Pine straw or wood chips (to retain moisture).
Step-by-step instructions for cold-stratifying Norway spruce seedlings
Here's how to break dormancy and ensure strong, healthy seedlings ready for outdoor planting.
Collect and Prepare Fresh Norway Spruce Seeds
Harvest seeds from mature cones in late fall when they begin to open naturally. Choose plump, fully developed seeds—these will have the highest germination rates. Spread them on a paper towel to dry for 24 hours at room temperature. This prevents mold while preserving viability.
Once dry, store the seeds in a sealed container in the refrigerator for 3 months to complete cold stratification. This mimics winter conditions and breaks the seed's natural dormancy. I label each container with the date and variety to track stratification progress accurately.
Sow Stratified Seeds in a Controlled Environment
Fill a shallow tray with 2-3 inches of moistened seed-starting mix, ensuring it’s evenly damp but not soggy. Sprinkle the stratified seeds ¼ inch deep, spacing them ½ inch apart to allow room for growth. Cover lightly with a thin layer of additional mix to protect them from drying out.
Place the tray in a cool, dark location (around 65-70°F) for germination. Avoid direct sunlight—this can cause the seeds to dry out prematurely. I use a seedling heat mat set to 60°F to maintain consistent warmth without overheating. Germination typically takes 4-8 weeks, so patience is key.
Provide Gradual Light and Humidity for Seedling Development
Once the first true leaves appear (not the initial cotyledons), move the seedlings to a bright, indirect light source. A south-facing window or a grow light positioned 6-8 inches above the tray works best. Avoid harsh sunlight, which can scorch tender young spruces.
Keep the soil consistently moist but never waterlogged—Norway spruce seedlings are sensitive to root rot. Mist the leaves lightly 2-3 times weekly to maintain humidity, especially in dry indoor environments. You’ll notice sturdy stems and deep green foliage as they grow.
Harden Off and Transplant Young Seedlings
When seedlings reach 3-4 inches tall with 3-4 sets of true leaves, begin hardening them off. Place them outdoors in a sheltered, shaded spot for 1-2 hours the first day, gradually increasing exposure over 2 weeks. This acclimates them to outdoor conditions without shock.
Transplant to individual 3-inch pots filled with well-draining potting mix once they’ve hardened off. Plant them at the same depth they were growing in the tray to avoid stress. Water deeply after transplanting to settle the soil around the roots.
Maintain Outdoor Growth Conditions for Maturity
After transplanting, keep seedlings in a partially shaded area for the first 2 weeks, then gradually introduce full sun over 10-14 days. Norway spruces thrive in full sun to partial shade, but young plants need time to adjust. You’ll see new growth within 4-6 weeks if conditions are ideal.
Water deeply once weekly, ensuring the soil stays moist but not waterlogged. Mulch around the base with 1 inch of organic mulch to retain moisture and regulate soil temperature. Monitor for pests like spider mites—early intervention prevents long-term damage.
Tips & tricks for perfect Norway spruce seedling growth
Cold-stratification transforms stubborn Norway spruce seeds into vigorous seedlings—here’s how to maximize your success without common pitfalls.
Seed Selection and Preparation: The 24-hour drying period on paper towels is non-negotiable—this critical step prevents mold while maintaining viability. I’ve learned the hard way that skipping this can lead to uneven germination. Use only fully developed, plump seeds; shriveled or small seeds rarely break dormancy effectively. For extra insurance, soak the seeds in lukewarm water for 12 hours before drying, which can boost germination rates by up to 20%.
Stratification Consistency: Maintaining a steady refrigerator temperature of 32-40°F during the required 3-month cold stratification is key. I store containers in the crisper drawer where temps are most stable. Avoid opening the fridge frequently—temperature fluctuations can disrupt dormancy breaking. Labeling containers with dates and varieties prevents mix-ups, especially if you’re working with multiple seed batches simultaneously.
Germination Environment Optimization: The 65-70°F germination range is ideal, but consistency matters more than exact degrees. I’ve found that placing the seed tray on a seedling heat mat set to 60°F creates a stable microclimate. If your home runs cooler, add a thin blanket over the tray to retain warmth. Cover the tray with plastic wrap to maintain humidity without creating a soggy environment—just remove it daily for 10 minutes to prevent mold.
Light Transition Strategy: When moving seedlings to bright, indirect light after true leaves appear, position them within 6-8 inches of the light source. I use a south-facing window with sheer curtains to diffuse harsh rays. For grow lights, LED bulbs with a color temperature of 6500K mimic natural sunlight best. Gradually increase light exposure over 3-4 days to avoid shocking tender seedlings.
Pro Tips for Norway Spruce Seedling
- Cold-stratification transforms stubborn Norway spruce seeds into vigorous seedlings—here’s how to maximize your success without common pitfalls.
- Seed Selection and Preparation: The 24-hour drying period on paper towels is non-negotiable—this critical step prevents mold while maintaining viability.
- Stratification Consistency: Maintaining a steady refrigerator temperature of 32-40°F during the required 3-month cold stratification is key.
Frequently asked questions
Got questions about growing Norway spruce seedlings? You’re not alone! Here are answers to the most common concerns—from timing to troubleshooting—to help you nurture thriving seedlings with confidence.
When is the best time to plant Norway spruce seedlings?
Plant your seedlings in early spring or fall (4–6 weeks before the first frost) for optimal root establishment. Avoid transplanting during extreme heat or drought. If planting in containers, use well-draining soil and keep them shaded until roots settle in.
Do Norway spruce seedlings need cold stratification?
Yes! Cold stratification (4–6 weeks at 33–41°F) mimics winter conditions and breaks seed dormancy. For seedlings, ensure they’re planted in cold-hardy zones (3–6) and mulch heavily in winter to protect tender roots.
What’s the fastest way to revive a struggling Norway spruce seedling?
Check for overwatering (yellow needles) or underwatering (brown tips). Trim dead branches, loosen compacted soil, and water deeply but infrequently. If roots are exposed, add organic mulch to retain moisture and improve soil health.
Can I grow Norway spruce from cuttings instead of seedlings?
While possible, seedlings are easier for beginners. If using cuttings, take semi-hardwood stems in late summer, dip in rooting hormone, and keep them in a humid, shaded environment. Success rates are lower than with seedlings, so stratification is still key.
Why are my Norway spruce needles turning brown?
Brown needles often signal fungal disease (like needle cast), pests (spider mites), or environmental stress. Prune affected branches, apply neem oil, and avoid overhead watering. Ensure good airflow and full sun (6+ hours daily) to prevent recurrence.
Still stumped? Drop your specific issue in the comments—we’re happy to help your spruce seedlings thrive!
Wrapping up and next steps
Growing Norway spruce seedlings with cold stratification is a rewarding journey that unlocks their full potential for lush, reliable blooms.
By following the right steps—from seed selection to proper chilling and planting—you’re setting the stage for a thriving evergreen that will grace your landscape for years. Now’s your chance to take action! Grab your seeds, gather your supplies, and get planting—your future spruce awaits! 🌱✨
Next step:
- Start with cold stratification this week to kickstart germination.
- Monitor moisture and light as your seedlings sprout—consistency is key!