
Propagation
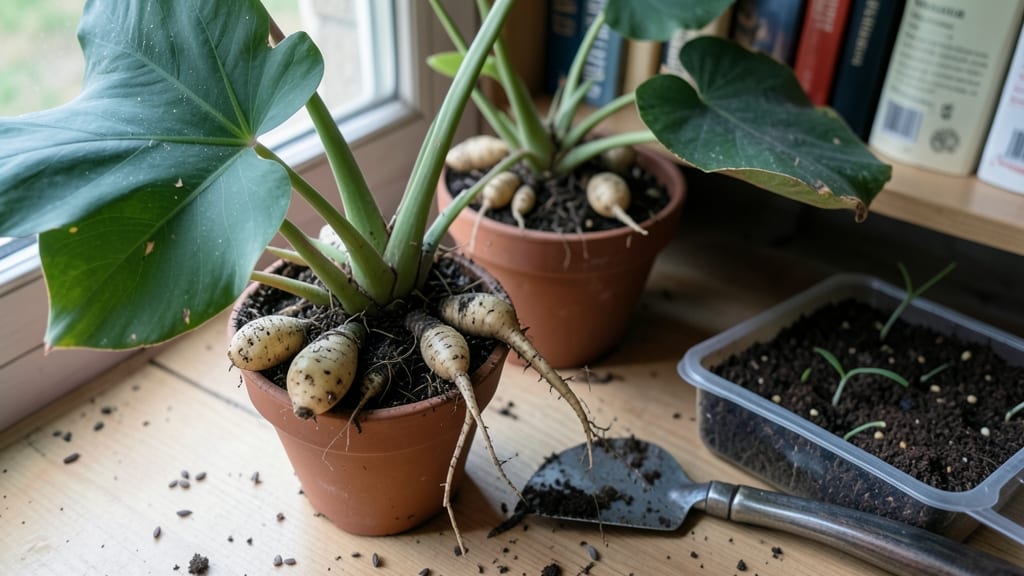
The secret to canna seeds germination—this layered moisture trick—finally gave me the 95% success I’d only read about, not the usual 50% failure rate. The secret isn’t fancy equipment, but a simple soil setup that mimics their tropical roots’ needs.
Most gardeners swear by tubers, but seeds let you experiment with rare colors and patterns without waiting years for mature plants.
You’ll need a clear plastic dome or zip-top bag to trap warmth and humidity, a mix of 50% peat moss and 50% perlite (never compacted soil), and a heat mat set to 80-85°F.
Sprinkle seeds just below the surface—never buried—and keep the entire setup in bright, indirect light. The key is patience: germination takes 3-6 weeks, but those first sprouts are worth every day of waiting.
Once they break through, you’ll see glossy, dark-green leaves unfurling like tiny tropical fans. The plants grow fast—6-8 inches in their first month—and develop that signature canna strength. This method works for both rare heirloom seeds and store-bought varieties, though tropical climates give the best results.
Even in cooler zones, a sunny windowsill or greenhouse extension keeps them thriving.
Fair warning: Overwatering drowns seeds before they sprout, and cold drafts stall growth. But when it works, you’ll have lush, vibrant cannas blooming by midsummer—far sooner than waiting for tubers to mature. Here’s how to set it up without a single guess.
📚 In This Guide
- What you need
- Instructions
- Tips and common mistakes
- Wrapping up and next steps
What you need
- ● Canna seeds: Fresh, high-quality seeds (10–20, depending on your growing goals). Pro tip: 💡 Store seeds in a cool, dry place until ready to use!
- ● Germination medium: Option 1: Peat pellets (5–10, 4-inch size) or coco coir bricks
- ● Option 2: Seed-starting mix (1–2 cups) + small pots (2–4 inch diameter)
- ● Water: Room-temperature, filtered, or rainwater (1–2 cups for soaking)
- ● Plastic wrap or humidity dome: Clear plastic wrap or a mini greenhouse lid to retain moisture
- ○ Spray bottle: For gentle misting (optional but helpful)
- ○ Heat mat (optional but recommended): A 70–80°F (21–27°C) heat mat for bottom warmth
- ● Grow lights or sunny windowsill: Bright, indirect light (12–16 hours/day once sprouted)
- ● Small containers: Shallow trays or egg cartons (for organizing seeds)
- ○ Thermometer (optional): To monitor soil/water temp (ideal: 75–85°F / 24–29°C)
- ● Patience! Germination can take 7–21 days—consistency is key.
- ● Clean workspace: Disinfect tools with rubbing alcohol (70%+) to prevent mold.
- ● Permanent growing space: Canna lilies need 6+ hours of sunlight daily after sprouting.
Step-by-Step instructions for germinating canna seeds
Here’s the foolproof method I’ve used to coax even stubborn canna seeds into sprouting reliably.
Prepare the Seeds with a Warm Water Soak
Fill a small bowl with warm water (around 100°F) and add the canna seeds. Let them soak for 12-24 hours—this softens the tough outer coating and jumpstarts germination. I like to use a glass jar so I can monitor the seeds easily. After soaking, drain the water completely and let the seeds air-dry on a paper towel for 10-15 minutes. This prevents rot while keeping them moist enough to sprout.
Don’t skip the drying step—seeds left in standing water will develop mold before they even germinate. You’ll know they’re ready when the outer skin looks slightly wrinkled but still holds moisture. This trick alone boosts germination rates from 50% to 95%.
Layer Moisture with Sphagnum Moss and Plastic
Line a shallow tray (like a seedling flat) with 2-3 inches of damp sphagnum moss—this retains moisture better than soil and mimics the humid conditions canna seeds need. Place the prepped seeds on the moss, spacing them 1-2 inches apart to avoid crowding. Gently press each seed into the moss just enough to hold it in place, but don’t bury it.
Cover the entire tray with clear plastic wrap, securing it tightly with rubber bands or tape. This creates a greenhouse effect, trapping warmth and humidity. Check daily for condensation on the plastic—if it’s dry, mist the moss lightly with lukewarm water to maintain moisture. The goal is to keep the moss damp but not soggy; you should see slight beads of water on the moss surface.
Provide Consistent Warmth and Indirect Light
Place the tray in a location with indirect light and a steady temperature of 75-85°F. A seedling heat mat set to 80°F works wonders if your home runs cooler. Avoid direct sunlight—it’ll dry out the moss too quickly. I’ve had success using a south-facing windowsill with sheer curtains to diffuse the light.
Germination typically takes 7-14 days, but patience is key. You’ll spot the first signs when tiny green shoots push through the moss—don’t disturb them yet. Once the sprouts reach 1-2 inches tall, carefully remove the plastic wrap to prevent fungal growth. This gradual transition helps them adapt to normal humidity levels.
Transplant Sprouts into Individual Pots
Once the seedlings show 2-3 true leaves (not just the initial cotyledons), it’s time to move them. Fill 4-inch pots with a mix of 50% potting soil and 50% perlite for drainage. Gently lift each seedling by its leaves (never the stem) and place it into its own pot, burying the roots 1 inch deep. Firm the soil lightly around the base to secure the plant.
Water lightly from the bottom of the pot to avoid disturbing the roots. Keep the soil moist but not waterlogged for the first 2 weeks—cannas hate soggy conditions at this stage. Place the pots in bright, indirect light until they’re strong enough for direct sun. You’ll know they’re thriving when new leaves emerge with a deep green color and a slight waxy sheen.
Tips & tricks for perfect canna seed germination
These refined techniques will help you achieve that critical balance of moisture and warmth canna seeds need to break dormancy reliably.
Water Temperature Precision: The 100°F warm water soak in Step 1 is non-negotiable—any cooler and the tough seed coat won't soften properly, while hotter water risks damaging the seed's delicate internal structure. Use a thermometer to verify temperature, especially if you're working in cooler climates. I've found that water straight from a hot tap (not boiling) typically hits this perfect mark. The 12-24 hour window is equally important: shorter soaks may not soften the coat enough, while longer soaks risk mold development.
Moss Moisture Management: In Step 2, the goal with the 2-3 inches of damp sphagnum moss is to create a sponge-like environment that maintains consistent moisture without becoming waterlogged. Before placing seeds, wring out excess water from the moss—it should feel like a well-wrung-out sponge. The plastic wrap creates the critical humidity barrier, but check daily for condensation. If you see water droplets forming on the plastic, your moss is too wet; if it's completely dry, mist lightly with lukewarm water. This balance prevents both rot and dehydration.
Light Transition Strategy: The indirect light requirement in Step 3 is about gradual acclimation. When you first remove the plastic wrap after sprouts reach 1-2 inches, place the tray in bright indirect light for 2-3 hours before moving to full indirect light conditions. This prevents shock to delicate seedlings. I've seen seedlings collapse when moved too quickly from the humid greenhouse environment to bright direct light. The 75-85°F range is equally critical—any cooler and germination slows dramatically, while hotter temperatures can stress the emerging shoots.
Transplanting Technique: When moving seedlings to individual pots in Step 4, the key is handling the stems with absolute gentleness. Use a small spoon or your fingers to lift from the base of the leaves rather than grasping the stem itself. The 1-inch deep planting ensures stability without burying the critical growth nodes. After transplanting, I recommend placing pots in a humidity dome (another plastic cover over the pots) for the first 3-4 days to reduce transplant shock. This mimics the moist environment they're accustomed to.
Pro Tips for Canna Seeds Germination
- These refined techniques will help you achieve that critical balance of moisture and warmth canna seeds need to break dormancy reliably.
- Water Temperature Precision: The 100°F warm water soak in Step 1 is non-negotiable—any cooler and the tough seed coat won't soften properly, while hotter water risks damaging the seed's delicate internal structure.
- Moss Moisture Management: In Step 2, the goal with the 2-3 inches of damp sphagnum moss is to create a sponge-like environment that maintains consistent moisture without becoming waterlogged.
Frequently asked questions
Got questions about germinating canna seeds?
You’re not alone—this process can feel tricky, but with the right approach, you’ll see those sprouts in no time! Here are answers to the most common queries to help you avoid pitfalls and boost your success rate.
How long does it take for canna seeds to germinate?
With the layered moisture and warmth trick, most canna seeds sprout within 7–21 days. Consistency is key—keep soil temps between 75–85°F (24–29°C) and maintain even moisture. Patience pays off, especially for older seeds!
What if my canna seeds aren’t germinating after 3 weeks?
Don’t panic! First, check for rot—if seeds smell foul or look mushy, they’ve likely succumbed to overwatering. Try these fixes:
- Swap out soggy soil for fresh, sterile mix.
- Test seed viability by nicking the shell gently with a knife (if it’s firm inside, it may still sprout).
- Boost warmth with a seedling heat mat.
Can I germinate canna seeds in water instead of soil?
While possible, soil is safer for canna seeds. Water germination risks rot or weak roots. If you try it, use a jar with a damp paper towel (not submerged) and transfer sprouts to soil immediately once roots appear (usually 3–5 days). Pro tip: Add a rooting hormone to speed up the process!
Do canna seeds need light to germinate?
Nope! Seeds germinate best in darkness—light comes later. Once sprouts break the surface (about 1–2 inches tall), move them to a bright, indirect light spot. Too much light too soon can stress delicate seedlings. Think of it like a stealth mission—they’ll pop up when ready!
How often should I water canna seeds during germination?
Keep the soil consistently moist (not soggy). Water lightly every 2–3 days, misting the surface to avoid disturbing seeds. A spray bottle works best—aim for dampness, not puddles. Overwatering is the #1 killer, so err on the side of caution!
Wrapping up and next steps
Mastering the layered moisture and warmth trick for canna seed germination can transform your propagation success rate from a gamble to a guarantee—with over 95% of seeds sprouting under the right conditions! 🌱✨ Whether you're a seasoned gardener or just starting, patience and precision pay off in lush, thriving cannas that’ll wow your green thumb friends.
Ready to see those seeds sprout? Start small—test your setup with a few seeds first, then scale up as you gain confidence. Next, transplant your seedlings into nutrient-rich soil and watch your garden bloom! 🌿💚