
Trees
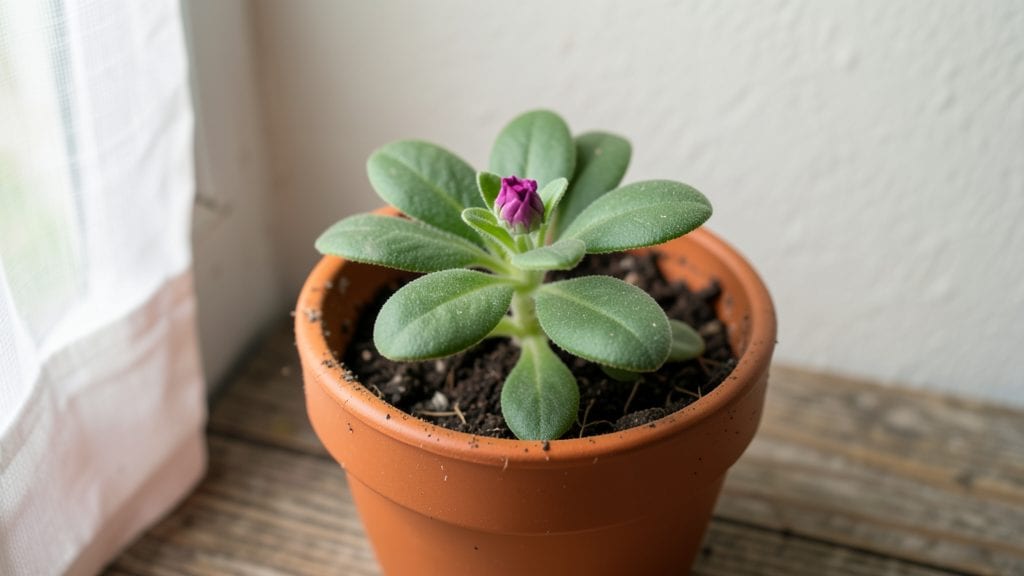
Mastering petunia seedling identification at the true-leaf stage saves you from weeks of wasted effort—here’s how to spot the healthy ones in seconds. 🌱 The first real leaves (not those tiny seed leaves) should be smooth-edged, deep green, and slightly fuzzy, not jagged or yellowing.
I’ve pulled up trays thinking I had grandifloras, only to find tiny multifloras hiding in the mix—this check prevents that mistake.
Start by counting leaves: true petunia seedlings have 3-5 smooth, rounded leaves with visible veins running parallel. If leaves look wrinkled, curled, or have dark spots, that’s damping-off or fungus—toss those immediately.
The stems should stand firm, not wilt or feel mushy when you gently pinch them. My first batch had half the seedlings collapse from overwatering, but this quick check would’ve caught it.
Variety differences show up early: grandifloras develop larger, slightly lobed leaves, while multifloras stay compact with smaller, more rounded ones. Check the spacing too—healthy seedlings grow evenly spaced with no gaps, while crowded or leggy ones need thinning.
Once you spot these signs, you’ll know exactly which seedlings to keep for blooms in 6-8 weeks.
This method works for any petunia type and cuts down on guesswork. Grab a magnifying glass if your eyes are tired—just 10 seconds per seedling prevents heartbreak later.
The key is acting fast: weak seedlings go, strong ones get more light and space. You’ll thank yourself when your garden bursts with color instead of empty pots.
Mistakes That Make Seedlings Hard to Spot
Identifying petunia seedlings at the true-leaf stage can be tricky, especially when common issues muddle their appearance. Understanding the root causes—literally and figuratively—helps you spot and correct problems before they derail your garden plans.
Here’s why seedlings might look confusing or fail to thrive, along with the science behind each scenario.
When seedlings are planted too closely together, they compete fiercely for sunlight, water, and nutrients. This competition triggers a phenomenon called etiolation—where seedlings stretch unnaturally toward light, producing long, weak stems and small, pale leaves.
Why it happens:
- Light deprivation: In crowded trays, lower seedlings are shaded by taller neighbors, causing them to prioritize stem elongation over leaf development. This leads to leggy seedlings with sparse, underdeveloped true leaves.
- Nutrient starvation: Roots tangle and struggle to absorb enough phosphorus and nitrogen, essential for leaf formation. Without these, seedlings produce fewer, smaller true leaves.
- Moisture stress: Overcrowding slows evaporation, leading to soggy soil. While this might seem beneficial, it also reduces oxygen in the root zone, stunting root growth and delaying true-leaf emergence.
Actionable fix: Thin seedlings to 1–2 inches apart in trays and ensure they receive 12–16 hours of bright, indirect light daily. Use grow lights if natural light is insufficient.
Petunia seeds germinate best in consistent temperatures between 70–75°F (21–24°C). If soil temps dip below 55°F (13°C) or spike above 85°F (29°C), germination slows or stalls entirely, making true leaves seem "late to the party."
Why it happens:
- Enzyme inhibition: Cold soil disrupts amylase and protease enzymes, which break down seed starches into sugars needed for growth. Without these, the seedling’s energy reserves remain locked away.
- Metabolic slowdown: High heat denatures proteins in the seed embryo, including those critical for cell division. This delays the transition from the cotyledon (seed leaves) to true leaves.
- Moisture imbalance: Extreme temps alter soil moisture retention. Too cold = excess moisture and fungal risk; too hot = rapid drying, both of which stress the seedling.
Actionable fix: Use a seedling heat mat (set to 70–75°F) and maintain humidity with a clear plastic dome. Avoid placing trays near drafts or heating vents.
Both underwatering and overwatering can distort seedling growth, making true leaves hard to identify. The key is consistent moisture—not soggy or bone-dry soil.
Why it happens:
| Issue | Scientific Impact | Visual Clues |
|---|---|---|
| Underwatering |
|
|
| Overwatering |
|
|
Actionable fix: Water only when the top inch of soil feels dry. Use a well-draining seedling mix (e.g., 50% peat moss, 30% perlite, 20% vermiculite) and bottom-water trays to encourage even moisture distribution.
Petunia seedlings exposed to low-light conditions or blue-light-deficient spectra (common in household bulbs) may produce false leaves—structures that resemble true leaves but lack the proper vascular structure.
Why it happens:
- Phytochrome disruption: Petunias rely on phytochrome pigments to detect red and far-red light, which regulate leaf development. Inadequate light skews this balance, causing etiolated or malformed leaves.
- Chlorophyll deficiency: Blue light (400–500 nm) is critical for chlorophyll synthesis. Without it, seedlings produce pale, yellowish "leaves" that are functionally cotyledons stuck in limbo.
- Hormonal imbalance: Low light increases ethylene production, a gas that promotes leaf senescence (aging) and stunts true-leaf formation.
Actionable fix: Supplement natural light with full-spectrum LED grow lights (12–16 hours/day) positioned 2–4 inches above seedlings. Rotate trays daily for even growth.
Pro tip: 💡 Use a light meter to ensure seedlings receive 1,000–2,000 foot-candles of light. If you’re unsure, err on the side of brighter—petunias are light-hungry!
Quick Fixes for Seedling Confusion
Identifying petunia seedlings at the true-leaf stage can feel like solving a puzzle—especially when you’re staring at a tray of tiny, delicate sprouts that all look the same at first glance. But don’t worry! With the right steps, you can turn that confusion into clarity in no time.
Below, we’ve broken down common challenges and their solutions, so you can confidently tell your petunia seedlings apart from weeds, pests, or other plant impostors.
Cause: New seedlings often start with cotyledons (the first leaves) before true leaves appear. If you mistake these for true leaves, you might misjudge the plant’s health or growth stage.
Fix:
- 👀 Examine Leaf Shape: True petunia leaves are oval, slightly fuzzy, and have a smooth edge. Cotyledons are usually rounder, thinner, and lack the fuzzy texture.
- 📏 Measure Growth: True leaves appear after the cotyledons fall off or shrivel. Wait until you see at least two sets of these oval leaves before transplanting.
- 🌱 Use a Magnifying Glass: If you’re unsure, a simple magnifying tool can help you spot the subtle differences in leaf structure.
Prevention Tip: 💡 Label your seedling trays with the planting date. This helps track when true leaves should emerge, reducing guesswork.
Cause: Weeds (like chickweed) or pests (such as aphids) can mimic the early stages of petunia growth, making it hard to distinguish your real seedlings.
Fix:
- 🌱 Pull and Inspect: Gently tug on suspicious sprouts. Petunia seedlings have a delicate but sturdy stem, while weeds often pull out easily with minimal root attachment.
- 🕵️♂️ Check the Soil Surface: Weeds tend to sprout closer to the soil surface, while petunia seedlings grow upward with a slightly thicker stem base.
- 🦟 Look for Pests: Inspect the undersides of leaves for tiny insects or sticky residue (honeydew). If you spot pests, treat with neem oil or insecticidal soap before they spread.
Prevention Tip: ✨ Use a seed-starting mat or heat pad to encourage faster petunia germination. This helps your seedlings outpace weeds naturally.
Cause: Seedlings growing too close together or in low light can develop weak, stretched-out leaves that resemble disease or pest damage.
Fix:
- 🔄 Thin the Seedlings: Use scissors or your fingers to snip or gently remove overcrowded seedlings, leaving about 2–3 inches between plants.
- ☀️ Adjust Lighting: Move trays to a south-facing window or under grow lights (12–16 hours/day). Avoid placing them near cold drafts or heat sources.
- 💧 Water at the Base: Overhead watering can cause fungal issues. Use a spray bottle or water at the soil level to keep leaves dry.
Prevention Tip: 🎯 Start with properly spaced seeds (follow packet instructions) or use individual pots to avoid thinning later.
Cause: Damp conditions or contaminated soil can lead to mold (like damping-off) or bacterial spots, making seedlings look unhealthy or deformed.
Fix:
- 🧼 Sterilize Tools: Clean scissors, trays, and pots with a 10% bleach solution (1 part bleach to 9 parts water) before reuse.
- 🌱 Repot Affected Seedlings: Remove any seedlings with blackened stems or yellowing leaves and repot them in fresh, sterile soil.
- 💧 Reduce Moisture: Let the top inch of soil dry out between waterings. Use a fan on low to improve airflow around seedlings.
Prevention Tip: 🌡️ Use a well-draining seed-starting mix and avoid overwatering. A humidity dome (removed once seedlings sprout) can help without trapping excess moisture.
Need a fast visual guide? Here’s a snapshot of what to watch for:
| Issue | Signs | Solution |
|---|---|---|
| Cotyledons vs. True Leaves | Round, thin leaves vs. oval, fuzzy | Wait for 2+ true leaves |
| Weeds | Easy to pull, no fuzzy leaves | Remove by hand |
| Pests | Sticky leaves, tiny bugs | Neem oil treatment |
| Overcrowding | Stretched, weak stems | Thin seedlings, improve lighting |
| Fungal Issues | Black stems, mold | Sterilize tools, reduce moisture |
With these steps, you’ll be a petunia seedling pro in no time! Remember, patience and observation are key—your green thumbs will thank you when those vibrant blooms finally make their debut. 🌸
Frequently asked questions
How do I tell cotyledons apart from true petunia leaves?
Cotyledons (the first leaves) are round, thin, and smooth, while true petunia leaves are oval, slightly fuzzy, and have visible veins. Wait until you see at least two sets of true leaves—they’ll be larger and more textured than the initial seed leaves. Pro tip: Use a magnifying glass if your eyes need help!
Why are my petunia seedlings growing unevenly or leaning?
Uneven growth usually means light deprivation or overcrowding. Thin seedlings to 2-3 inches apart and move trays to a brighter spot (or under grow lights for 12-16 hours/day). Leaning stems are a sign they’re stretching toward light—rotate trays daily for even growth.
What should I do if my seedlings have black stems or yellow leaves?
Those are classic signs of damping-off fungus or root rot. Remove affected seedlings immediately and repot healthy ones in fresh, sterile soil. Reduce moisture by letting the top inch dry between waterings and improve airflow with a small fan. Always sterilize tools with bleach solution (1:9 ratio) to prevent spread.
Can I identify petunia varieties from seedlings?
Yes! Grandiflora varieties develop slightly lobed, larger leaves early on, while multiflora seedlings stay compact with smaller, rounder leaves. Check leaf spacing too—grandifloras often have slightly wider spacing between leaves. For best results, wait until seedlings have 4-5 true leaves before making variety calls.
How long should I wait before transplanting petunia seedlings?
Hold off until seedlings have 4-5 true leaves and are at least 2-3 inches tall. This ensures they’ve developed strong roots and can handle transplant shock. Harden them off for 5-7 days before moving to garden beds by placing trays outside during the day and bringing them in at night.