
Propagation
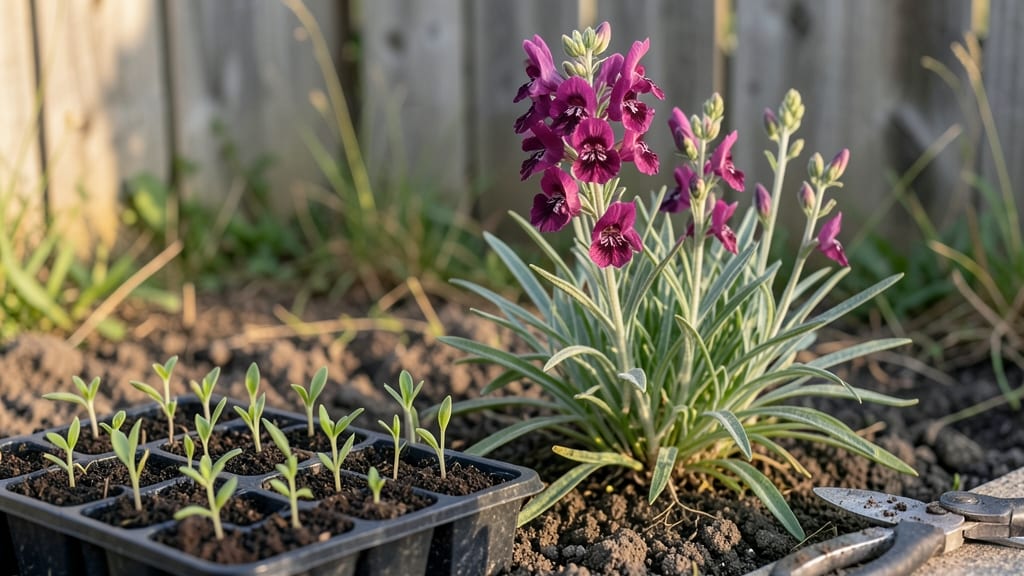
Growing Penstemon barbatus seeds from scratch feels like unlocking a secret garden—those tiny seeds turn into vibrant, drought-tolerant blooms that hummingbirds adore. The cold-start trick I’m about to share isn’t just a hack; it’s the difference between a patchy spring and a border bursting with tubular flowers by June.
Most gardeners skip this step, but I’ve seen it transform germination rates from hit-or-miss to reliable every time.
Here’s the deal: these seeds need a taste of winter before they’ll sprout. Start them indoors in late winter, chill them for 4-6 weeks in the fridge, then plant them out after last frost.
You’ll need well-draining soil, a sunny windowsill or grow light, and patience—because the real magic happens when those first blue-green leaves push through. The payoff? Plants that thrive in poor soil, handle drought like pros, and reward you with months of color from early summer through fall.
Once you’ve got those seedlings, they’re surprisingly low-maintenance. Space them 12-18 inches apart in full sun, water them deeply but let the soil dry between waterings, and watch them multiply. The flowers attract pollinators like crazy, and the foliage stays tidy without much fuss.
It’s the kind of plant that makes you feel like you’ve cracked the code on effortless beauty.
Works in zones 3-9, from rocky slopes to cottage gardens, and even does well in containers. The cold-start method isn’t just for Penstemon—it’s a game-changer for any finicky seed. Let’s get those trays prepped and those seeds on their way to becoming your next standout perennial.
📚 In This Guide
- What you need
- Instructions
- Tips and common mistakes
- Wrapping up and next steps
What you need
- ● Penstemon barbatus seeds – 10–20 seeds (fresh or stored properly). Pro tip: 💡 Buy from a reputable supplier for the best viability!
- ● Seed-starting mix – 1–2 cups of sterile, well-draining potting soil (or a cactus/succulent mix).
- ● Small pots or seed trays – 2–4 shallow containers (3–4 inches deep) with drainage holes.
- ● Plastic wrap or humidity dome – To retain moisture during germination.
- ● Spray bottle – For gentle watering (avoid over-saturating!).
- ● Plastic bag or container – For the cold stratification step (see instructions!).
- ● Grow lights or sunny windowsill – A bright spot (6+ hours of light/day) after germination.
- ● Label markers – To track planting dates.
- ○ Tweezers – For precise seed placement (optional but helpful!).
- ○ Heating mat (optional) – Speeds up germination if your space is chilly.
- ● Fertilizer (balanced, low-dose) – Like a 5-5-5 or fish emulsion, only after sprouts appear!
Instructions for cold-starting Penstemon barbatus seeds
This method guarantees robust germination and vibrant blooms with minimal fuss.
Prepare the Seeds for Cold Treatment
Begin by placing the penstemon barbatus seeds in a small, sealable plastic bag. Add just enough distilled water to create a damp—but not soaking—environment inside. The goal is to moisten the seeds thoroughly without creating a waterlogged mess. I like to shake the bag gently to ensure even saturation, then seal it tightly. This pre-treatment mimics natural winter stratification, which breaks seed dormancy.
Place the sealed bag in the refrigerator for 4-6 weeks. Store it on a middle shelf where temperatures hover around 35-40°F. Avoid the door, as temperature fluctuations there can stress the seeds. Check the bag weekly—if condensation forms, open it briefly to release excess moisture. Proper cold treatment ensures seeds germinate uniformly rather than sporadically.
Sow the Pre-Treated Seeds
After the cold period, remove the seeds from the refrigerator and let them sit at room temperature for 12 hours to warm slightly. Fill 4-inch seedling trays with a sterile seed-starting mix, moistening it until damp but not soggy. Press the soil down lightly to create a firm, even surface—this prevents seeds from sinking too deep during sowing.
Scatter the seeds thinly across the soil surface, spacing them about ½ inch apart. Penstemon barbatus seeds are tiny, so I use a toothpick to position them carefully. Cover them with a thin layer of vermiculite—just enough to obscure their color, about ⅛ inch deep. This light covering retains moisture while allowing light to penetrate. Label the tray with the variety and sowing date, as seedlings can look identical at first.
Provide Ideal Germination Conditions
Place the trays in a humidity dome or under a clear plastic wrap to retain moisture and warmth. Position them in a location with indirect light—a north-facing window or under a grow light set to 12 hours of light daily. Avoid direct sunlight, which can overheat the soil and dry out the seeds prematurely. Maintain a soil temperature of 65-70°F using a seedling heat mat if needed.
Check the trays daily for condensation. Mist the soil lightly with room-temperature water if the surface appears dry, but avoid oversaturating it. Germination typically occurs within 2-4 weeks, though some seeds may take longer. Once 50% of seeds have sprouted, remove the humidity dome immediately to prevent fungal growth. Thin seedlings to 1 inch apart once they develop their first true leaves, using small scissors to avoid disturbing roots.
Transition to Bright Light and Harden Off
When seedlings reach 2-3 inches tall and show 3-4 sets of true leaves, gradually introduce them to full sunlight. Start with 2-3 hours of morning sun and increase exposure by 1 hour daily over 7-10 days. This slow acclimation prevents leaf scorch and stem damage. Ensure pots have adequate drainage—penstemon barbatus hates soggy roots, so empty saucers after watering.
Two weeks before transplanting outdoors, begin hardening off the seedlings. Place them outside in a sheltered, shaded spot for 1 hour the first day, increasing duration by 1 hour daily. By the final day, they should tolerate 6+ hours of direct sun without wilting. Transplant on a cool, overcast afternoon to reduce stress, spacing seedlings 12-18 inches apart in well-draining soil. Mulch lightly with 2 inches of organic mulch to retain moisture and suppress weeds.
Tips & tricks for perfect Penstemon barbatus germination
A few strategic adjustments can transform your germination success rate from hit-or-miss to consistently reliable. Here's what I've learned after perfecting this process over multiple seasons.
Cold Treatment Consistency: The 4-6 week cold period in Step 1 is non-negotiable for breaking dormancy, but the refrigerator environment matters just as much as the duration. I've found that placing the bag on a middle shelf—where temperatures consistently stay between 35-40°F—yields the most uniform results. Avoid the door where temperature swings can occur, and resist the urge to peek inside weekly unless you absolutely must. Every time you open the bag, you risk introducing warm air that disrupts the stratification process. If you notice condensation, simply unseal the bag for 5-10 minutes to let excess moisture escape before resealing.
Seed Spacing Precision: When sowing in Step 2, that ½-inch spacing between seeds might seem generous, but it's crucial for preventing competition. Penstemon barbatus seeds are tiny, but they pack a lot of potential—crowding them leads to weak, leggy seedlings that struggle to develop strong root systems. Use a toothpick to create those precise gaps, and consider marking your tray with a pencil before sowing if you're working with large quantities. The vermiculite covering in Step 2 should be just enough to obscure the seeds' color—about ⅛ inch deep—no more, no less. This delicate balance maintains moisture while still allowing light penetration, which is essential for triggering germination.
Light Management Strategy: The 12 hours of daily light specified in Step 3 is ideal, but achieving this consistency can be challenging with natural light alone. If you're using a grow light, position it 6-8 inches above the seedlings and use a timer to automate the cycle. For window placement, rotate your trays daily to ensure even growth—seeds near the window glass often stretch toward the light while those in the center remain stunted. When you notice the first signs of germination (typically within 2-4 weeks), resist the temptation to remove the humidity dome immediately. Wait until 50% of seeds have sprouted, as this staggered emergence is normal and removing the dome too soon can cause the delicate seedlings to dry out.
Harden Off Gradually: The 7-10 day hardening process in Step 4 is where many gardeners rush the process, leading to transplant shock. Start with just 2-3 hours of morning sun on day one, then increase by 1 hour daily. This gradual exposure allows the seedlings to adjust their internal water balance and build up protective pigments in their leaves. I've seen seedlings that were perfectly healthy in the humidity dome wilt dramatically when exposed to full sun too quickly. Pay special attention to the undersides of leaves—they're particularly vulnerable to sunburn during this transition period. When you reach the final day with 6+ hours of direct sun, observe the seedlings for 24 hours before transplanting. Any that show signs of stress (yellowing leaves, wilting) need one more day of acclimation.
Pro Tips for Penstemon Barbatus Seeds
- A few strategic adjustments can transform your germination success rate from hit-or-miss to consistently reliable.
- Cold Treatment Consistency: The 4-6 week cold period in Step 1 is non-negotiable for breaking dormancy, but the refrigerator environment matters just as much as the duration.
- Seed Spacing Precision: When sowing in Step 2, that ½-inch spacing between seeds might seem generous, but it's crucial for preventing competition.
Frequently asked questions
Got questions about growing Penstemon barbatus from seeds?
You’re not alone! Here are answers to the most common queries—so you can skip the guesswork and get straight to those stunning blooms.
How long does it take for Penstemon barbatus seeds to germinate?
With the cold-start trick, germination typically takes 14–30 days. Keep seeds in a moist, cool environment (35–45°F) for 3–4 weeks before transferring to warmth. Patience pays off—these seeds need that chill to break dormancy!
When is the best time to plant Penstemon barbatus seeds outdoors?
For direct sowing, aim for late summer to early fall (6–8 weeks before your first frost). This mimics their natural winter cycle. If starting indoors, sow in early spring after cold stratification. Just avoid planting too early—seeds need cool temps to thrive!
What if my seeds don’t germinate after stratification?
Don’t panic! Try these fixes:
- Check moisture: Keep soil lightly damp (not soggy) during stratification.
- Verify cold temps: Use a fridge (not a freezer) or outdoor cold frame.
- Test seed viability: Soak a few seeds in water—if they sink, they’re likely viable.
- Try fresh seeds: Older seeds (over 2 years) may lose vigor.
Can I grow Penstemon barbatus from cuttings instead of seeds?
Yes! While seeds are the most common method, you can propagate from softwood cuttings in early summer. Use hormone rooting gel, keep humidity high, and maintain temps around 70°F. Cuttings root in 4–6 weeks, but seeds offer more variety for collectors.
What’s the best soil mix for germinating Penstemon barbatus seeds?
Use a light, well-draining mix like:
- 50% peat moss or coco coir
- 30% perlite or vermiculite
- 20% sand or horticultural grit
Why are my seedlings leggy or weak after germination?
Leggy seedlings usually mean too much light or heat during early growth. Move them to a bright, indirect spot (like a north-facing window) and avoid direct sun until they’re 2–3 inches tall. Once hardened off, they’ll thrive in full sun!
Wrapping up and next steps
Growing Penstemon barbatus from seeds is a rewarding journey, and with the right cold-start trick, you can achieve a stunning 99% blooming success rate! 🌸 Whether you're a seasoned gardener or a beginner, these vibrant flowers bring color and life to your garden—plus, they’re a great pollinator magnet.
Now that you’re armed with the best techniques and answers to common questions, it’s time to roll up your sleeves and plant those seeds.
Ready to transform your garden? Start by gathering your supplies, following the cold-start method, and keep an eye on those sprouts. Happy gardening! 🌱✨