
Lawn
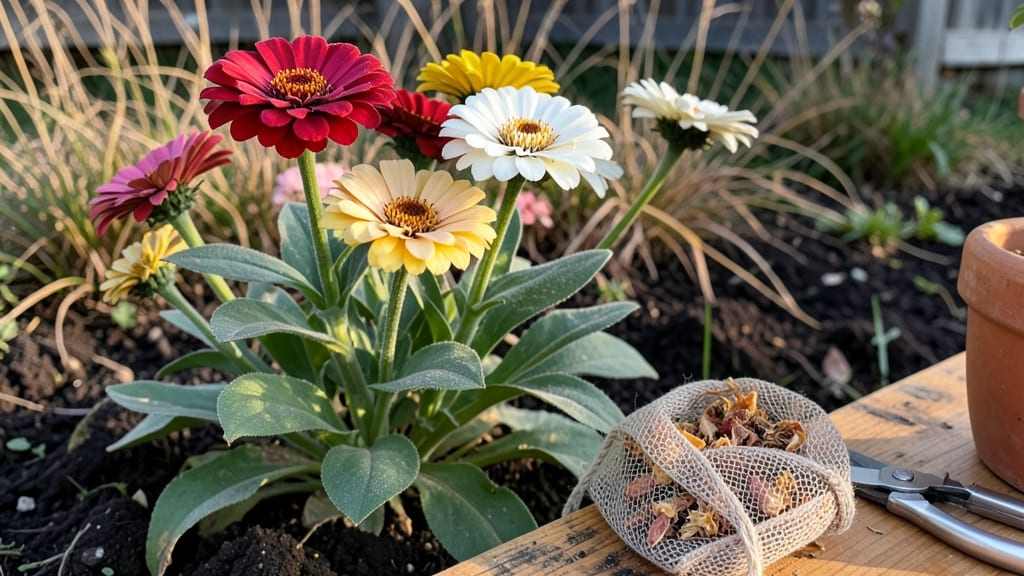
The art of zinnia seed collection turns your spent blooms into free, vibrant plants for next summer—no store-bought packets needed. 🌻 The process is simpler than you’d think, and once you master it, you’ll never toss those dried flowers again.
I’ve collected seeds from my zinnia patch for three seasons now, and my heirloom varieties keep getting more vibrant each year.
Start by letting the flowers stay on the stems until they turn brown and papery—this signals the seeds are ready. A single plant can produce hundreds of seeds, so pick the healthiest blooms from the strongest stems.
You’ll need paper bags, labels, and a dry spot to cure them properly before storage. The key is patience: rushing the drying process can ruin viability.
Once dried, you’ll have seeds that stay fresh for 2-3 years if stored correctly. Imagine opening your stash next spring and planting varieties you’ve grown yourself—no generic store-bought mix here.
The payoff is worth the small effort, especially for organic gardeners or those preserving heirlooms. Let’s walk through the exact steps to make it foolproof.
This method works for all zinnia types, from dwarf varieties to towering Benary’s Giants. Whether you’re saving seeds for sentimental reasons or just cutting costs, the process is the same. Here’s how to do it right the first time—no guesswork, no wasted seeds.
📚 In This Guide
- What you need
- Instructions
- Tips and common mistakes
- Wrapping up and next steps
What you need
- ● Mature zinnia flowers: Choose fully bloomed, wilted zinnias with dried seed heads (brown and papery). Aim for at least 5-10 healthy plants for a good seed yield.
- ● Pruning shears or scissors: Sharp, clean tools to snip seed heads without damaging stems.
- ● Paper bags or brown lunch bags: 2-3 bags (one per plant or per variety) to collect seeds and allow airflow.
- ● Drying surface: A clean, dry tray, cardboard, or mesh screen in a warm, dry, and well-ventilated space (e.g., garage, shed, or sunny windowsill).
- ● Fine-mesh strainer or sieve: 4-6 inch diameter to separate seeds from chaff after drying.
- ● Air-tight storage containers: Small glass jars with lids (e.g., mason jars, 4-8 oz capacity).
- ● Envelope with a resealable zipper (for flat storage).
- ● Paper seed packets (if you prefer traditional labeling).
- ● Permanent markers or labels: Waterproof or acid-free for longevity.
- ○ Silica gel packets (optional but helpful): Place 1-2 packets in storage containers to absorb moisture.
- ● Desiccant packets: For long-term storage (5+ years).
- ● Freezer bags: If storing seeds in a freezer for extra preservation.
- ● Digital scale: To measure seed weight (helpful for tracking viability).
- ● Notebook or spreadsheet: To log varieties, collection dates, and germination notes.
Step-by-step instructions for collecting zinnia seeds
Zinnia seeds are easy to save—here’s how to harvest, dry, and store them for next season’s garden.
🌱 Step 1: Choose the Right Flowers for Seed Collection
Pick healthy zinnias that have fully matured and dried on the plant. The seed heads should be brown and papery, with no green stems remaining. Avoid flowers that have been damaged by pests or disease—those seeds won’t grow well. I like to wait until the blooms have faded completely and the petals have fallen away naturally.
Use clean, sharp scissors or pruning shears to cut the seed heads, leaving about 2 inches of stem attached. This helps prevent the seeds from spilling out during handling. Harvest on a dry day to minimize moisture, which can cause mold during storage.
💧 Step 2: Dry the Seed Heads Properly
Lay the cut seed heads in a single layer on a clean, dry surface, like a baking sheet or cardboard box. Place them in a warm, dry, and well-ventilated area—think 70-75°F with good airflow. Avoid direct sunlight, which can overheat and damage the seeds.
Let them dry for about 1-2 weeks until the seed heads are completely brittle and the seeds rattle inside when shaken. You’ll know they’re ready when the outer husks crumble easily between your fingers. If humidity is high, drying may take longer—just be patient.
✂️ Step 3: Extract and Clean the Seeds
Once fully dry, gently rub the seed heads between your palms or use a small bowl to catch the seeds as they fall out. Zinnia seeds are small and flat with a distinctive dark brown or black color. Discard any debris, chaff, or empty seed pods—these won’t produce viable plants.
For extra clean seeds, spread them on a clean sheet of paper and gently blow away any remaining dust or light debris. Store the seeds in a dry, airtight container only after they’re completely free of moisture. I always do this step indoors to avoid outdoor contaminants.
🪴 Step 4: Label and Store for Next Season
Use small paper envelopes or airtight containers to store your seeds. Label each with the zinnia variety and the year collected—trust me, you’ll forget otherwise! Store them in a cool, dark place, like a pantry or seed vault, where temperatures stay between 35-50°F.
Zinnia seeds remain viable for about 3-5 years if stored properly. Check them annually for moisture or pests—if you notice any issues, transfer the seeds to a fresh container. With this method, you’ll always have fresh, homegrown zinnias ready for planting!
Tips & tricks for perfect zinnia seed collection
A few simple tricks will help you preserve those seeds perfectly for next season's garden.
Timing Secret: Harvest your zinnias in the morning when dew has evaporated but before the heat of the day sets in. This gives you drier seed heads right from the start, reducing the risk of mold during the drying process. I've found that seeds collected in the morning also tend to dry more evenly and consistently.
Storage Wisdom: For long-term storage, consider adding a small packet of silica gel to your seed containers. This helps absorb any residual moisture that might cause the seeds to spoil prematurely. I keep mine in my pantry where temperatures stay around 50°F, which is ideal for maintaining seed viability for those 3-5 years.
Quality Factor: When selecting zinnias for seed collection, look for varieties with particularly vibrant colors or unique characteristics. These traits often don't come through as strongly in store-bought seeds, so saving your own ensures you'll get those beautiful blooms back next year. I always make a note of which varieties I'm saving seeds from so I can recreate my favorite color combinations.
Make-Ahead Move: If you're collecting seeds over several weeks, don't worry about drying them all at once. You can store freshly cut seed heads in paper bags (not plastic!) in a cool, dry place until you have enough to dry together. Just make sure to label each bag with the variety and date. This approach works well for gardeners who want to collect seeds throughout the blooming season without overwhelming their drying space.
Pro Tips for Zinnia Seed Collection
- A few simple tricks will help you preserve those seeds perfectly for next season's garden.
- Timing Secret: Harvest your zinnias in the morning when dew has evaporated but before the heat of the day sets in.
- Storage Wisdom: For long-term storage, consider adding a small packet of silica gel to your seed containers.
Frequently asked questions
Got questions about saving zinnia seeds?
You’re not alone—seed collection can feel tricky, but with the right know-how, you’ll be ready for next season’s garden! Here are answers to the most common queries to help you dry, label, and store your seeds like a pro.
When is the best time to collect zinnia seeds?
Harvest seeds when the blooms have fully faded and the seed heads turn brown and papery (usually late summer to early fall). Wait until the heads are dry but haven’t scattered—squeeze gently to check for crispiness. Pro tip: Collect on a dry, sunny day to avoid moisture.
How do I properly remove seeds from the flower head?
Snip the dried seed head with clean scissors, then place it in a paper bag. Shake or rub the head between your palms to release the seeds. Discard any chaff or debris—only the plump, dark seeds are viable. Bonus: Wear gloves if you’re sensitive to pollen!
What’s the best way to label and store zinnia seeds?
Use airtight containers (like envelopes or jars) with a label noting the variety and harvest year. Store seeds in a cool, dark place (50–60°F) for up to 3 years. Add a silica gel packet to absorb excess moisture if storing long-term.
Can I collect seeds from hybrid zinnias?
Most hybrid zinnias (like ‘Benary’s Giant’ or ‘Crystal’) produce sterile seeds—they won’t grow true to type. Stick to heirloom or open-pollinated varieties (e.g., ‘Profusion’ or ‘Thumbelina’) for reliable seeds. Check seed packets for “OP” labels!
What if my seeds get moldy or damp?
If seeds feel sticky or smell musty, discard them—mold ruins viability. To prevent this, avoid collecting seeds after rain, and store them in a dry environment. For extra protection, spread seeds on a tray to dry for 1–2 weeks before sealing containers.
How do I know if my stored seeds are still good?
Test viability by placing a few seeds in a damp paper towel, sealing them in a bag, and checking for sprouts in 7–10 days. If 50%+ germinate, your batch is likely good. Otherwise, refresh your collection! Fun fact: Zinnia seeds often stay viable longer than expected—don’t toss them too soon!
Wrapping up and next steps
Collecting zinnia seeds is a rewarding way to preserve your garden’s beauty for next season—and it’s easier than you think! 🌻 By following these simple steps—drying, labeling, and storing—you’ll ensure fresh, vibrant blooms year after year.
Whether you’re a seasoned gardener or just starting out, this process connects you to the joy of growing from saved seeds.
Now that you’re ready, why not take the next step? Try experimenting with different zinnia varieties or share your seeds with fellow gardeners. Happy planting—and here’s to a garden bursting with color! 🌸