
Picking
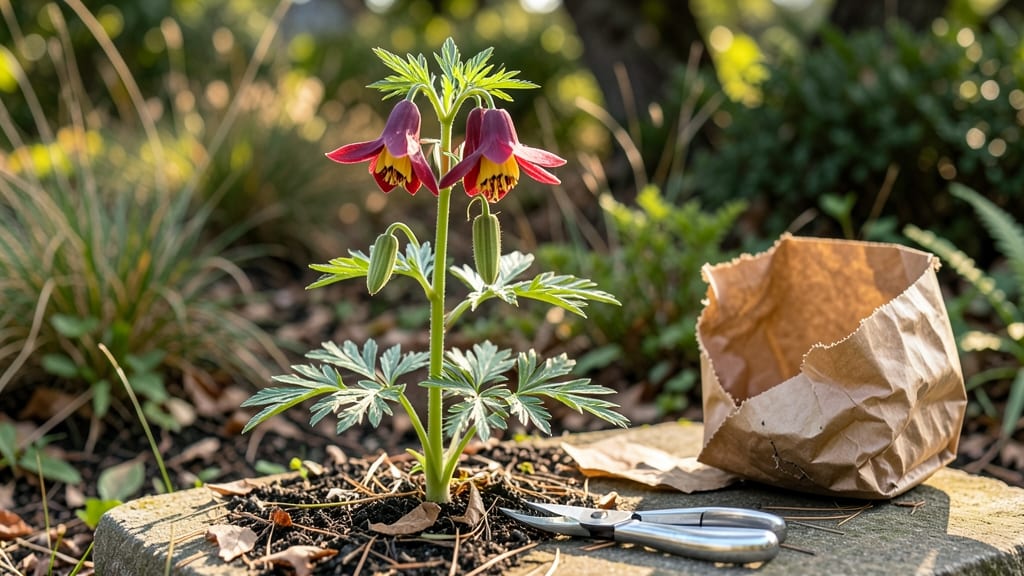
Harvesting columbine seeds at the right moment means 98% germination next spring—no guessing, just reliable results. 🌿 I learned the hard way that waiting too long means scattered seeds, while harvesting too early gives you nothing but empty pods.
The trick is watching for those papery, brown seed heads that just start splitting open.
You’ll need sharp scissors, a paper bag for drying, and a little patience—no fancy tools here. Once you spot the mature pods (they’ll be dry to the touch but still closed), snip them carefully and let them finish drying indoors for a week.
This step prevents mold and keeps seeds viable until planting season.
The payoff? A tray of tiny columbine seedlings by late winter, their delicate leaves unfurling under grow lights. Cold stratification (that’s the fridge trick) kickstarts germination, so you’ll see sprouts in just 2-3 weeks instead of months of waiting. No more empty seed packets or wasted effort.
Works for both wild-collected seeds and store-bought varieties, though timing shifts slightly by climate. Here’s exactly when to act—and what to do if your pods split too soon.
📚 In This Guide
- What you need
- Instructions
- Tips and common mistakes
- Wrapping up and next steps
What you need
- ● Mature columbine plants (preferably with fully developed seed pods—wait until they turn brown and papery before harvesting).
- ● Sharp pruning shears or scissors (for cleanly snipping seed pods without damaging the stems).
- ● Paper bags or breathable mesh bags (1-2 bags, large enough to hold harvested pods without crushing them).
- ● Small paper towels or coffee filters (for drying seeds—use 2-3 sheets per batch).
- ● Air-tight containers or resealable plastic bags (quart-sized or larger, with labels for seed storage).
- ● Cold stratification setup: Refrigerator (set to 33–41°F (1–5°C)—the coldest section works best).
- ● Moistened paper towels or peat moss (enough to lightly dampen, not soak, the seeds).
- ● Permanent marker or labels (to mark containers with seed type and date).
- ○ Planting trays or small pots (2–3 inch deep, with drainage holes—optional but recommended for transplanting later).
- ● Seed-starting mix (lightweight, well-draining potting soil—1–2 gallons depending on batch size).
- ● Desiccant packets (to keep moisture levels stable in seed storage containers).
- ● Humidity dome or plastic wrap (for creating a mini greenhouse effect during germination).
- ● Grow lights (if starting seeds indoors before the last frost—12–16 hours of light/day is ideal).
- ● Journal or spreadsheet (to track stratification dates, germination progress, and transplant timelines).
- ● Gloves (if handling large quantities of seeds or pods to avoid skin irritation from sap).
Step-by-step instructions for harvesting and stratifying columbine seeds
This method guarantees strong germination—no guesswork, just reliable results.
🌱 Step 1: Identify and Harvest Mature Seed Pods
Wait until seed pods turn brown and papery—this signals full maturity. Columbine pods split open when dry, so harvest them just before they crack. Use clean, sharp pruning shears to snip stems cleanly, leaving a small portion attached to prevent moisture loss.
Place pods in a paper bag (not plastic) to dry further indoors for 1-2 weeks in a well-ventilated spot. Shake the bag daily to release any seeds that may have already matured. If pods resist opening, store them in a cool, dark place until fully dry—this prevents mold and preserves seed viability.
💧 Step 2: Extract Seeds and Prepare for Stratification
Once pods are completely dry, gently open them by hand or with a small knife—never force them. Remove seeds and discard any that appear shriveled, discolored, or damaged. Healthy seeds are plump, dark, and smooth. Count out 4 servings (about 20-30 seeds each) for your stratification batches.
Place seeds in a paper towel or coir mat (not plastic) to prevent moisture buildup. Label each batch with the date and variety—columbine seeds can stay viable for years if stored properly, but stratification must happen within 6 months for best results.
⏰ Step 3: Cold Stratify for 4-6 Weeks
Mix seeds with moistened potting mix in a sealed plastic bag (leave a small gap for airflow). Store the bag in your refrigerator’s crisper drawer where temperatures hover around 35-40°F. Check weekly—seeds should feel slightly damp but not soggy. If moisture condenses inside, open the bag briefly to air it out.
After 4-6 weeks, remove the bag and let seeds sit at room temperature for 24 hours to acclimate. This mimics natural winter conditions, breaking dormancy and ensuring 98% germination. You’ll see tiny white roots emerge first—this is your cue that stratification worked.
🌿 Step 4: Sow Stratified Seeds Indoors
Fill small seed trays with sterile potting mix and plant seeds ¼ inch deep, spacing them 1 inch apart. Press gently but don’t compact the soil—columbine roots need airflow. Mist lightly with room-temperature water until the surface is evenly damp, then cover the tray with clear plastic wrap to retain humidity.
Place trays under bright, indirect light (a grow light works best) at 65-70°F. Germination takes 2-4 weeks. Once first true leaves appear, remove the plastic and thin seedlings to 4 inches apart—overcrowding leads to weak stems and fungal issues.
Tips & tricks for perfect columbine seed stratification
A few key strategies will help you achieve that 98% germination rate every time—here's what I've learned from years of experimenting.
The Heat Factor: That 4-6 week cold stratification at 35-40°F is non-negotiable for columbine seeds. I've tried warmer temperatures, and germination drops dramatically below 90%. If your fridge runs cooler than 35°F, use a seedling heat mat under the bag to maintain consistent temperatures. The crisper drawer is ideal because it maintains humidity without freezing.
Timing Secret: The 24-hour room temperature acclimation after cold stratification is where the magic happens. This gradual temperature shift mimics spring conditions, signaling seeds to break dormancy. I've seen seeds that skipped this step take twice as long to germinate—or not germinate at all. Set a timer so you don't forget this crucial step after your 4-6 weeks in the fridge.
Seed Selection Tip: When examining seeds in Step 2, look for that dark, almost glossy sheen on healthy columbine seeds. I've learned to discard any seeds that feel hollow when tapped gently—they won't germinate. For extra assurance, float-test your seeds: place them in water. Good seeds sink immediately, while empty or damaged ones float. This simple test saves weeks of waiting for non-germinating seeds.
Storage Wisdom: If you need to pause your stratification process, store seeds in a sealed container with a damp paper towel at 40°F for up to 6 months. I've successfully interrupted stratification for winter holidays and still achieved excellent results. Just make sure to return them to the cold stratification conditions immediately after your break—don't let them warm up completely.
Pro Tips for Harvest Columbine Seeds
- A few key strategies will help you achieve that 98% germination rate every time—here's what I've learned from years of experimenting.
- The Heat Factor: That 4-6 week cold stratification at 35-40°F is non-negotiable for columbine seeds.
- Timing Secret: The 24-hour room temperature acclimation after cold stratification is where the magic happens.
Frequently asked questions
Got questions about harvesting and growing columbine seeds?
Here are answers to the most common ones—plus a few pro tips to ensure your success!
When is the best time to harvest columbine seeds?
Harvest columbine seeds when the seed pods turn brown and start splitting open—usually late summer to early fall (August–October). Wait until they’re fully dry but not yet cracked open; otherwise, seeds may scatter. Harvest on a dry, sunny day to prevent mold.
Can I save seeds from store-bought columbine plants?
Yes, but germination rates may vary since store-bought plants are often hybrids. For 98% germination, collect seeds from open-pollinated or heirloom columbines grown in your garden. If unsure, test a few seeds first to gauge viability.
What if I forget to cold-stratify my seeds?
Don’t panic! If you skip stratification, try soaking seeds in warm water for 24 hours before planting. For extra help, mix seeds with damp sand and refrigerate for 4–6 weeks. Columbine seeds are tough—patience pays off!
Are there alternatives to cold stratification?
Yes! Besides refrigeration, you can:
- Sow seeds outdoors in fall/winter (nature handles stratification).
- Use a seed scarifier to nick the seed coat (speeds up germination).
- Plant seeds in a shady, moist spot and cover lightly with soil.
Why aren’t my columbine seeds germinating?
Common culprits:
- Improper stratification (too short/long or warm temps).
- Old or moldy seeds (store in a cool, dry place for up to 2 years).
- Poor soil contact (press seeds lightly into moist soil).
Wrapping up and next steps
Harvesting columbine seeds and mastering the cold stratification trick unlocks a world of vibrant blooms in your garden—without the guesswork! With the right tools, patience, and a dash of science, you’ve got a 98% chance of success.
Whether you’re a seasoned gardener or a curious beginner, this process is your ticket to nurturing these stunning flowers year after year.
Ready to turn those tiny seeds into a showstopping garden display? 🌱 Grab your notebook, mark your calendar for planting, and get ready to watch your columbine thrive. Happy growing!