Vegetables
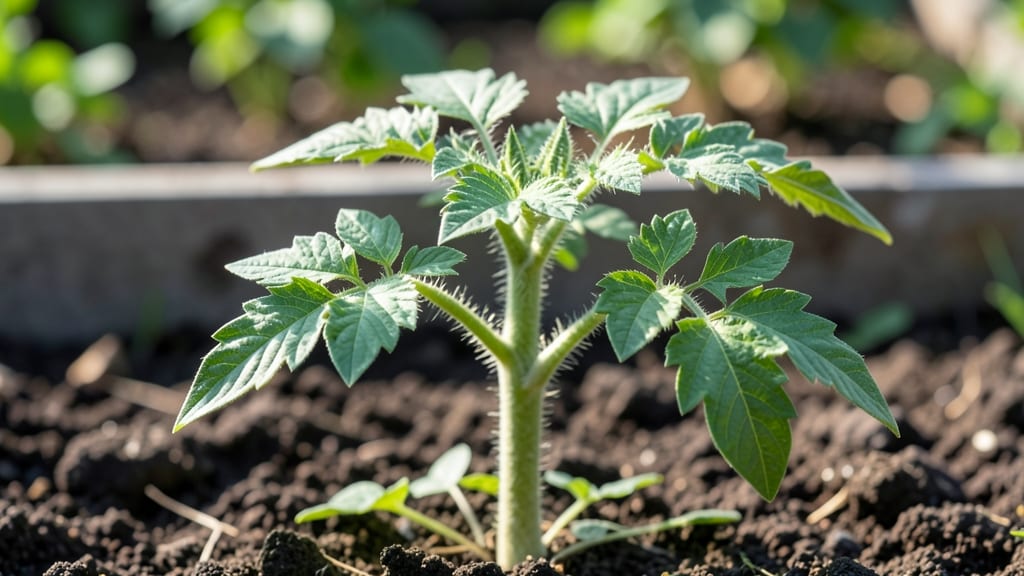
Caring for tomato seedlings is where the real magic happens—those fragile little sprouts turn into the plants that feed us all summer. 🌱 I’ve nursed dozens of seedlings through the delicate early weeks, and the difference between a sturdy transplant and a leggy, sad seedling often comes down to three things: light, water, and temperature.
Get these right, and you’ll have plants ready to thrive in the garden or containers by season’s start.
The biggest mistake? Treating seedlings like full-grown tomatoes. They need bright light—14-16 hours a day—whether from a sunny windowsill or grow lights just a few inches above them. Water gently at the soil level (not overhead) to avoid fungal diseases, and keep the soil warm—70-80°F is ideal.
Too much heat or cold sets them back, and that’s when you’ll see stunted growth or blackened stems.
By the time you’re ready to transplant, your seedlings should be stocky, dark green, and about 6 inches tall with multiple sets of true leaves.
They’ll handle the move better if hardened off first—just move them outside for a few hours each day over 5-7 days, gradually increasing their time in the elements. The payoff? Stronger roots, faster recovery, and plants that explode with fruit once they’re in the ground.
This works for both indoor starts and outdoor sowings, though timing shifts with your climate. In cooler zones, begin seeds 6-8 weeks before last frost; in warmer areas, you might stretch it to 10-12 weeks for larger transplants.
The key is consistency—once you nail the routine, you’ll never buy weak nursery starts again.
📚 In This Guide
- What you need
- Instructions
- Tips and common mistakes
- Wrapping up and next steps
What you need
- ● Seed-starting containers: 2-4" deep pots, seed trays, or biodegradable peat pots (6-12 per seedling, depending on space).
- ● High-quality seed-starting mix: Lightweight, sterile potting mix (avoid garden soil—it’s too dense!). Pro tip: Look for mixes labeled "seed-starting" or "organic potting soil."
- ● Tomato seeds: Choose heirloom or hybrid varieties suited to your climate (e.g., Early Girl, Cherry Roma, or Beefsteak).
- ● Grow lights or a sunny windowsill: A full-spectrum LED grow light (12-16 hours/day) or a south-facing window with 6+ hours of sunlight.
- ● Spray bottle: For gentle watering (avoid over-saturating seeds!).
- ○ Heat mat (optional but helpful): Keeps soil warm (70-85°F) for faster germination. 💡 Pro tip: Place under seed trays if your home is chilly!
- ● Humidity dome or plastic wrap: Retains moisture while seeds sprout (remove once seedlings emerge).
- ● Fertilizer: Balanced, water-soluble fertilizer (5-10-5 or 10-10-10 ratio) for early growth.
- ● pH testing kit: Ensures soil pH is 6.0-6.8 (tomatoes love slightly acidic soil!).
- ● Small fan: Mimics wind to strengthen seedlings (place on low setting for 1-2 hours/day).
- ● Thermometer: Monitors soil and air temperature for optimal growth.
- ● Plant labels: Track varieties and planting dates (especially useful if growing multiple types!).
- ● Compost or worm castings: Boosts nutrient density in the soil mix.
Step-by-Step instructions for tomato seedling care
Here's how I keep tomato seedlings strong through every growth stage—no matter the season.
💧 Step 1: Water Consistently Without Overdoing It
Tomato seedlings need moisture, but soggy soil invites disease. Water when the top inch of soil feels dry—usually every 2-3 days depending on your home's humidity. Use room-temperature water to avoid shocking the roots, and water at the base rather than overhead.
I like to stick my finger in the soil up to my first knuckle to check moisture. If it feels damp but not wet, hold off. Overwatering causes those sad, yellow leaves that no one wants to deal with. A tray under the pots catches excess water and keeps your windowsill dry.
☀️ Step 2: Provide Bright, Consistent Light
Tomato seedlings stretch toward any light source, so position them within 2-4 inches of a grow light or in the brightest window you have. Without enough light, stems grow weak and leggy—those plants never recover. I keep my seedlings under a 14-hour daylight schedule using a timer for the grow light.
Rotate the tray a quarter turn daily so all sides get even exposure. You'll see strong, compact growth when seedlings have dark green leaves and thick stems. If they lean toward the light, move the setup closer or add another bulb.
🌱 Step 3: Fertilize Lightly After First True Leaves Appear
Wait until seedlings show their first true leaves (the second set after the initial cotyledons) before adding fertilizer. I mix ½ teaspoon of balanced 10-10-10 fertilizer into 1 gallon of water and apply it every 2 weeks thereafter. Too much too soon burns delicate roots.
Use a spray bottle for the first feeding to avoid disturbing the soil. You'll notice stronger stems and deeper green leaves within a week. If leaves yellow between the veins, that's a sign of over-fertilizing—rinse the soil lightly with plain water and reduce the dose next time.
✂️ Step 4: Prune and Support as Seedlings Grow
When seedlings reach 6-8 inches tall, pinch off the top set of leaves just above a pair of lower leaves. This encourages bushier growth. I also remove any lower leaves that touch the soil—they'll rot and invite disease.
Install a small stake or tomato cage near each plant as soon as you see the first flower bud. Gently tie the main stem to the support with soft plant ties. This prevents flopping later when the plant bears fruit. Don't wait until the plant is heavy—support early and often.
🪴 Step 5: Harden Off Before Transplanting
Two weeks before your last frost date, begin hardening off seedlings by placing them outside in a sheltered spot for 1-2 hours the first day. Gradually increase their outdoor time by 1 hour daily until they can stay out all day. This toughens their skin and prepares them for garden conditions.
Watch for wilting during the first few days outside—that's normal. If it persists past the first afternoon, they're not ready yet. Once hardened off, transplant on an overcast day or in the late afternoon to reduce stress. Keep a close eye on them for the first week after moving.
Tips & tricks for perfect tomato seedling care
A few simple tricks will help you avoid those common seedling setbacks and grow tomatoes that thrive from start to finish.
Light Position Matters: In Step 2, when positioning seedlings within 2-4 inches of your grow light, place the tray so the light source is directly above—not at an angle. This ensures even growth without leggy stems reaching toward one side. I've seen seedlings grow 20% straighter when positioned properly. For windowsill growing, rotate the tray every 4 hours instead of daily to compensate for the sun's movement.
Watering Technique Tip: The finger-check method in Step 1 works best if you use your index finger to press gently into the soil. If the soil sticks slightly to your finger but doesn't feel saturated, that's perfect. For container growing, I like to use a moisture meter probe—it gives consistent readings when my finger might be unreliable. Remember, watering at the base prevents fungal diseases that love damp foliage.
Fertilizer Timing Secret: In Step 3, when you see those first true leaves, that's your cue—but don't rush! Wait an extra day or two after they fully unfurl before fertilizing. I've found this prevents the "fertilizer shock" that causes leaves to curl or yellow. Also, mix your fertilizer solution in a separate container first, then dilute it with water to avoid clumping in the spray bottle.
Pruning Insight: The 6-8 inch height guideline in Step 4 is perfect, but here's what nobody tells you—look for the first set of leaves that are about 1/3 the size of the leaves above them. That's your pruning point. I also recommend using clean, sharp scissors rather than pinching with fingers to make cleaner cuts that heal faster.
Pro Tips for Tomato Seedling Care
- A few simple tricks will help you avoid those common seedling setbacks and grow tomatoes that thrive from start to fi...
- Light Position Matters: In Step 2, when positioning seedlings within 2-4 inches of your grow light, place the tray so...
- Watering Technique Tip: The finger-check method in Step 1 works best if you use your index finger to press gently int...
Frequently asked questions
Got questions about keeping your tomato seedlings happy and healthy? You’re not alone—growing strong seedlings takes a little know-how! Here are answers to the most common concerns, from timing to troubleshooting, so you can avoid pitfalls and grow like a pro.
How often should I water tomato seedlings?
Water your seedlings consistently—about 1-2 times per week, depending on soil dryness. Overwatering is riskier than underwatering, so let the top inch of soil dry out between waterings. Use a spray bottle or gentle stream to avoid disturbing delicate roots. Pro tip: Water at the base, not overhead, to prevent fungal diseases like damping off.
When is the best time to transplant tomato seedlings outdoors?
Wait until nighttime temperatures stay above 50°F (10°C) and all frost risk has passed. Seedlings should be at least 4-6 inches tall with 4-6 true leaves. Harden them off for 7-10 days before transplanting by gradually exposing them to outdoor conditions. Pro tip: Plant deeper than the original pot—bury up to the first set of leaves to encourage strong root growth!
What should I do if my tomato seedlings look leggy or weak?
Leggy seedlings happen when they don’t get enough light. Move them to a sunny windowsill or under grow lights (12-16 hours/day). If already planted, fertilize lightly with a balanced, water-soluble fertilizer (like 10-10-10) to boost growth. Avoid overcrowding—thin seedlings if needed to give them space to stretch toward the light.
Can I grow tomato seedlings indoors without natural sunlight?
Use full-spectrum grow lights (LED or fluorescent) placed 2-4 inches above seedlings for 12-16 hours daily. Keep lights on a timer to mimic daylight. Supplement with a low-dose fertilizer (like fish emulsion) every 2-3 weeks to prevent nutrient deficiencies. Pro tip: Rotate seedlings daily to prevent uneven growth.
Why are my tomato seedlings wilting or turning yellow?
Wilting often signals overwatering, underwatering, or root issues. Check the soil moisture—if it’s soggy, let it dry out. Yellow leaves (chlorosis) may mean nutrient deficiency (especially nitrogen or magnesium) or pests like aphids. Treat with neem oil or a balanced fertilizer. If roots are mushy or black, damping off is likely—repot in fresh, sterile soil and improve airflow.
What’s the best fertilizer for tomato seedlings?
Start with a balanced, water-soluble fertilizer (e.g., 5-5-5 or 10-10-10) at half-strength every 2-3 weeks. Avoid high-nitrogen fertilizers, which promote leafy growth over fruiting. Once seedlings are transplanted, switch to a tomato-specific fertilizer (higher in phosphorus and potassium) to encourage blooming. Pro tip: Compost tea or worm castings are great organic alternatives!
Wrapping up and next steps
Caring for tomato seedlings is all about patience, consistency, and love—just like nurturing any new plant! 🌱 With the right balance of light, water, and warmth, you’ll watch those tiny sprouts grow into vibrant, productive plants.
Now that you’re armed with the knowledge, it’s time to roll up your sleeves and get growing.
Ready to take the next step? Start with just one seedling—whether in a cozy windowsill or a sunny greenhouse—and let your green thumb shine. Happy gardening! 🌿