
Trees
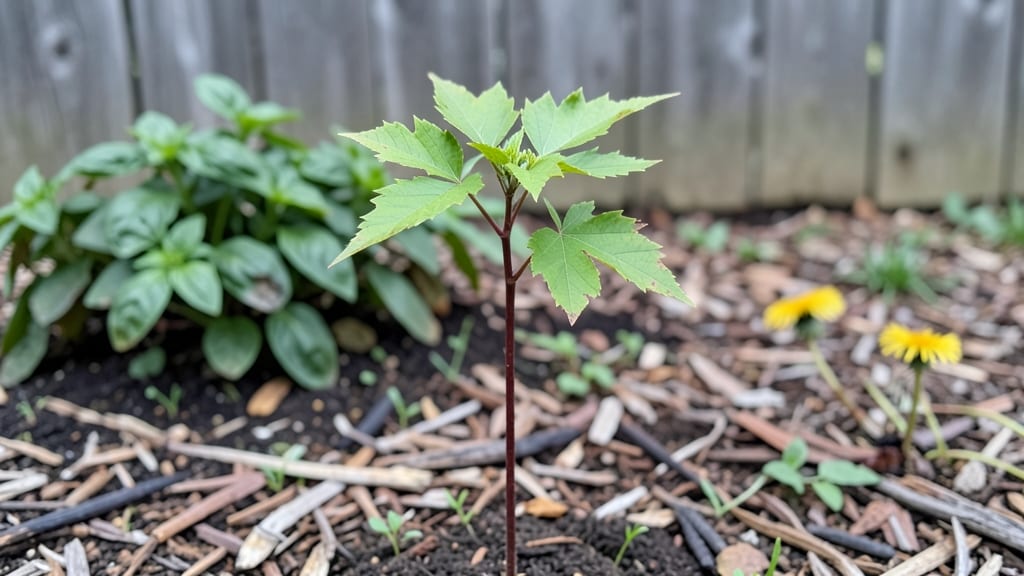
Growing a sugar maple seedling from scratch means decades of golden fall foliage if you do it right. 🌿 The key to success lies in mimicking nature’s gradual process—especially that critical layered chill period that strengthens roots before spring planting.
Without it, seedlings struggle to establish, and years of growth potential vanish.
Start with a 3-5 gallon container filled with well-draining soil mix (half potting soil, half perlite or sand). Plant the seedling at the same depth it grew in its nursery pot, then place it in a shaded spot for the first two weeks to reduce transplant shock.
Water deeply once a week, keeping the soil consistently moist but never soggy—sugar maples hate wet feet.
Here’s where the layered chill comes in: After two months of growth, move the container outside in fall, exposing it to 40-50°F nights for at least 8-10 weeks.
This mimics winter dormancy, priming the roots for stronger spring growth. Come planting season, your seedling will be hardier, faster-establishing, and far less likely to succumb to disease.
Long-term care is simple: Mulch heavily around the base to retain moisture, avoid heavy pruning until the tree is at least 5 feet tall, and watch for signs of stress like yellowing leaves—often a sign of overwatering or poor drainage.
With patience, your sugar maple will grow 3-5 feet per year in ideal conditions, delivering that iconic autumn spectacle.
📚 In This Guide
- What you need
- Instructions
- Tips and common mistakes
- Wrapping up and next steps
What you need
- ● Sugar maple seeds (Acer saccharum) – 10–20 seeds (fresh or cold-stratified for best results).
- ● Seed-starting mix – 2–3 gallons of high-quality, sterile potting soil (look for a blend with perlite or vermiculite for drainage).
- ● Seedling trays or small pots – 6–12 individual cells or 3–4-inch pots (biodegradable pots work great!).
- ● Clear plastic dome or plastic wrap – To create a mini greenhouse effect.
- ● Spray bottle – For gentle watering (avoid over-saturating the soil).
- ● Grow lights or sunny windowsill – Seedlings need 12–16 hours of light daily.
- ● Refrigerator or cold stratification setup – A sealed container with damp paper towels (for 60–90 days before planting).
- ● Heat mat – Keeps soil warm (70–75°F) during germination.
- ● pH testing kit – Ensures soil pH is between 5.0–7.0 (ideal for maple seedlings).
- ● Fertilizer (balanced, low-nitrogen) – Like a 10-10-10 or fish emulsion (diluted to half-strength).
- ● Labeling tags – To track planting dates and seedling progress.
- ● Pruning shears – For future thinning or shaping as seedlings grow.
Step-by-Step guide to growing sugar maple seedlings with the layered chill technique
Here's how to cultivate hardy sugar maple seedlings using a proven cold stratification method that mimics nature's process.
🌱 Step 1: Collect and Prepare Fresh Seeds
Harvest seeds directly from mature sugar maple samaras in late fall when they begin to yellow and drop naturally. Remove the papery wings and store the seeds in a paper towel-lined container with a sprinkle of damp sphagnum peat moss—just enough to keep them moist but not soggy. This mimics the forest floor's natural moisture balance.
Place the container in a plastic bag and seal it loosely to maintain humidity. Store it in your refrigerator's crispier drawer where temperatures hover around 35-40°F. This cold stratification period lasts 90-120 days and breaks the seed's dormancy, preparing it for germination.
💧 Step 2: Stratify Seeds in Moist Growing Medium
After the cold period, transfer the seeds to a sterile seed-starting mix in a shallow tray. Press each seed just ½ inch deep—any deeper and they'll struggle to emerge. Use a fine mist spray bottle to dampen the mix until it feels like a wrung-out sponge.
Cover the tray with a clear plastic dome or plastic wrap to maintain high humidity. Place it in a cool, dark location (like a basement) where temperatures stay between 45-55°F. Check weekly and mist the surface if it feels dry to the touch. Germination typically begins in 2-4 weeks, signaled by tiny green sprouts breaking through the soil.
☀️ Step 3: Transition Seedlings to Light Gradually
Once seedlings reach 2-3 inches tall, remove the plastic cover and move them to a bright, indirect light area. Avoid direct sunlight initially—young seedlings can scorch easily. I use a grow light on a timer for 12 hours daily to simulate natural daylight without intensity.
After 2 weeks under grow lights, gradually introduce them to morning sun only. Watch for deep green leaves and sturdy stems—these indicate healthy growth. If seedlings develop long, thin stems (called "leggy"), they're stretching for light. Move them closer to the light source or increase exposure by 1 hour daily.
⏰ Step 4: Harden Off and Plant Outdoors
When seedlings have 4-6 true leaves and are 6-8 inches tall, begin hardening them off. Place them outside in a sheltered spot for 2 hours daily, gradually increasing exposure over 2 weeks. Choose a cloudy day for their first outdoor session to minimize stress.
Transplant outdoors in early spring after the last frost date, when soil temperatures reach 50°F. Dig a hole twice as wide as the root ball but only as deep as the container. Gently remove the seedling, loosen the roots if they're circling, and place it in the hole. Backfill with soil and water deeply to settle the roots. Mulch with 2-3 inches of organic mulch to retain moisture and regulate soil temperature.
🌿 Step 5: Maintain Through First Growing Season
Water seedlings 1-2 times weekly, providing 1 inch of water per week during dry spells. Use a moisture meter to check soil depth—water when the top 2 inches feel dry. Avoid overhead watering to prevent fungal diseases like powdery mildew, which can weaken young seedlings.
Fertilize lightly in early spring with a balanced 10-10-10 fertilizer at half strength. Monitor for pests like aphids or spider mites, which thrive on tender new growth. If pests appear, treat with a soapy water spray (1 tablespoon mild dish soap per gallon of water) and repeat every 3-5 days until they're gone.
Tips & tricks for perfect sugar maple seedling cultivation
Mastering the layered chill technique transforms sugar maple seeds into sturdy saplings—here's how to avoid common pitfalls and maximize success.
Temperature Precision: The 90-120 day cold stratification at 35-40°F is non-negotiable for breaking dormancy. I use a refrigerator thermometer to verify temps—some models fluctuate. If your fridge runs warmer, move the container to a cooler spot like the bottom shelf. Remember, seeds need consistent cold, not just any cold environment.
Seed Placement Technique: In Step 2, pressing seeds just ½ inch deep creates the perfect balance—too shallow and they dry out, too deep and they suffocate. Use a pencil to make small divots before placing seeds, then cover lightly with mix. This creates ideal air pockets while keeping them protected.
Light Transition Strategy: The gradual light introduction in Step 3 prevents shock. Start with 12 hours of grow light, then transition to morning sun only after 2 weeks. I've seen seedlings bolt (grow too fast) when moved to full sun too quickly—watch for pale leaves or elongated stems as warning signs.
Harden Off Smartly: Begin hardening with just 2 hours on cloudy days to minimize stress. Increase exposure by 30 minutes every 2-3 days rather than doubling time. This mimics natural spring conditions and prevents transplant shock when you eventually move them outdoors at 50°F soil temps.
Pro Tips for Sugar Maple Seedling
- Mastering the layered chill technique transforms sugar maple seeds into sturdy saplings—here's how to avoid common pitfalls and maximize success.
- Temperature Precision: The 90-120 day cold stratification at 35-40°F is non-negotiable for breaking dormancy.
- Seed Placement Technique: In Step 2, pressing seeds just ½ inch deep creates the perfect balance—too shallow and they dry out, too deep and they suffocate.
Frequently asked questions
Got questions about growing sugar maple seedlings? You’re not alone! Here are some of the most common concerns—and their answers—to help you nurture strong, healthy trees from the start.
How long does it take for sugar maple seedlings to sprout after layering?
With the layered chill technique, you’ll typically see tiny sprouts emerging within 4–8 weeks after planting. Patience is key—some varieties may take a little longer, especially if soil temps stay cool. Keep the area moist but well-drained, and avoid disturbing the layered stem.
Do I need to refrigerate the layered cuttings before planting?
Yes! The "chill" in the layered chill technique is critical. Store your cuttings in a moist paper towel inside a sealed bag in the fridge (34–40°F) for 4–6 weeks before planting. This mimics winter dormancy and boosts rooting success.
Can I use this method for other maple species, like silver or red maple?
While the technique works for sugar maples, silver and red maples may respond differently. Sugar maples thrive with this method due to their cold-hardiness, but experiment with shorter chill times (3–4 weeks) for other species. Always research your specific variety first!
What do I do if my layered cutting rots instead of sprouting?
Rotting is often caused by too much moisture or poor airflow. If you spot mold or a foul smell, remove the cutting immediately. For future attempts, use sterilized tools, avoid overwatering, and ensure the layered stem is slightly elevated (not buried).
How big should the sugar maple seedlings be before transplanting outdoors?
Wait until seedlings have 2–3 sets of true leaves and a 2–3 inch root system before transplanting. Harden them off gradually (place outside for a few hours daily) over 1–2 weeks to prevent shock. Early spring or fall are ideal planting times for most regions.
Wrapping up and next steps
Growing sugar maple seedlings with the layered chill technique is a rewarding way to nurture strong, resilient trees for years to come. 🌱 By mimicking nature’s cycles—with proper stratification, moisture, and patience—you’re setting the stage for vibrant growth and deep root systems.
Whether you’re a seasoned gardener or just starting, every small effort makes a difference.
Ready to take the next step? Start small:
- Plant your first seedling this fall and observe its progress.
- Share your journey with fellow tree enthusiasts—ask questions or swap tips!
- Expand your knowledge with local forestry resources or workshops.