
Propagation
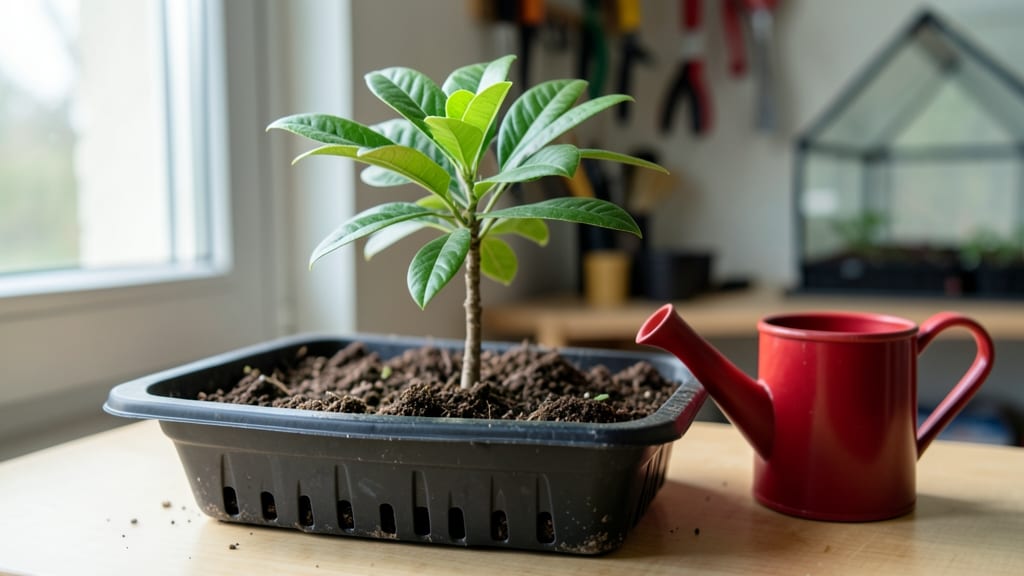
Growing pomegranate sprouts from seeds is faster than you think—just 3-4 weeks to see those first green leaves. 🌱 I’ve turned discarded pomegranate seeds into thriving seedlings that outpace store-bought plants, and the secret lies in how you prep them before planting.
The key? A quick soak and the right balance of moisture and warmth—no fancy equipment needed.
Start with fresh seeds from a ripe pomegranate—no need to buy specialty supplies. After soaking them overnight, place them in a shallow tray with damp paper towels, keeping them in a warm spot (around 75°F).
Most seeds sprout within 7-10 days, but patience pays off—some take up to 2 weeks if they’re on the slower side.
Once the sprouts reach 2 inches tall, transplant them into small pots with well-draining soil. Keep them in bright, indirect light at first, then gradually move them to full sun as they grow stronger.
By 6-8 weeks, you’ll have sturdy seedlings ready for their permanent home—whether that’s a container or your garden bed.
Here’s the thing—these aren’t just for fruit. Even if your pomegranate tree never bears edible fruit (they often don’t in colder climates), the ornamental value is stunning with its glossy leaves and vibrant blooms. Let’s get those seeds sprouting!
📚 In This Guide
- What you need
- Instructions
- Tips and common mistakes
- Wrapping up and next steps
What you need
- ● Pomegranate seeds: 1–2 fresh, organic pomegranates (ensure they’re not pre-treated or dyed). Aim for 20–30 seeds for a small batch.
- ● Water: Filtered or distilled water (avoid tap water with high chlorine—use a glass jar for soaking).
- ● Germination container: Option 1: A wide-mouth mason jar (8–16 oz) with a breathable lid (or cheesecloth + rubber band).
- ● Option 2: A sprouting tray or shallow dish (8x10 inches) with drainage holes.
- ● Breathable cover: Cheesecloth, paper towel, or a sprouting lid (to keep seeds moist but ventilated).
- ○ Organic sprouting medium (optional but recommended): Hydroponic pads (for vertical sprouting).
- ● Unbleached cotton pads or organic jute mesh (for drainage).
- ● Fine-mesh strainer or colander (for rinsing seeds).
- ● Spray bottle (with water for misting).
- ● Kitchen timer (to track soaking and rinsing intervals).
- ● Small bowl or plate (for draining excess water).
- ● Scissors (if cutting cheesecloth or cotton pads).
- ○ Food processor or mortar & pestle (optional—if you want to blend sprouted seeds into pesto or hummus!).
- ● A clean workspace (wash hands and tools thoroughly).
- ● Room temperature (65–75°F / 18–24°C)—pomegranate seeds sprout best in warmth!
- ● Indirect sunlight or grow light (after germination, for ~4–6 hours/day).
- ● Patience! Sprouts emerge in 3–7 days (depending on conditions).
Step-by-Step instructions for germinating pomegranate seeds
Here's how to coax those jewel-like seeds into sprouts—no fancy equipment needed, just patience.
🌱 Step 1: Extract and Prepare the Seeds
Rinse a fresh pomegranate under cool water to loosen the seeds, then scoop them into a bowl. Discard any shriveled or discolored seeds—they won’t germinate. I like to spread them on a paper towel to dry for 1-2 hours at room temperature. This prevents mold later, especially in humid climates.
Once dry, separate the seeds from their membranes. The membrane slows germination, so removing it gives your sprouts a faster start. Place the clean seeds in a small bowl and cover them with lukewarm water for 12-24 hours. This softens the hard outer shell, making it easier for the radicle (the first root) to break through.
💧 Step 2: Set Up Germination Trays
Line a shallow tray or seed-starting container with a damp paper towel or a thin layer of the peat moss (if using). Arrange the soaked seeds about 1 inch apart—crowding them leads to tangled roots and weak sprouts. Cover the tray with another damp paper towel or plastic wrap to retain moisture and warmth.
Place the tray in a warm spot, ideally between 70-80°F. A sunny windowsill or a seedling heat mat works best. You’ll see tiny white roots emerge in 3-7 days, depending on temperature. Keep the paper towels or moss consistently damp but never soggy—excess water drowns seeds before they sprout.
☀️ Step 3: Transfer to Soil for Early Growth
Once the seeds sprout ½-inch roots, gently remove them from the paper towels and plant them ¼ inch deep in individual 2-inch pots filled with the potting mix. Press the soil lightly around each seedling to secure it without compacting. Water gently until the soil is moist but not waterlogged.
Place the pots in bright, indirect light for 1-2 weeks to prevent leggy growth. You’ll notice the first true leaves (not the initial seed leaves) appear in 2-3 weeks. This is your cue to move them to a slightly sunnier spot, like a south-facing window or under a grow light for 12-14 hours daily.
🌿 Step 4: Care for Young Seedlings
Water the seedlings when the top ½ inch of soil feels dry—overwatering causes root rot, especially in pomegranates, which are drought-tolerant once established. Use a spray bottle for precision, avoiding the leaves to prevent fungal issues. Fertilize lightly with a diluted liquid fertilizer (half-strength) once the seedlings have 3-4 true leaves.
Thin out weaker seedlings to leave the strongest one in each pot. Pomegranate seedlings grow slowly at first, but once they reach 6 inches tall, you’ll see faster growth. This is the stage to harden them off—gradually expose them to outdoor conditions over 10-14 days before transplanting to the garden or a larger container.
Tips & tricks for fast, reliable pomegranate seed sprouts
Here’s how to accelerate germination while avoiding the most common pitfalls—because patience doesn’t mean sacrificing speed.
Speed Up Germination: The 12-24 hour soak in lukewarm water is non-negotiable, but you can cut down the 3-7 day root emergence window by placing your tray on a seedling heat mat set to 80°F. Warmth is the single biggest factor in fast germination—think of it as giving your seeds a jumpstart. I’ve seen roots appear in just 48 hours when using this method.
Membrane Removal Matters: Don’t skip separating seeds from their membranes in Step 1—this step alone can double your germination rate. The membrane acts like a natural barrier, and removing it lets the radicle break through faster. Use a small knife or your fingernail to gently scrape away the white film, but work quickly to avoid damaging the seed.
Moisture Balance is Critical: The damp paper towels or peat moss must stay moist but never soggy during germination. Overwatering in Step 2 is the #1 reason seeds fail to sprout. I recommend misting lightly every 12 hours rather than soaking—this keeps humidity high without creating anaerobic conditions that suffocate seeds. A spray bottle gives you perfect control.
Light Transition Strategy: When moving seedlings to soil in Step 3, place them under 12-14 hours of grow light immediately rather than waiting for true leaves. This prevents the "leggy" growth that happens when seedlings stretch toward weak natural light. Use a full-spectrum LED bulb—it’s worth the investment for this critical growth phase.
Pro Tips for Sprouts Pomegranate Seeds
- Here’s how to accelerate germination while avoiding the most common pitfalls—because patience doesn’t mean sacrificing speed.
- Speed Up Germination: The 12-24 hour soak in lukewarm water is non-negotiable, but you can cut down the 3-7 day root emergence window by placing your tray on a seedling heat mat set to 80°F.
- Membrane Removal Matters: Don’t skip separating seeds from their membranes in Step 1—this step alone can double your germination rate.
Frequently asked questions
Got questions about sprouting pomegranate seeds?
You’re not alone! Here are some of the most common queries—and answers—to help you grow these vibrant sprouts like a pro.
How long does it take for pomegranate seeds to sprout?
Patience is key! With the right conditions (moisture, warmth, and indirect light), you’ll see tiny sprouts peeking out in 3 to 7 days. Some seeds may take up to 2 weeks—don’t toss them yet! Keep them consistently damp and in a cozy spot (around 70–75°F).
Do I need to soak pomegranate seeds before sprouting?
Soaking isn’t required, but it can speed things up! Give your seeds a 4–6 hour soak in room-temperature water to soften their hard outer shells. After soaking, drain well and place them in your sprouting setup. Pro tip: Use a fine-mesh strainer or sprouting jar to avoid overcrowding.
Can I sprout pomegranate seeds indoors without sunlight?
Pomegranate seeds germinate best in warmth and moisture, not direct light. Place your sprouting container near a bright, indirect light source (like a window with sheer curtains) or under a grow light. Once sprouts emerge, they’ll need more light to grow strong—aim for 12–16 hours of light daily.
What if my pomegranate seeds rot instead of sprouting?
Rotting is a common issue, but it’s fixable! Overwatering or poor airflow are usually the culprits. Troubleshoot:
- Rinse seeds twice daily (morning and evening) with fresh water.
- Ensure your container has drainage holes or tilt it slightly to prevent pooling.
- Use a well-ventilated setup (like a mesh sprouting lid) to reduce humidity.
Can I eat pomegranate sprouts, or are they just for decoration?
You can eat them—but they’re not as flavorful as mature pomegranates! Young sprouts (with just a few leaves) are mild and slightly sweet, packed with antioxidants and fiber. Best uses:
- Add to salads for a crunchy, peppery bite.
- Blend into smoothies for a nutrient boost.
- Use as a garnish for soups or yogurt.
What’s an alternative if my pomegranate seeds won’t sprout?
If your seeds refuse to cooperate, try these backup options:
- Buy fresh pomegranates—older seeds lose viability faster.
- Try sprouting other fruit seeds like citrus (e.g., lemon or orange) or avocado.
- Experiment with hydroponic setups for faster germination.
Wrapping up and next steps
Growing sprouts from pomegranate seeds is a rewarding journey that brings fresh, nutrient-packed greens to your table with minimal effort! 🌱 With the right materials, a little patience, and these germination secrets, you’ll soon enjoy vibrant sprouts bursting with flavor and health benefits.
Whether you’re a beginner or a seasoned gardener, this method proves that sustainable, homegrown food is just a few steps away.
Ready to take the next step? Start small—try a single batch of seeds to perfect your technique, then scale up as you gain confidence. Share your sprouting success with friends or explore other seed varieties to keep your kitchen adventures exciting! 🌟