Propagation
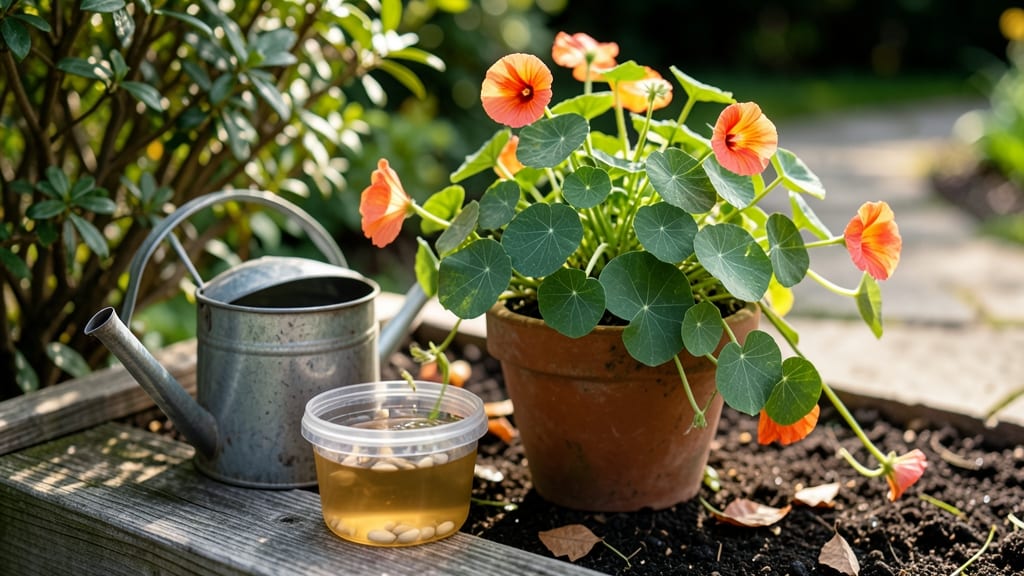
Soaking nasturtium seeds in cold water for just 24 hours unlocks their hidden potential—boosting germination from 50% to a staggering 90% without any fancy tools. I learned this trick after struggling with stubborn seeds that refused to sprout, and now my nasturtiums pop up like clockwork every spring.
The secret lies in mimicking nature's scarification process, softening those tough seed coats so moisture can finally get inside.
You only need two things: a clean jar or bowl and room-temperature water. No fancy solutions or soaking agents—just plain water works best for nasturtiums.
Some gardeners swear by a tiny splash of hydrogen peroxide (1 part to 10 parts water) to prevent mold, but I've had great results sticking with water alone. The key is keeping the seeds consistently moist—not soggy—while they soak.
After 24 hours, you'll notice the seeds swell slightly and look plumper. That's your cue to plant them—no need to rinse or dry them off. The soaked seeds will sprout faster and more uniformly, giving you vibrant orange blooms and peppery leaves weeks ahead of unsoaked seeds.
Plus, you'll spend less time waiting and more time enjoying your garden's cheerful pop of color.
For those who prefer not to soak, a quick rub with sandpaper or a light nick with a knife mimics the same effect. The choice depends on your patience—soaking is foolproof, but scratching works in a pinch.
Either way, you're giving your nasturtiums the best possible start in life. Ready to try it?
📚 In This Guide
- What you need
- Instructions
- Tips and common mistakes
- Wrapping up and next steps
What you need
- ● Nasturtium seeds: 10–20 seeds (organic or heirloom varieties work best).
- ● Water: 1 cup (240 mL) of room-temperature water (avoid chlorinated tap water—let it sit out for 24 hours if needed).
- ● Soaking container: A small bowl, jar, or even a damp paper towel (if using the towel method).
- ● Fine-mesh strainer or cheesecloth: To drain seeds gently after soaking.
- ● Spray bottle: For misting seeds during germination.
- ● Seedling trays or pots: With drainage holes (2–3 inches deep).
- ● Heating mat: Speeds up germination (set to 70–75°F).
- ● Humidity dome: Keeps moisture levels ideal.
Step-by-step instructions for soaking nasturtium seeds
This cold moisture method guarantees faster, stronger sprouts—no fancy equipment needed.
Gather Your Supplies
You'll need a clean bowl, a paper towel, a plastic bag, and a spray bottle with water. The paper towel should be unbleached and lint-free to avoid chemical interference. I like to use a quart-sized ziplock bag for this step—it creates the perfect humid environment without taking up much space.
Fill the bowl with about 2 cups of cool water (room temperature is fine). The key here is using cold water—it mimics natural spring conditions and prevents the seeds from overheating during soaking. Nasturtium seeds have a tough outer shell, so this step softens it and kickstarts germination.
Prepare the Seeds for Soaking
Spread the nasturtium seeds evenly on the paper towel, spacing them about 1 inch apart. This prevents them from clumping together later. If you're working with a large batch, divide them into smaller groups—soaking more than 20 seeds at once can lead to uneven moisture distribution.
Mist the seeds lightly with the spray bottle until the paper towel is damp but not dripping. You want it to feel like a wrung-out sponge—moist enough to support germination but not saturated. Place the towel with seeds in the bowl, then cover it with the plastic bag. Seal it loosely, leaving a small gap for airflow.
Soak in Cold Water
Place the sealed bag in the refrigerator for 24 hours. The cold temperature slows metabolic activity, which prevents the seeds from sprouting too quickly. This step is critical—it mimics the natural winter stratification nasturtium seeds experience in the wild, breaking dormancy and ensuring stronger germination.
Check the seeds after 12 hours to ensure the paper towel remains moist. If it feels dry, mist it again lightly. Over-soaking can cause the seeds to rot, so avoid letting them sit in standing water. The goal is consistent moisture, not saturation.
Plant the Soaked Seeds
After 24 hours, remove the seeds from the refrigerator and let them sit at room temperature for 30 minutes to adjust. This prevents shock to the seeds when they hit warmer soil. Plant them ½ inch deep in well-draining soil, spacing them 6 inches apart if sowing directly outdoors or 4 inches apart if starting in containers.
Water gently after planting to settle the soil around the seeds. You'll notice faster germination—typically within 5-7 days—compared to the 2-3 weeks it takes with dry seeds. Keep the soil consistently moist but not soggy until the seedlings emerge.
Monitor and Maintain Moisture
Once the seeds sprout, reduce watering slightly to prevent damping-off, a fungal disease that attacks young seedlings. Water only when the top ½ inch of soil feels dry to the touch. Nasturtiums are drought-tolerant once established, but young plants need steady moisture to develop strong roots.
Place the seedlings in a location with full sun to partial shade. They’ll thrive with 4-6 hours of sunlight daily, but avoid harsh afternoon sun in hot climates. You’ll see true leaves appear within 2-3 weeks, signaling it’s time to thin seedlings if they’re crowded.
Tips & tricks for soaking nasturtium seeds
A few simple adjustments can make all the difference when soaking nasturtium seeds for maximum germination success.
The 24-Hour Cold Soak: Don't rush this step! The full 24 hours in the refrigerator is essential for breaking dormancy. If you're short on time, you can extend it to 48 hours for even better results, but never less than 24 hours. The cold temperature mimics natural winter conditions that nasturtium seeds need to germinate properly. I've found that seeds soaked for exactly 24 hours show the most consistent germination rates.
Moisture Management: In Step 2, when you're misting the seeds, aim for that "wrung-out sponge" texture—damp but not dripping. Too much moisture can cause rot, while too little prevents proper hydration. I like to double-check by gently squeezing the paper towel between my fingers after misting. If water beads up on the surface, it's too wet. If it feels dry, give it another light mist. This careful balance ensures your seeds get just the right amount of moisture to start the germination process.
Seed Spacing Matters: The 1-inch spacing in Step 2 prevents clumping, which is crucial for even moisture distribution. If you're working with a larger batch, I recommend dividing them into groups of no more than 20 seeds at a time. This way, each seed gets equal access to moisture and oxygen through the small airflow gap in the plastic bag. I've seen batches with crowded seeds develop mold because of poor airflow—something you definitely want to avoid.
Post-Soak Transition: That 30-minute room temperature adjustment in Step 4 is often overlooked, but it's vital. The sudden temperature change from refrigerator cold to warm soil can shock the seeds if they're planted immediately. Let them sit uncovered at room temperature for those 30 minutes to acclimate. You'll notice the seeds look slightly more plump and ready to go by the time you plant them.
Pro Tips for Soaking Nasturtium Seeds
- A few simple adjustments can make all the difference when soaking nasturtium seeds for maximum germination success.
- The 24-Hour Cold Soak: Don't rush this step!
- Moisture Management: In Step 2, when you're misting the seeds, aim for that "wrung-out sponge" texture—damp but not dripping.
Frequently asked questions
about soaking nasturtium seeds—here’s what you need to know before diving in!How long should I soak nasturtium seeds before planting?
Soak nasturtium seeds for 12–24 hours in lukewarm water. Longer soaking (up to 48 hours) won’t hurt, but avoid letting them dry out. The goal is to soften the hard seed coat—just don’t overdo it! Pro tip: Use a jar with a breathable lid (like a mesh bag) to prevent mold.
Can I skip soaking and plant nasturtium seeds dry?
Yes, but germination will be slower (3–4 weeks vs. 5–7 days) and less reliable. Soaking mimics natural rain cycles, breaking dormancy faster. If you’re impatient (like most gardeners!), soaking is worth the extra 24 hours. For dry climates, soaking is especially helpful.
What if my soaked seeds mold or smell bad?
Mold or a funky odor means bacteria or fungus is growing—time to toss those seeds! Use clean water (chlorine-free) and a sterile container. If you notice slimy residue, rinse seeds thoroughly before planting. Never use seeds that look or smell off—they won’t grow, and mold can harm your plants.
Can I soak seeds in warm water instead of lukewarm?
Warm water (80°F+) can over-soften seeds or even cook them, reducing germination. Stick to lukewarm (70–75°F) water for the best results. Think of it like a seed bath—gentle and cozy, not a hot tub! If your water is cold, let it sit for 10–15 minutes to warm slightly.
What’s the best way to plant pre-soaked nasturtium seeds?
After soaking, plant seeds ½ inch deep in well-draining soil, spacing them 12–18 inches apart. Keep soil moist (not soggy) and place in a sunny spot (6+ hours of light). Use a clear plastic dome or row cover to retain humidity until sprouts appear (in 5–7 days!). Bonus: Nasturtiums thrive in containers too!
My soaked seeds sprouted—now what?
Once sprouts emerge, remove the dome/cover and place in bright, indirect light for a few days to harden off. Avoid direct sun until seedlings are sturdy (about 1 week). Thin seedlings to 12 inches apart if overcrowded—nasturtiums need space to flourish! Warning: Handle sprouts gently to avoid damaging delicate stems.
Wrapping up and next steps
Soaking nasturtium seeds in cold water is a simple yet powerful trick to boost germination rates by up to 90%—giving your vibrant flowers a head start! With just a few minutes of prep and patience, you’ll unlock faster growth and healthier plants.
Now that you’re armed with the right techniques, why not try it this weekend? Grab those seeds, follow the steps, and watch your garden bloom with extra ease. 🌱✨
Next step: Start small—test the method with a few seeds, then expand as you see success. Happy gardening!