Planting
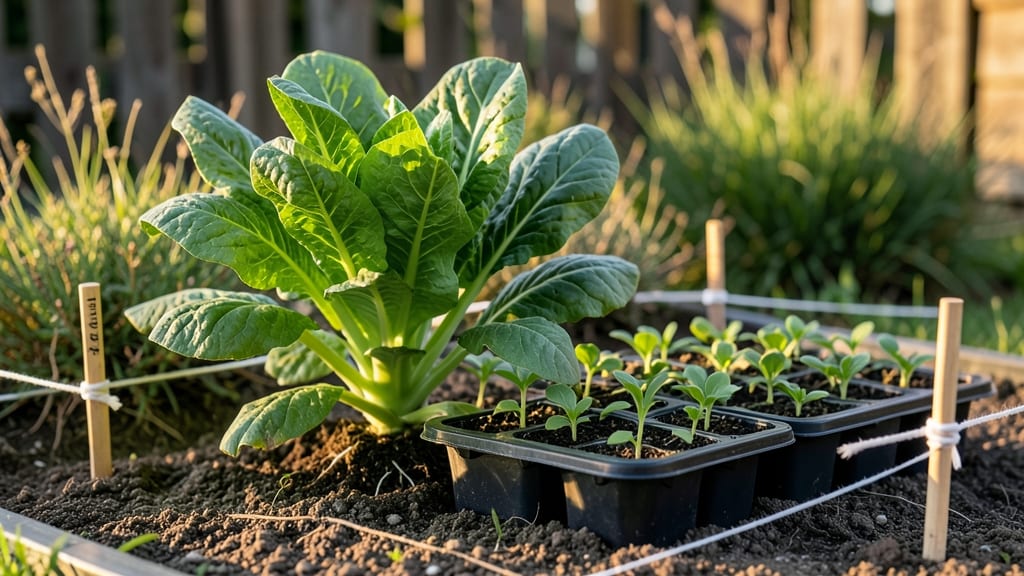
My seed spacing chart saved me from overcrowded seedlings and wasted space last summer. ✨ Proper spacing isn't just about fitting plants in—it's about giving each one room to thrive, which means bigger harvests and fewer weeds fighting for resources.
I learned the hard way when my carrot seedlings grew so close they warped instead of straightening.
The chart covers everything from tiny lettuce seeds to sprawling pumpkins, with spacing based on mature plant size. You'll see how to adjust for poor soil (closer together) or rich soil (more room), and when to thin seedlings versus transplanting.
Most gardeners overlook how companion plants affect spacing—like basil next to tomatoes—but I'll show you how to work with those relationships.
By following these measurements, you'll end up with plants that reach their full potential instead of competing for sunlight and nutrients. The difference between crowded chaos and a neat, productive garden comes down to these simple numbers. Ready to transform your planting game?
This works for raised beds, in-ground gardens, and even container growing—just scale the numbers down for smaller spaces. The chart itself is a quick-reference tool you'll pull out season after season, so bookmark this for next year's planning.
📚 In This Guide
- What you need
- Instructions
- Tips and common mistakes
- Wrapping up and next steps
What you need
- ● Seed spacing chart (printed or digital) – Tailored to your plants (e.g., tomato, pepper, or herb-specific charts). Pro tip: 💡 Use a customizable template for flexibility!
- ● Seeds – High-quality, fresh seeds (check the packet for spacing recommendations). Pro tip: 🌱 Label seed packets with planting dates!
- ● Garden soil or potting mix – Well-draining, nutrient-rich soil (or compost-amended soil for containers). Pro tip: 🌡️ Test soil pH if growing picky plants like blueberries!
- ● Planting containers or garden beds – Raised beds, pots, or in-ground plots (ensure they’re large enough for mature plant sizes).
- ● Measuring tools: Ruler or tape measure (for precision spacing, ¼" to 1" increments are ideal).
- ● String + stakes (for marking rows in larger gardens).
- ○ Calipers (optional but helpful for tiny seeds like carrots).
- ● Planting tools: Hand trowel or dibbler (for small seeds).
- ● Transplanting spade (for seedlings or larger seeds).
- ● Seedling trays (if starting indoors).
- ● Watering can or hose with a gentle nozzle – Avoid disturbing seeds after planting.
- ● Seedling heat mat – For starting cold-sensitive plants indoors. 🔥
- ● Plant labels & markers – Save time later with waterproof tags or a whiteboard.
- ● Row cover or shade cloth – Protects young seedlings from pests or harsh sun.
- ● Laser level or grid system – For ultra-precise large-scale planting (e.g., commercial gardens).
- ● Gloves – Keeps hands clean and comfortable during long planting sessions.
How to use a seed spacing chart for perfect plant layouts
Precision spacing ensures healthy roots, better airflow, and maximum yields—here’s how to apply it like a pro.
🌱 Step 1: Determine Plant Mature Size and Spacing Needs
Start by identifying each plant’s mature width and height from your seed packet or spacing chart. For example, bush beans need 4-6 inches apart in rows 18-24 inches apart, while sunflowers require 12-18 inches spacing in all directions. I always jot these measurements on a small sketch of my garden bed to visualize the layout before digging.
If you’re planting multiple varieties, group them by similar spacing needs. For instance, lettuce and radishes can share a 6-inch grid, while tomatoes and peppers need 18-24 inches between plants to prevent competition. This step prevents overcrowding, which leads to weak stems, disease, and poor yields.
📏 Step 2: Sketch Your Garden Layout with Gridlines
Grab a pencil and graph paper (or use a free garden planning app). Draw your bed dimensions, then sketch gridlines based on row spacing. For instance, if your chart says 18 inches between rows of carrots, mark every 1.5 feet on your sketch. I use a ruler to ensure straight lines—crooked rows make thinning seedlings a nightmare later.
Label each section with plant names and quantities. For example, a 4-foot-wide bed might hold two 18-inch rows of basil with 6-inch spacing between plants. This visual map lets you adjust spacing on the fly if your bed isn’t perfectly rectangular. Pro tip: Use a measuring tape to mark row lines directly on the soil with a stick or hose before planting.
🌿 Step 3: Plant Seeds or Transplants at Specified Depths and Intervals
For seeds, use a seed spacing tool (or a wooden dowel) to create evenly spaced holes at the chart’s recommended depth. For example, marigold seeds need ¼-inch depth and 12-inch spacing, so I poke holes with a stick every 12 inches along the row. If planting transplants, dig holes twice as wide as the root ball to encourage root spread.
I like to tap the seed packet gently to release one seed at a time—planting too many in one hole leads to weak, crowded seedlings. For larger seeds like beans, place one per hole; for tiny seeds like lettuce, I scatter 2-3 per spot and thin later. Water lightly after planting to settle the soil around seeds without disturbing their position.
✂️ Step 4: Thin Seedlings to Maintain Spacing
Once seedlings emerge, use small scissors or your fingers to snip or pull the weakest plants, leaving only the strongest 1-2 inches tall. For instance, if your chart says 4 inches between radishes, I measure with a ruler and remove extras until the spacing is uniform. This might seem harsh, but thinning now prevents future competition for nutrients and light.
I always thin on a cloudy day to reduce stress on the remaining plants. Water deeply after thinning to help roots recover. If you’re short on space, consider succession planting—after harvesting early crops like radishes, you can replant with faster growers like bush beans in the same spot.
🌱 Step 5: Adjust for Companion Planting and Growth Habits
Some plants thrive together (like basil and tomatoes), while others compete (such as corn and potatoes). Check your spacing chart for companion planting notes—for example, onion and carrot pairings can share the same 6-inch grid because their root systems grow at different depths. I often plant fast growers like lettuce between slower ones like broccoli to maximize bed use.
For vining plants like cucumbers or squash, use trellises or cages to save horizontal space. The chart might recommend 36-inch spacing for squash, but if you’re growing them vertically, you can reduce that to 18 inches apart. Always follow the chart’s minimum spacing to avoid stunted growth, but feel free to increase it for larger varieties.
Tips & tricks for perfect seed spacing layouts
Precision planting transforms your garden from chaotic to productive—here’s how to avoid the most common spacing mistakes that sabotage yields.
Visualize Before You Dig: Sketching your garden layout in Step 2 isn’t just helpful—it’s essential. I’ve seen gardeners skip this step and end up with crowded rows that stifle growth. Use a measuring tape to mark actual row lines in the soil before planting; this prevents the "eyeballing" errors that lead to uneven spacing. For rectangular beds, draw diagonal lines to ensure perfect 90-degree angles between rows—this creates the most efficient use of space.
The Depth Difference Matters: In Step 3, planting seeds at the correct depth is just as critical as spacing. Tiny seeds like lettuce need only ¼-inch coverage, while larger seeds like beans can go twice as deep. I use a toothpick or pencil to mark depth guidelines in the soil—this prevents over-planting, which leads to weak, leggy seedlings. For transplants, dig holes twice as wide as the root ball to encourage outward root growth.
Thinning is Non-Negotiable: The most painful lesson I’ve learned is that skipping Step 4’s thinning process leads to stunted plants and wasted effort. When radishes reach that 1-2 inch height and you’re tempted to leave extras, resist! Use a small hand pruner for clean cuts—it’s less traumatic than pulling. I’ve found that thinning on a cool, cloudy morning gives remaining plants the best chance to recover without stress.
Companion Planting Hacks: Step 5’s companion planting suggestions go beyond just "don’t plant these together." For example, the 6-inch grid for onions and carrots works because their root systems grow at different soil depths—onions spread horizontally while carrots grow vertically. I’ve also had success planting nasturtiums around tomatoes to repel pests while adding color, all within the same spacing parameters.
Pro Tips for Seed Spacing Chart
- Precision planting transforms your garden from chaotic to productive—here’s how to avoid the most common spacing mistakes that sabotage yields.
- Visualize Before You Dig: Sketching your garden layout in Step 2 isn’t just helpful—it’s essential.
- The Depth Difference Matters: In Step 3, planting seeds at the correct depth is just as critical as spacing.
Frequently asked questions
Got questions about seed spacing?
You’re not alone! Whether you’re a beginner gardener or a seasoned pro, spacing seeds correctly can feel tricky. Below, we’ve answered the most common questions to help you plant with confidence—so your garden thrives from the first sprout to harvest.
Why does seed spacing matter?
Proper spacing ensures plants get enough sunlight, water, and nutrients to grow strong. Crowded plants compete for resources, leading to weaker yields, pests, or diseases. A good spacing chart balances growth potential with your garden’s layout—think of it as giving each plant its own "personal space" to shine!
Can I plant seeds closer together if I plan to thin them later?
Yes! Many gardeners do sow seeds closer than the recommended spacing (e.g., carrots or lettuce) and thin them as they grow. Just be prepared for extra weeding or transplanting. Pro tip: Use a small hand trowel or scissors for thinning—it’s quicker than pulling by hand.
Does seed spacing change based on climate or soil type?
Generally, spacing guidelines are for average conditions, but adjustments may be needed. In poor soil, space seeds slightly wider (10–20% more) to reduce competition. In hot climates, some plants (like peppers) benefit from extra room for airflow. Always check your local plant hardiness zone for tweaks!
What if I don’t have a seed spacing chart? Can I improvise?
Use everyday objects as guides:
- Fingers: 1 inch = width of your pinky finger (great for small seeds like basil).
- Hand span: 6 inches = distance from thumb to pinky (ideal for beans or radishes).
- Ruler or stick: Mark measurements with tape for larger plants (e.g., corn or sunflowers).
My seedlings look crowded—how do I fix over-planted seeds?
Don’t panic! Start by watering deeply to help weaker plants fade. Then, use sharp scissors to snip seedlings at soil level, leaving the strongest ones. For root veggies (like beets), transplant the thinned sprouts to a salad bowl or pot—they’ll still grow! Bonus: Mulch the area to suppress weeds while roots recover.
Wrapping up and next steps
Mastering the art of seed spacing is your secret weapon for a thriving garden—whether you're a seasoned green thumb or just starting out! 🌱 With the right spacing, you’ll maximize yields, minimize competition, and create a lush, organized space that’s easy to maintain.
Now that you’re armed with a seed spacing chart and expert tips, it’s time to roll up your sleeves and plant with confidence!
Ready to take the next step? Sketch a layout of your garden beds, grab your seeds, and start planting—your future harvest is waiting! For extra inspiration, explore companion planting guides or dive into soil prep techniques to give your plants the best possible start.