
Pruning
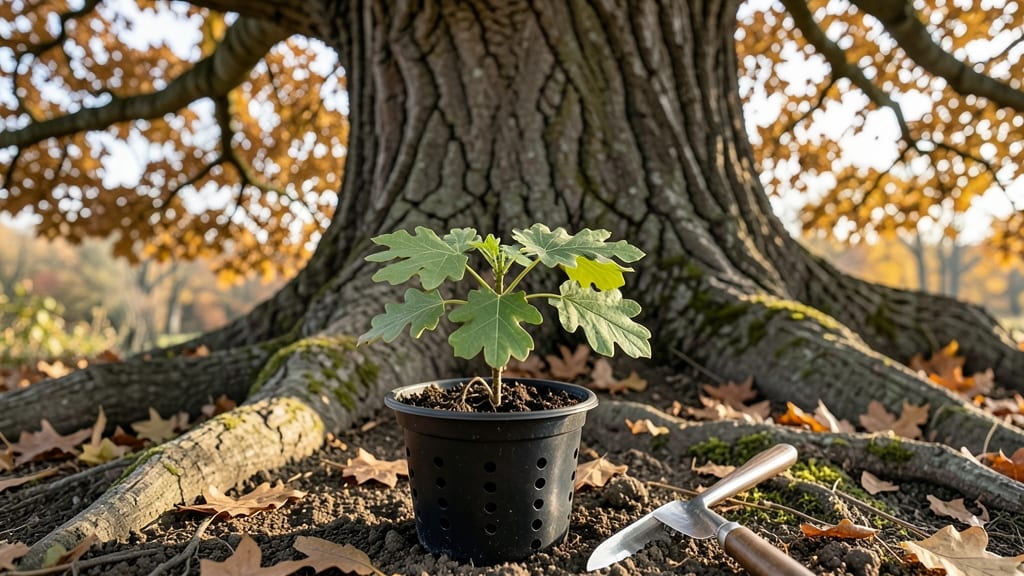
Turning a delicate seedling into a strong, thriving tree is the ultimate gardening reward. 🌱 I’ve watched my own saplings go from fragile stems to sturdy trunks with the right pruning blueprint—one that keeps them growing year-round, not just in spring.
The key isn’t just cutting branches; it’s understanding when, why, and how to shape each stage of growth.
You’ll need sharp pruners, a notebook for tracking growth, and patience—this isn’t a quick fix, but a long-term commitment. Start with soil prep: loose, well-draining mix with compost to give roots room to stretch.
Water deeply but let the top inch dry between sessions to avoid rot. Pruning begins early, shaping the seedling’s structure before it outgrows your hands.
By year two, you’ll see real transformation—thicker branches, fuller foliage, and the first signs of a mature canopy. Prune to remove weak growth in late winter, then again after flowering to encourage new shoots.
The goal is a tree that supports itself, not one that leans or snaps under its own weight.
This method works for fruit trees, shade trees, or even large shrubs—just adjust timing for your climate. The payoff? A tree that stays healthy, productive, and beautiful for decades. Let’s get those branches growing the right way.
📚 In This Guide
- What you need
- Instructions
- Tips and common mistakes
- Wrapping up and next steps
What you need
- ● Seedlings: 3–5 healthy, disease-free saplings (species-dependent; e.g., fruit trees, shade trees, or ornamental varieties).
- ● Pruning shears: 1 pair of bypass pruners (for cuts up to ½ inch in diameter). Opt for sharp, stainless steel blades for clean cuts.
- ● Loppers: 1 pair for thicker branches (½–1½ inches in diameter). Look for anvil-style or bypass loppers with comfortable grips.
- ● Pruning saw: 1 bow saw or pruning saw for branches over 1½ inches in diameter.
- ● Gloves: 1 pair of cut-resistant, breathable gloves (gardening or pruning-specific).
- ● Disinfectant: Rubbing alcohol (70% isopropyl) or a pruning sealant (e.g., tree wound dressing) to prevent disease spread.
- ● Planting supplies: 5-gallon pots or nursery containers (if starting indoors).
- ● Well-draining potting mix (e.g., 50% peat moss, 30% perlite, 20% compost).
- ● Slow-release fertilizer (e.g., 10-10-10 NPK ratio, 1 tbsp per seedling).
- ● Support stakes: 3–4 bamboo or wooden stakes (4–5 feet tall) + tree ties (soft fabric or plastic) for young saplings.
- ● Hand pruners: For precision trimming on smaller branches (great for detail work!).
- ● Extension pole: A pruning pole with a saw or shears attachment for hard-to-reach branches.
- ● Tree spray: Organic copper fungicide or neem oil to protect against pests/diseases.
- ● Mulch: 2–3 inches of wood chips or straw to retain moisture and regulate soil temperature.
- ● Moisture meter: A soil hydrometer to monitor watering needs (especially for container-grown seedlings).
- ● Safety gear: Safety glasses (to shield from debris) and long sleeves/pants (for sun/bug protection).
Step-by-Step pruning blueprint for sustainable tree growth
Here's how to guide your young trees from fragile seedlings to sturdy, thriving specimens using proven pruning techniques.
🌱 Step 1: Assess and Prepare for First Pruning
Start by examining your seedling for the first time in early spring, just as new growth begins. Look for any dead, crossing, or crowded branches—these are your first targets. I always prune when the tree is still dormant but showing signs of waking up, usually in late winter or early spring. This timing gives the tree energy to heal before summer's heat stress.
Gather your tools: clean, sharp pruning shears for small branches and a pruning saw for thicker stems. Sterilize them with rubbing alcohol to prevent spreading disease. Wear gloves to protect your hands from thorns or rough bark. The goal here is precision—make cuts just outside the branch collar where the branch meets the trunk, at a 45-degree angle.
✂️ Step 2: Remove Problem Branches and Shape the Canopy
Begin by eliminating any branches that are rubbing against each other—they'll create wounds that invite rot or pests. Next, remove any branches growing inward toward the center of the tree, as they'll compete for light and weaken the structure. I like to step back every few cuts to visualize the tree's shape, ensuring an open, balanced canopy that allows sunlight to reach all leaves.
For young trees, limit your cuts to no more than 25% of the foliage in a single session. Over-pruning stresses the tree and can stunt growth. Focus on removing branches that are thinner than a pencil—these are easier to cut cleanly and won't leave large wounds. If you're unsure about a cut, wait until the next season to reassess.
☀️ Step 3: Encourage Strong Branch Development
Now, it's time to encourage the tree to develop a strong framework. Look for branches that form a natural, wide angle (about 45-60 degrees) from the trunk—these will become your main scaffold branches. If you see a branch growing too upright or too low, you can gently guide its growth by tying it to a stake or by pruning it back slightly to encourage a better angle.
Leave at least 6-12 inches of space between branches on the trunk to prevent future crowding. This spacing ensures good air circulation and reduces the risk of disease. For fruit trees, you might also want to thin out some branches to improve fruit production and size. Water the tree deeply after pruning to help it recover and reduce stress.
🌿 Step 4: Maintain Year-Round with Seasonal Adjustments
After the initial pruning, check your tree every 3-4 months to address any new issues. In late summer, remove any suckers or water sprouts—these are fast-growing, weak branches that drain the tree's energy. Summer pruning is less stressful for the tree because it's already actively growing, but avoid heavy pruning during this time.
In fall, focus on cleaning up any dead or diseased branches that may have appeared during the growing season. Avoid heavy pruning in late fall or winter, as the tree is preparing for dormancy and needs all its energy to survive the colder months. Instead, plan your next round of shaping for early spring when the tree is just waking up.
⏰ Step 5: Monitor and Adjust for Long-Term Health
As your tree matures, your pruning approach will shift from shaping to maintenance. Keep an eye out for any signs of stress, such as yellowing leaves, stunted growth, or unusual leaf spots—these could indicate over-pruning or disease. If you notice these signs, reduce your pruning and focus on improving growing conditions, like ensuring proper watering and sunlight.
Every 2-3 years, reassess the tree's structure and adjust your pruning plan as needed. Older trees may require more selective pruning to maintain their shape and health. Always prune just before a growth spurt to encourage new, healthy growth. With consistent care, your seedling will grow into a strong, beautiful tree that stands for decades.
Tips & tricks for perfect tree pruning
Transforming a seedling into a thriving tree requires patience and precision—here's how to avoid common mistakes while maximizing growth.
The Right Angle Matters: When making cuts in Step 1, the 45-degree angle isn't just about aesthetics—it's about healing. Cutting just outside the branch collar (where the branch meets the trunk) allows the tree to seal the wound naturally. I've seen too many pruning jobs where cuts were made too close to the trunk, leaving ugly scars that never close properly. Always make your cut at that precise angle to encourage smooth recovery.
Visualize Your Tree's Future: Step back every few cuts during Step 2 to visualize the tree's mature shape. I learned this the hard way after pruning a young apple tree too aggressively—it took years to recover its balance. Aim for an open center that allows sunlight to reach all leaves. For young trees, remember the 25% rule: never remove more than a quarter of the foliage in one session, or you'll stress the tree unnecessarily.
Seasonal Timing Secrets: The instructions mention early spring for your first pruning, but there's more to seasonal timing. In Step 4, when checking every 3-4 months, late summer is actually the best time to remove suckers and water sprouts—they're easier to spot when the tree is fully leafed out. Fall pruning should be minimal, focusing only on dead or diseased branches. Winter is strictly for planning your next spring session when the tree is dormant but showing signs of waking up.
Long-Term Maintenance Strategy: The 2-3 year reassessment in Step 5 is your chance to prevent future problems. Mark your calendar now—set reminders to examine your tree's structure during its dormant season. Look for branches that have grown too close together or those forming narrow angles (less than 45 degrees) with the trunk. These are the weak points that will cause issues as the tree matures. Addressing them now saves hours of cleanup later.
Pro Tips for Seedling To Tree
- Transforming a seedling into a thriving tree requires patience and precision—here's how to avoid common mistakes while maximizing growth.
- The Right Angle Matters: When making cuts in Step 1, the 45-degree angle isn't just about aesthetics—it's about healing.
- Visualize Your Tree's Future: Step back every few cuts during Step 2 to visualize the tree's mature shape.
Frequently asked questions
Got questions about nurturing your seedlings into thriving trees? You’re not alone! Here are some of the most common queries—and their straightforward answers—to keep your pruning journey on track.
How often should I prune a young seedling vs. a mature tree?
Young seedlings need light pruning (just trimming damaged or overcrowded branches) every 4–6 weeks during their first year to encourage strong growth. Once established (3+ years old), shift to seasonal pruning: late winter (dormant season) for major cuts, and light touch-ups in summer to shape and remove deadwood.
Can I prune a tree at any time of year?
Timing matters! Late winter or early spring (before buds swell) is ideal for heavy pruning—it promotes vigorous growth. Avoid pruning in fall (unless removing dead/diseased branches), as new growth may not harden off before frost. Summer pruning is best for light shaping or removing suckers/water sprouts.
What’s the best tool for pruning seedlings vs. larger trees?
For seedlings, a sharp pair of bypass pruners (or even clean scissors) works perfectly. For mature trees, upgrade to felco pruners (for branches up to ¾ inch) or a pruning saw (for thicker limbs). Always disinfect tools with rubbing alcohol between cuts to prevent disease spread!
What if my seedling isn’t growing after pruning?
Don’t panic! Slow growth could mean underwatering, poor soil, or over-pruning. Check these first:
- Ensure the seedling gets 1–1.5 inches of water weekly (deep soak, not surface drips).
- Amend soil with compost for nutrients.
- Reassess pruning cuts—avoid removing more than 25% of foliage at once.
Are there alternatives to traditional pruning for small spaces?
For urban or limited spaces, try:
- Espalier training: Grow trees flat against a wall/fence to save space.
- Topiary shaping: Prune into geometric forms (great for bonsai-style trees!).
- Pollarding: Cut back hard annually to encourage dense, bushy growth (ideal for fruit trees).
Wrapping up and next steps
From tender seedling to thriving tree, your pruning journey is a year-round commitment—but every careful cut brings you closer to lush, healthy growth! 🌱 The key? Consistency and intentionality: knowing when to trim, how to shape, and why each snip matters.
Whether you’re tackling winter dormancy or summer blooms, your efforts nurture strength, beauty, and resilience.
Ready to see your tree flourish? Start small—pick one technique from this blueprint and apply it this season. Track your progress, celebrate each milestone, and watch your green companion transform. Your garden’s future is in your hands! 🌿