
Propagation
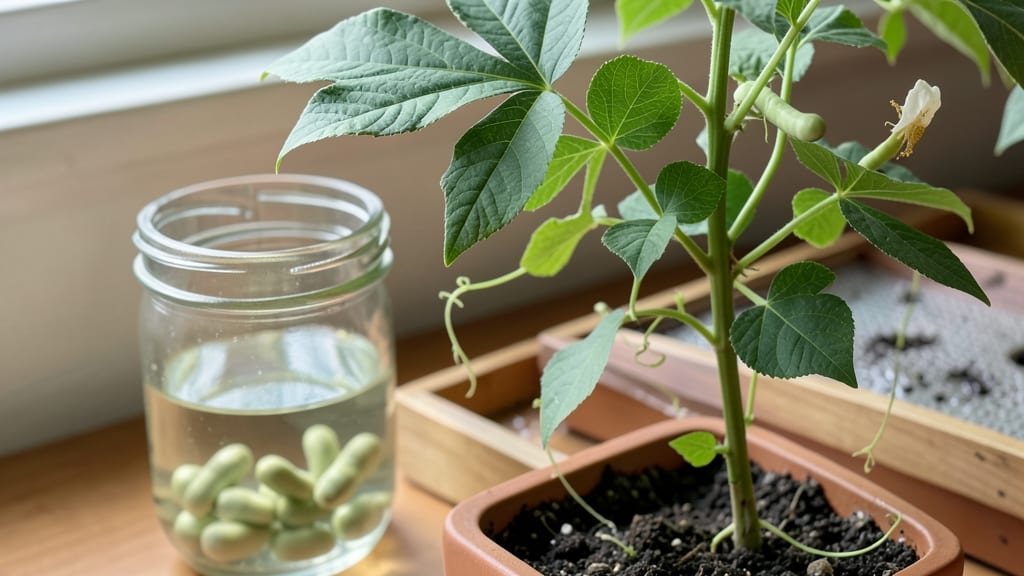
Soaking seeds before planting can cut your germination time in half—especially for stubborn varieties like peas or beans. 🌱 I’ve watched seeds that took weeks to sprout pop up in just days after a simple overnight soak, and the science behind it is surprisingly straightforward: water softens tough seed coats while jump-starting hydration.
The trick isn’t just dunking seeds in water, though—timing, temperature, and even seed type make all the difference.
You’ll need a bowl, clean water, and a breathable container (like a paper towel-lined tray) for drainage. For most seeds, a 12-hour soak at room temperature works, but cold-activated soaking (like chilling overnight) mimics natural winter cycles and can boost success for finicky varieties.
The goal is to plump them up without overdoing it—think of it like waking a seed from a long nap rather than drowning it.
What you’ll get is a head start on growth, with roots forming while you wait. Those first tiny sprouts appear faster, and seedlings emerge stronger, ready to outpace their unsprouted neighbors.
The payoff? Fewer lost seeds, more consistent results, and a garden that looks like it’s been growing for weeks instead of days. Here’s how to do it right—without the guesswork.
This method works for everything from hard-shelled beans to delicate flowers, though some seeds (like tomatoes) don’t need soaking at all. We’ll cover which varieties benefit most, how to spot over-soaked seeds, and the simple tweaks that turn this technique into a foolproof way to speed up your planting season.
Let’s get those seeds sprouting!
📚 In This Guide
- What you need
- Instructions
- Tips and common mistakes
- Wrapping up and next steps
What you need
- ● Seeds: Any cold-hardy or pre-soaked varieties (e.g., peas, beans, lentils, or brassicas). Aim for 1–2 cups (or your desired quantity).
- ● Cold water: Room-temperature or slightly chilled (60–70°F / 15–21°C). Use enough to fully submerge seeds (e.g., 2–4 cups for 1 cup of seeds).
- ● Germination container: A wide-mouthed jar (quart-sized) or glass bowl (with lid or plastic wrap).
- ● OR a seed germination tray with drainage (for larger batches).
- ○ Cheesecloth, fine mesh bag, or paper towel: To strain seeds (optional but reduces mess).
- ● Refrigerator space: A crisp, dark spot (e.g., crisper drawer) for 12–48 hours.
- ● Colander or strainer: For rinsing seeds post-soak.
- ● Spray bottle: To keep seeds moist during germination (if not submerged).
- ● pH strips: To test water acidity (ideal: 6.0–7.0). Tap water is usually fine!
- ○ Hydrogen peroxide (3%): 1 tsp per quart of water to disinfect seeds (optional but helpful for mold prevention).
- ● Grow lights or sunny windowsill: For post-cold germination (if not direct-sowing).
- ● Planting medium: Seed-starting mix or coir pellets for transplanting sprouts.
How to soak seeds for faster, cold-activated germination
Here’s the method I use to break dormancy and speed up sprouting—especially for tough seeds like peas or delphinium.
💧 Step 1: Select Seeds Requiring Scarification or Soaking
Not all seeds need soaking—only those with hard seed coats or cold stratification requirements. Check your seed packet for notes like "scarify" or "stratify." Peas, beans, and some wildflowers benefit most from a 12-24 hour soak in lukewarm water. Cold-activated seeds (like many perennials) need 30-90 days in moist, chilled conditions—skip soaking for those.
I always soak seeds in a wide, shallow container (like a pie plate) to avoid overcrowding. Use lukewarm water—cold water shocks seeds, while hot water kills embryos. If your seeds float, they’re likely empty or nonviable—discard them.
🌱 Step 2: Soak Seeds for the Optimal Duration
Fill the container with enough water to cover seeds by 1 inch. Let them soak for 12 hours minimum—this softens the seed coat and kickstarts hydration. For extra-tough seeds (like some legumes), extend soaking to 24 hours, but don’t exceed 48 hours or risk rotting.
After soaking, drain the water completely. I use a fine-mesh strainer to rinse seeds gently under cool running water to remove any residual soapy film or debris. Pat them dry with a clean paper towel—damp seeds left in a pile will mold overnight.
☀️ Step 3: Plant Soaked Seeds Immediately
Sow soaked seeds within 1-2 hours of drying. The window is short—they’ll start germinating even before planting if left too long. Use the 3 gallons of moistened potting mix from your supplies, filling containers to 1 inch below the rim. Press the mix down lightly to remove air pockets, then make ¼-inch-deep furrows with your finger.
Drop seeds into the furrows 1 inch apart (closer spacing for tiny seeds like lettuce, wider for large ones like beans). Cover lightly with a thin layer of additional potting mix—just enough to obscure the seeds. Mist the surface with water until the mix feels evenly damp but not soggy. A spray bottle works best to avoid displacing seeds.
⏰ Step 4: Provide Warmth and Humidity for Germination
Place the container in a warm, dark spot (like on top of the fridge) to maintain 75-80°F soil temperature. Germination speeds up dramatically in warmth—expect sprouts in 3-7 days for soaked seeds (vs. 2+ weeks for dry seeds). Check daily but resist watering again until the soil feels dry to the touch ½ inch down.
Once seedlings emerge, move them to bright, indirect light immediately. Stretchy, pale stems mean they’re reaching for light—this is your cue to increase light exposure within 24 hours. Use a grow light if natural light is weak; keep it 2-3 inches above seedlings to prevent burning.
🌿 Step 5: Transplant When True Leaves Appear
Wait until seedlings show first true leaves (not the initial cotyledons) before transplanting. This usually takes 7-14 days after germination, depending on the seed type. Gently loosen the soil around each seedling with a small fork or your fingers, then lift them without pulling the stems. Transplant into the prepared garden beds or larger containers with the same moist potting mix.
Bury seedlings to the same depth they were in their starter pots—deeper planting stresses roots, while shallow planting exposes them. Water thoroughly after transplanting, focusing on the base of the stems to avoid fungal issues. Mulch with 1 inch of organic mulch to retain moisture and regulate soil temperature.
Tips & tricks for perfect seed soaking germination
These game-changing strategies will help you achieve faster, more reliable germination every time—especially with those stubborn seeds.
The Temperature Factor: The 75-80°F soil temperature range in Step 4 is your germination sweet spot. Use a thermometer to verify—most household locations won't naturally hit this mark. I place my seed trays on top of my fridge (which runs warm) or use a seedling heat mat for consistent results. Cold soil slows germination dramatically, while temperatures above 85°F can stress delicate seedlings.
Visual Cue for True Leaves: In Step 5, those "first true leaves" look completely different from the initial cotyledons (the first leaves that appear). True leaves are smaller, more complex, and often have different shapes than the simple cotyledons. For peas, they'll be more elongated; for lettuce, they'll resemble miniature versions of mature leaves. Wait for these before transplanting—it's your signal the seedling is ready for the next phase.
Make-Ahead Strategy: You can prep your soaking containers up to 24 hours in advance of planting day. Just store them uncovered in the fridge until you're ready to add seeds and water. This saves time when you're ready to start—simply add your seeds, cover with water, and follow the 12-24 hour soaking timeline from Step 2. The container stays ready without risking mold growth.
Troubleshooting Floaters: If you notice seeds floating during the 12-24 hour soak (Step 2), they're likely empty or nonviable. Remove them immediately—they'll only compete with viable seeds for nutrients. I've found that seeds with smooth, unblemished surfaces tend to float more often. For extra assurance, test a few seeds by gently pressing them with your fingernail—they should dent slightly if viable.
Pro Tips for Seed Soaking Germination
- These game-changing strategies will help you achieve faster, more reliable germination every time—especially with those stubborn seeds.
- The Temperature Factor: The 75-80°F soil temperature range in Step 4 is your germination sweet spot.
- Visual Cue for True Leaves: In Step 5, those "first true leaves" look completely different from the initial cotyledons (the first leaves that appear).
Frequently asked questions
Got questions about seed soaking and germination? You’re not alone! Here are answers to the most common concerns—plus a few pro tips to set you up for success.
How long should I soak seeds before planting?
Most seeds need 4–12 hours of soaking, depending on the type. Small seeds (like lettuce or radishes) soak for 4–6 hours, while larger seeds (beans, peas) may need 8–12 hours. Avoid over-soaking—it can cause rot!
Can I reuse the soaking water for multiple batches?
Nope! The water becomes saturated with enzymes and nutrients after one use, which can actually inhibit germination. Always use fresh water for each batch. Pro tip: Save the used water for watering houseplants—it’s still nutrient-rich!
What if my seeds don’t sprout after soaking?
Don’t panic! Check these first:
- Seed viability: Test a few seeds by scratching the shell—if it’s hard and unbroken, they may still be good.
- Temperature: Some seeds need warmth (70–85°F) to germinate. A seedling heat mat helps!
- Moisture: Keep them damp (not soggy) in a warm, dark place until sprouts appear (usually 3–7 days).
Do I need to soak all seeds, or are there exceptions?
Not all seeds need soaking! Hard-coated seeds (like tomatoes, peppers, or beans) benefit the most. Others, like carrots, onions, or corn, germinate just fine without soaking. Always check seed packets for specific instructions.
Can I speed up germination with cold treatment?
For cold-activated seeds (like parsley, cilantro, or some herbs), place soaked seeds in the fridge for 1–3 days before planting. This mimics winter conditions and tricks them into sprouting faster. Just keep them moist but not wet!
What’s the best way to store soaked seeds if I can’t plant them right away?
Rinse soaked seeds thoroughly, then store them in a paper towel-lined container with a damp (not wet) cloth on top. Keep them in the fridge for up to 3–5 days. Avoid plastic—it traps too much moisture and causes mold.
Wrapping up and next steps
Mastering seed soaking germination—especially with cold-activated sprouting—can transform your gardening game! 🌱 Whether you're a beginner or a seasoned grower, these techniques unlock faster, healthier starts and stronger plants. The key? Patience, preparation, and a little chill.
Ready to take the next step? Start small—try soaking a few seeds of your favorite herbs or veggies this week. Track your progress, tweak your method as needed, and soon, you’ll be reaping the rewards of speedier germination and vigorous growth. Happy growing! 🌿