Propagation
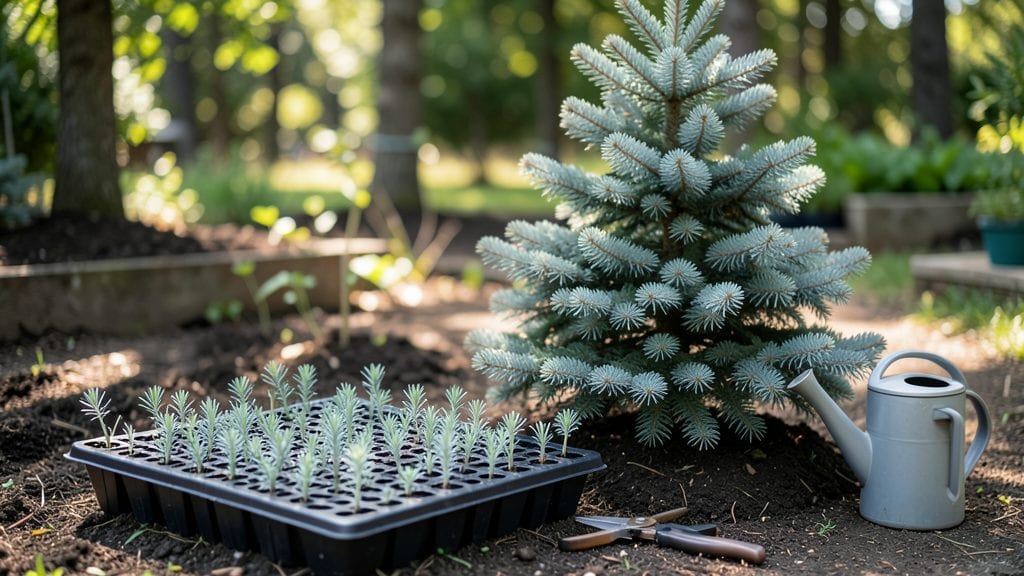
Growing Colorado Blue Spruce from Picea pungens seeds is like unlocking a slow-motion secret—those tiny specks hold the potential for a towering, fragrant evergreen that takes patience but rewards with striking blue-green foliage.
I’ve tried this twice, and the first batch taught me that rushing the process means waiting years for results. The key? Cold stratification, which mimics winter’s natural dormancy period before seeds even think about sprouting.
You’ll need fresh seeds (or at least 1-2 years old), a plastic bag with damp peat moss or paper towels, and a refrigerator for 30-60 days of cold treatment. Skip this step, and you’re gambling with germination rates that hover around 10%.
Once stratified, plant them 1/4-inch deep in well-draining soil and keep them consistently moist—think damp sponge, not soggy swamp. The real magic happens when you move them to bright, indirect light after the cold treatment.
Those first tiny needles will appear in 4-12 weeks, but don’t expect instant gratification—Colorado Blue Spruce seedlings grow at a glacial pace. Still, the payoff is worth it: a tree with needles that smell like a mountain breeze and branches that hold their shape like architectural marvels.
By year 3, you’ll have a 3-foot sapling that’s already outpacing nursery-grown transplants in resilience.
Outdoor planting comes after the seedling’s first winter, but indoor starters need a cool, bright window or grow light until they’re sturdy enough for the ground. The biggest mistake? Overwatering or letting them dry out—both kill these finicky seedlings faster than you can say “blue spruce.”
Here’s where it gets interesting: once established, they thrive on neglect, making them the perfect low-maintenance evergreen for anyone willing to play the long game.
📚 In This Guide
- What you need
- Instructions
- Tips and common mistakes
- Wrapping up and next steps
What you need
- ● Picea pungens seeds: 50–100 fresh, viable seeds (collect from healthy trees or purchase from reputable suppliers).
- ● Cold stratification medium: 1 part peat moss (sterilized, 2–3 cups)
- ● 1 part perlite or coarse sand (for drainage, 2–3 cups)
- ● Containers: 2–3 small plastic or paper seedling trays (with drainage holes) or a sealed plastic bag (for wet stratification method).
- ● Spray bottle: For gentle moisture application (avoid over-saturating!).
- ● Plastic wrap or breathable lid: To maintain humidity during stratification.
- ● Refrigerator or cold frame: Set to 34–40°F (1–4°C) for 30–90 days.
- ● Grow lights or sunny windowsill: For post-stratification germination (12+ hours of light/day).
- ○ pH test kit (optional but helpful): Ideal soil pH for spruce seeds is 5.0–6.5.
- ● Fungicide: 1 tsp hydrogen peroxide (3%) per cup of water to prevent mold.
- ● Heat mat: Post-stratification, to encourage faster germination (70–75°F).
- ● Labeling tags: To track seed batches and stratification dates.
- ● Humidity dome: For extra moisture retention during early growth.
- ● Seedling fertilizer: Diluted fish emulsion (1:10 ratio) after sprouts emerge.
Step-by-Step instructions for germinating Picea pungens seeds
Cold stratification is the secret weapon for breaking dormancy in these finicky evergreen seeds.
Collect and Prepare Fresh Seeds
Harvest seeds directly from ripe cones in late fall or purchase them from a reputable supplier. Picea pungens seeds require freshness—older seeds lose viability quickly. Spread the seeds on a paper towel to dry for 24 hours at room temperature. This prevents mold while maintaining moisture content for stratification.
Once dry, place the seeds in a sealed plastic bag with a damp paper towel. The towel should feel slightly moist—not dripping—but not bone-dry. This initial moisture kickstart mimics natural winter conditions. Label the bag with the date and variety if you're working with multiple strains.
Stratify Seeds in a Controlled Cold Environment
Refrigerate the sealed bag in the vegetable crisper of your fridge, where temperatures hover around 35-40°F. This mimics the natural winter chilling period Picea pungens seeds need to break dormancy. Check the bag weekly—if the paper towel dries out, mist it lightly with water and reseal.
Stratification typically requires 60-90 days, but don’t rush it. Seeds left too short a time won’t germinate, while over-stratification can reduce vigor. You’ll know it’s working when the seeds begin to soften slightly—press one gently between your fingers. If it gives way without resistance, it’s ready for the next step.
Sow Stratified Seeds in a Controlled Growing Medium
Fill a shallow tray with a sterile seed-starting mix—avoid garden soil, which can harbor pathogens. Moisten the mix until it’s damp but not soggy, then sow the seeds ¼ inch deep. Space them ½ inch apart to prevent overcrowding as they germinate. A humidity dome or plastic wrap helps retain moisture while the seeds sprout.
Place the tray in a warm, bright location with indirect light—direct sun can overheat the mix. Ideal germination temperatures are 65-70°F. Avoid placing it near a heat source, like a radiator, which can dry out the soil too quickly. Patience is key—germination can take 2-4 weeks, depending on seed freshness and stratification success.
Transplant Seedlings to Individual Pots
Once seedlings develop 2-3 true needles (not the initial seed leaves), it’s time to transplant. Gently lift each seedling with a small spoon or your fingers, taking care not to damage the delicate roots. Place one seedling per 3-inch pot filled with the same seed-starting mix, pressing lightly around the base to secure it.
Water the pots thoroughly but avoid soggy soil—Picea pungens seedlings are prone to root rot if overwatered. Keep the pots in a bright, shaded area for the first week to reduce transplant shock. After that, gradually introduce them to morning sun, increasing exposure over 7-10 days to prevent leaf burn.
Acclimate and Transition to Outdoor Conditions
After 4-6 weeks of indoor growth, when seedlings reach 3-4 inches tall, begin hardening them off. Start by placing them outside in a sheltered, shaded spot for 1-2 hours the first day. Gradually increase their outdoor time over 10-14 days, exposing them to direct morning sun for progressively longer periods.
Once seedlings tolerate full sun without wilting, they’re ready for their permanent outdoor home. Plant them in well-draining soil with partial shade for their first year, as young Picea pungens are sensitive to intense sunlight. Mulch around the base to retain moisture and protect roots from temperature swings—a critical step for long-term survival.
Tips & tricks for perfect Picea pungens seed germination
Mastering the cold stratification process for Picea pungens seeds transforms a challenging task into a rewarding success story. These refined techniques ensure you maximize germination rates while avoiding common pitfalls that plague novice growers.
Precision in Moisture Control: During the initial 24-hour drying period in Step 1, monitor the seeds closely to prevent either over-drying or excessive moisture retention. The paper towel should feel like a wrung-out sponge—not damp enough to drip, but not so dry it crumbles. This balance is critical because Picea pungens seeds are particularly sensitive to moisture extremes that can trigger mold or premature dehydration before stratification begins. For best results, place the seeds on a mesh screen over a shallow tray to allow airflow underneath while maintaining even drying.
Stratification Temperature Consistency: The 35-40°F range specified for Step 2 is non-negotiable for breaking dormancy effectively. While most refrigerators maintain these temperatures in the vegetable crisper, I recommend placing a thermometer inside your fridge to verify consistency—some models fluctuate significantly. If your fridge runs warmer (common in kitchen models), consider using a dedicated seed stratification chamber or even a well-insulated cooler with ice packs. The goal is to mimic natural alpine winter conditions where these seeds evolved, and even slight temperature variations can disrupt the biochemical processes required for germination.
Visual Readiness Indicators: In Step 2, the text mentions seeds softening as a readiness indicator, but there's another subtle visual cue: the seed coat will develop a faint translucent sheen when properly stratified. This occurs because the seed's natural oils migrate to the surface during the cold treatment. When you see this along with the softening, it's your definitive signal that stratification is complete. This visual confirmation is particularly valuable when working with multiple seed batches that may have different stratification timelines within the 60-90 day window.
Germination Environment Optimization: For Step 3, while the instructions specify 65-70°F as ideal germination temperatures, I've found that adding a small heat mat beneath the seed tray creates more consistent results. The heat mat should be set to its lowest setting (around 60°F) to avoid overheating, but it helps maintain even warmth throughout the tray. This is especially important if your growing space has temperature fluctuations. Combine this with a clear plastic dome to create a mini greenhouse effect—just remember to remove it daily for 10 minutes to prevent fungal growth from excess humidity.
Pro Tips for Picea Pungens Seeds
- Mastering the cold stratification process for Picea pungens seeds transforms a challenging task into a rewarding success story.
- Precision in Moisture Control: During the initial 24-hour drying period in Step 1, monitor the seeds closely to prevent either over-drying or excessive moisture retention.
- Stratification Temperature Consistency: The 35-40°F range specified for Step 2 is non-negotiable for breaking dormancy effectively.
Frequently asked questions
Got questions about growing Picea pungens (Colorado blue spruce) from seeds? You’re not alone! Here are answers to the most common queries—plus a few pro tips to set your seedlings up for success.
How long does cold stratification take for Picea pungens seeds?
Cold stratification for Picea pungens seeds typically requires 3–6 months in moist, refrigerated conditions (34–40°F). Mimic winter’s chill by mixing seeds with damp peat moss or vermiculite in a sealed bag. Patience is key—rushing this step often leads to poor germination rates. Pro tip: Label your bags with the start date to track progress!
When should I plant stratified Picea pungens seeds outdoors?
Plant stratified seeds outdoors in early spring (after the last frost) or start them indoors 8–12 weeks before your last frost date. Seedlings need 6–12 months to develop strong roots before transplanting. Choose a partial shade spot with well-draining soil—these spruces hate soggy feet! Bonus: Use a mini greenhouse or cold frame for extra protection.
What’s the best alternative if my Picea pungens seeds won’t germinate?
If germination fails, try these backups:
- Cutting propagation: Root semi-hardwood cuttings (4–6 inches) in perlite/peat mix with rooting hormone. Success rates are higher!
- Layering: Bend a low-hanging branch to the ground, cover with soil, and wait 1–2 years for roots to form.
- Buy seedlings: Nursery-grown Picea pungens (like ‘Glauca’ cultivars) skip the guesswork—just plant and water!
Why are my Picea pungens seedlings wilting or turning yellow?
Yellowing or wilting often signals overwatering or poor drainage. Spruces prefer consistently moist but not soggy soil. Check for:
- Root rot: Ensure pots have drainage holes and avoid saucers that trap water.
- Too much sun: Young seedlings scorch in direct light—opt for 50% shade until established.
- Pests: Spider mites or aphids? Spray with neem oil or insecticidal soap.
How tall can I expect Picea pungens seedlings to grow in 1 year?
With ideal care, Picea pungens seedlings may grow 6–12 inches in their first year—but growth varies by cultivar and conditions. Slow and steady wins the race! Focus on root development over height. Goal: Aim for a 1–2 foot seedling by year 2 for better transplant shock resilience.
Wrapping up and next steps
Growing Picea pungens (Colorado Blue Spruce) from seeds is a rewarding journey that unlocks the magic of fragrant evergreens—with patience and the right techniques, like cold stratification, you’re well on your way!
Remember, the key lies in mimicking nature’s timing, ensuring proper moisture, and providing gentle care during germination. Your effort will soon bloom into a stunning, aromatic tree that adds character to any landscape.
Ready to take the next step? Start with a small batch of seeds and experiment with your setup. Keep a journal to track progress—you might even discover your own tweaks for success! 🌱✨