How To
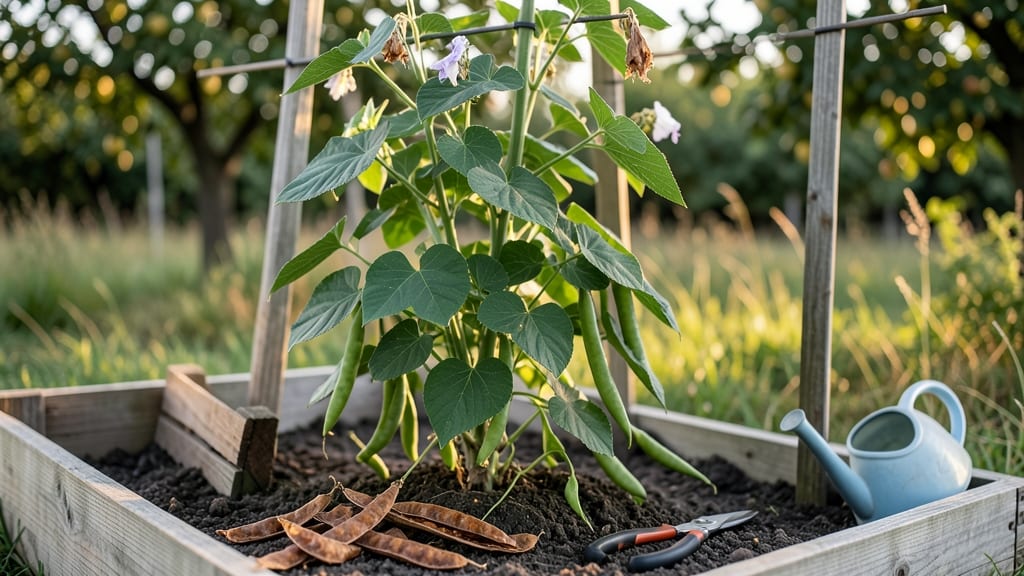
Harvesting green bean seeds 🌱 from your plants is the easiest way to save money and keep growing your favorite varieties year after year.
Picture this: You’ve spent months nurturing your green beans, and now those pods are turning woody and dry—your signal to act before the seeds scatter. One wrong move, and you could end up with shriveled seeds that won’t sprout next spring.
But with the right timing and a few simple steps, you’ll have a stash of viable seeds ready for planting in April.
This guide covers everything from spotting the perfect pods to drying and storing seeds so they stay fresh for years. Whether you’re saving heirlooms or just want to cut costs, you’ll learn the key tricks to avoid common mistakes and maximize your yield.
Ready to turn this year’s harvest into next year’s plants? Let’s get started with the step-by-step process that works every time.


When and how to identify mature green beans ready for seed harvesting
Harvesting green bean seeds at the right moment ensures high viability and strong germination next season. Unlike harvesting for fresh pods, seed-saving requires letting beans mature fully on the vine.
This means waiting until the pods turn yellow-brown and dry out—significantly longer than the typical 50-60 day harvest for eating.
For heirloom varieties, this patience pays off with seeds true to the parent plant. Hybrid varieties, however, may not produce reliable offspring, so focus on saving seeds from open-pollinated types like 'Blue Lake' or 'Kentucky Wonder.' Always label your plants to avoid cross-contamination between varieties.
Pod maturity is the first clue—look for pods that have turned papery and dried to a tan or brown color. The seeds inside should be plump and firm, not shriveled or hollow. If you harvest too early, seeds won’t fully develop; too late, and they risk shattering or attracting pests like bean beetles.
Texture is another key indicator: mature pods feel dry and crisp when squeezed, almost like parchment paper. If the pod still feels plump or moist, it’s not ready. Snap a pod open—if the seeds inside are hard and dark-colored, they’re ready for harvest. Soft, light-colored seeds mean more drying time is needed.
Timing matters too: aim to harvest seeds before the first frost in your USDA zone, usually between late summer and early fall. In Zone 6a, this typically means August to September.
If frost hits early, you can harvest and dry pods indoors under a dehumidifier or fan to speed up the process.
Overripe pods are a red flag—they’ll split open on the vine, releasing seeds prematurely. These seeds often won’t germinate well because they’ve absorbed too much moisture or been exposed to pests or mold. Always check plants weekly once pods start drying to catch the perfect moment.
Choose the healthiest plants for seed saving—select those with no signs of disease, strong vines, and abundant pods. Avoid plants with yellowing leaves or spotted pods, as these can indicate fungal infections or bacterial issues that may compromise seed quality.
Morning is the best time to harvest for seeds, as dew has evaporated and pods are dryest. Use clean, sharp pruners or scissors to snip pods just above the seed pod junction. Lay them on a paper towel or mesh screen in a well-ventilated area to finish drying.
Once pods are fully dry, shell the seeds by gently rubbing them between your fingers or using a mortar and pestle. Store seeds in a cool, dry place like a seed envelope or airtight container with a silica gel packet to prevent moisture damage.
Properly stored seeds can last 3-5 years!
Remember: patience is key—rushing the process leads to low germination rates. With the right timing and care, you’ll have viable seeds ready for next year’s garden! 🌱
If you’re unsure whether a pod is ready, cut it open and inspect the seeds. Immature seeds will be soft and light-colored, while mature seeds are hard and dark.
For pole beans, focus on the upper pods first, as they often mature earlier than those lower on the vine.
Pro tip: Label your plants at the start of the season to track varieties and maturity dates. Use colored flags or tags to mark seed-saving plants separately from those grown for fresh eating. This prevents accidental mixing and ensures pure strains for next year.
Finally, document your process! Note the harvest date, pod
Step-by-step process for extracting, cleaning, and drying green bean seeds
Once you’ve identified your mature green bean pods, the next step is extracting and preparing the seeds for long-term storage. Proper cleaning and drying are critical to prevent mold and ensure high germination rates.
Skipping these steps can lead to poor seed viability, so let’s break it down into simple, actionable stages.
Start by selecting the healthiest pods—those that are fully mature but not shriveled or damaged. Avoid pods with signs of pests or disease, as these can compromise your seeds.
Use clean, sharp pruning shears or scissors to harvest them directly from the vine, ensuring you don’t bruise the pods during the process.
How to Extract, Clean, and Dry Green Bean Seeds
- Step 1: Shell the Pods - Gently open each pod and remove the seeds. Place them in a clean bowl, avoiding any debris or plant matter. For easier handling, wear gloves or use tweezers to avoid contamination.
- Step 2: Rinse the Seeds - Transfer the seeds to a fine-mesh strainer and rinse them under cool, running water to remove any residual pulp or dirt. Shake gently to ensure all debris is removed.
- Step 3: Air-Dry the Seeds - Lay the seeds on a paper towel or mesh screen in a single layer. Place them in a well-ventilated, dry area away from direct sunlight. This process can take 7-14 days, depending on humidity.
- Step 4: Oven-Dry (Optional) - For faster drying, spread seeds on a baking sheet and place them in an oven at 100°F (38°C) for 1-2 hours. Check frequently to avoid overheating, which can damage the seeds.
- Step 5: Test for Dryness - Seeds are ready when they’re hard to the touch and no longer sticky. A simple test is to try bending a seed—if it snaps, it’s dry. Store only completely dry seeds.
- Step 6: Store Properly - Place dried seeds in paper envelopes or airtight containers with a silica gel packet to absorb moisture. Label each container with the variety name and date for easy identification.
When drying your seeds, humidity control is key. High humidity can lead to mold, while low humidity speeds up the process. Aim for a relative humidity below 40% in your drying space. If you live in a damp climate, consider using a dehumidifier or fan to improve airflow.
After drying, store your seeds in a cool, dark place, such as a pantry or seed vault. Green bean seeds can remain viable for 3-5 years if stored correctly. Always test a few seeds before planting to ensure they’re still germination-ready.
One common mistake is rushing the drying process, which can leave seeds too moist. Patience is essential—rushed drying often results in moldy or non-viable seeds. Take your time and monitor the seeds daily until they’re fully dry and ready for storage.