
Container Gardens
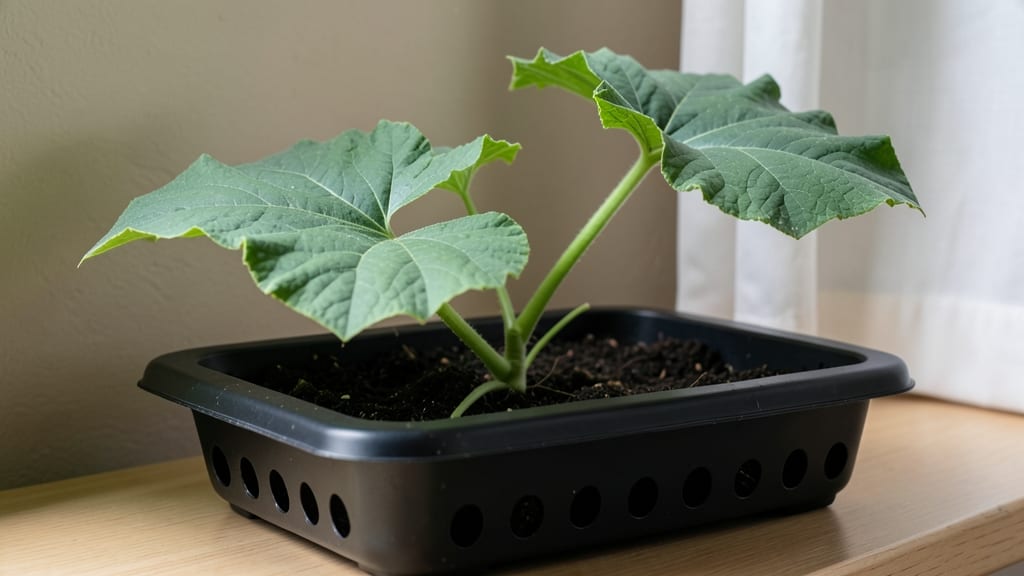
Growing pumpkin seeds indoors lets you cheat the season and get a jumpstart on vines that’ll eventually stretch across your yard. 🌱 I’ve grown pumpkin seedlings indoors for three years now, and the trick isn’t just patience—it’s matching their needs to your space.
After my first failed attempt with a dark corner and soggy soil, I learned that pumpkins want warmth, light, and just enough moisture to stay damp without drowning.
The secret to success starts with the right container—a 5-gallon bucket or deep pot with drainage holes—and a mix of potting soil and compost. Place your seeds about 1 inch deep, two to three per pot, since pumpkins sprout quickly and need space.
Within 5-7 days, you’ll see those first green hooks breaking the soil, and by day 14, you’ll have sturdy seedlings ready to handle transplant shock.
The key is keeping soil warm (a heating mat helps if your windowsill is chilly) and giving them 12-14 hours of bright light daily—a simple grow light works wonders if your window isn’t sunny enough.
By the time you’re ready to move them outside, these seedlings will be 2-3 feet tall and thriving, giving them a 3-4 week head start over store-bought plants. You’ll notice the difference in their resilience—no wilting, no shock—just strong, eager vines ready to take over your garden.
The best part? You’ll have control over the entire process, from seed to sprawling vine, and you’ll know exactly what’s going into the soil.
This method works for any variety—from sugar pie pumpkins to giant Atlantic Giants—and even if you don’t have outdoor space, you can keep them in containers all season.
Just be ready for the vines to grow: they’ll need trellises, cages, or a dedicated corner once they outgrow your indoor setup. Here’s how to keep them happy every step of the way.
📚 In This Guide
- What you need
- Instructions
- Tips and common mistakes
- Wrapping up and next steps
What you need
- ● Pumpkin seeds: 5–10 fresh, organic seeds (check for plumpness and no cracks).
- ● Growing container: Small pots (4–6 inches deep) or
- ● A seed-starting tray with drainage holes (for multiple seeds).
- ● Potting mix: 2–3 cups of seed-starting mix (lightweight, sterile, and well-draining). No garden soil!
- ● Spray bottle: For gentle watering (1–2 oz capacity).
- ○ Plastic wrap or humidity dome: To retain moisture (optional but helpful for the first few days).
- ● Grow lights or sunny windowsill: Sunlight: 6+ hours of direct light daily (south-facing window ideal).
- ● Grow lights: LED full-spectrum bulb (12–16 hours/day if natural light is limited).
- ○ Small fan (optional but recommended): To prevent mold by improving air circulation.
- ● Heating mat (70–75°F) for faster germination.
- ● Fertilizer: Diluted fish emulsion or seaweed extract (1 tsp per gallon of water) after sprouts appear.
- ● Plant labels: To track seed varieties if testing multiple types.
- ● Humidity tray: A shallow tray filled with pebbles and water to boost moisture.
Step-by-step instructions for growing pumpkin seeds indoors
Here’s how to coax pumpkin sprouts from seeds in just two weeks using only a sunny windowsill.
🌱 Step 1: Prepare Containers and Seed Starting Mix
Fill four 4-inch diameter pots with 2 gallons of seed-starting mix—this gives each seedling enough room to develop strong roots before transplanting. I press the mix down gently with my fingers until it’s firm but not compacted. The goal is to eliminate air pockets while keeping it loose enough for tender roots to push through.
Moisten the mix with lukewarm water until it’s damp to the touch but not dripping. Overwatering now will suffocate seeds. Place the pots in a shallow tray to catch any excess moisture that drains through.
🌱 Step 2: Sow Seeds at the Right Depth
Plant 1-2 pumpkin seeds per pot at a depth of 1 inch—about three times the seed’s diameter. Pumpkin seeds need this depth to access moisture and warmth without drying out. I use my finger to make a small hole, drop in the seeds, then cover them lightly with the remaining mix.
Mist the surface with water until it’s evenly damp but not soggy. A spray bottle works best—it won’t disturb the seeds like a heavy watering can. Label each pot with the variety and date, because pumpkin seedlings can look identical until they sprout their first true leaves.
☀️ Step 3: Provide Warmth and Bright Light
Place the pots in a south-facing window where they’ll receive at least 6 hours of direct sunlight daily. Pumpkin seeds germinate best in 75-85°F soil, so I set the pots on a seedling heat mat to maintain consistent warmth. Without this, germination can take 3-4 weeks instead of the promised 14 days.
Keep the soil surface moist but never waterlogged—you’ll know it’s right when the top inch feels damp to the touch. Cover the pots loosely with plastic wrap to trap humidity, but remove it once sprouts appear to prevent mold.
💧 Step 4: Care for Seedlings Until Transplanting
Once the first true leaves (not the initial seed leaves) appear, move the seedlings to a larger 6-inch pot with 1 additional gallon of potting mix per plant. Pumpkins need deep roots, so this upgrade prevents crowding. I transplant carefully, keeping the soil ball intact to avoid damaging delicate roots.
Water once a week at the base, letting the soil dry out between waterings. Overwatering now will cause the stems to rot. Watch for leggy growth—a sign the seedlings need more light. If they stretch toward the window, move them within 4 inches of the glass.
⏰ Step 5: Harden Off Before Moving Outdoors
Two weeks before your last frost date, begin hardening off the seedlings by placing them outside in a shaded, sheltered spot for 1-2 hours the first day. Gradually increase their outdoor time by 1 hour daily until they can tolerate a full day in the sun. This prepares them for the garden and prevents shock.
Transplant after all danger of frost has passed, choosing a spot with full sun and well-draining soil. Pumpkins need space—plant each seedling 5 feet apart in all directions. You’ll see strong, healthy vines within weeks, ready for pollination and harvest.
Tips & tricks for perfect indoor pumpkin seed sprouts
Here's what I've learned from growing pumpkin seedlings indoors—these little tricks make all the difference between healthy sprouts and sad, wilted failures.
The Soil Temperature Secret: While the instructions mention 75-85°F soil, I've found that using a seedling heat mat set to 85°F is the sweet spot for germination. Place a small thermometer in the soil to monitor—if it drops below 75°F, germination slows dramatically. I keep mine plugged in continuously until sprouts appear, which usually happens within 7-10 days.
Lighting Upgrade: If your south-facing window doesn't get at least 6 hours of direct sun, supplement with a grow light placed 4-6 inches above the seedlings. I use a simple LED grow bulb on a timer for 12 hours daily. The key is keeping the light close enough to prevent leggy growth but not so close it overheats the soil.
Transplanting Hack: When moving seedlings to 6-inch pots in Step 4, I make the transition easier by mixing a bit of liquid seaweed fertilizer into the new potting mix. This gives them a gentle nutrient boost during their first week in the larger container. The extra gallon of mix per plant is crucial—pumpkin roots grow fast and need room to spread.
Hardening Off Shortcut: For the 1-2 hour daily outdoor acclimation in Step 5, I place my seedlings on a patio table near the house where they get morning sun but stay protected from wind. This mimics outdoor conditions without the shock of full exposure. The gradual increase of 1 hour daily is non-negotiable—rushing this step often leads to transplant shock.
Pro Tips for Growing Pumpkin Seeds Indoors
- Here's what I've learned from growing pumpkin seedlings indoors—these little tricks make all the difference between healthy sprouts and sad, wilted failures.
- The Soil Temperature Secret: While the instructions mention 75-85°F soil, I've found that using a seedling heat mat set to 85°F is the sweet spot for germination.
- Lighting Upgrade: If your south-facing window doesn't get at least 6 hours of direct sun, supplement with a grow light placed 4-6 inches above the seedlings.
Frequently asked questions
Got questions about sprouting pumpkin seeds indoors? You’re not alone—this method is exciting but comes with a few quirks! Here are answers to the most common queries to help you grow confidently.
How long do pumpkin seeds take to sprout indoors?
With the right conditions (warmth, moisture, and indirect light), pumpkin seeds typically sprout in 5–14 days. Some varieties, like Cucurbita pepo, may sprout faster (5–7 days), while others like Cucurbita maxima can take up to 2 weeks. Patience is key—keep seeds consistently moist and warm!
What if my seeds aren’t sprouting after 2 weeks?
If seeds remain dormant, check these fixes: Are they still moist? (Damp paper towels work best.) Is the temperature right? (Ideal: 70–85°F.) Are they viable? Test by soaking a few in water—if they sink, they’re likely good! If not, try fresh seeds or a different variety.
Can I plant these indoor sprouts directly outside later?
Once sprouts have 1–2 true leaves (not just the seed leaves), they’re ready for transplanting. Harden them off for 3–5 days by placing them outside in shade for a few hours daily. Choose a spot with full sun (6+ hours) and well-draining soil for best results.
Do I need grow lights, or will a sunny window work?
A sunny windowsill can work, but grow lights are ideal for consistent growth. If using natural light, place seeds near a south-facing window (6+ hours of light daily). Without enough light, sprouts may become leggy or weak. A simple LED grow light on a timer solves this!
Are these sprouts safe to eat before transplanting?
Yes! Pumpkin seed sprouts are edible and packed with nutrients like protein, magnesium, and zinc. Snip the sprouts (leaving roots intact) and add them to salads, sandwiches, or smoothies. Just ensure you’re using organic, untreated seeds and rinse them well before eating.
What if my sprouts grow mold or fungus?
Mold or fungus (fuzzy spots) usually means too much moisture or poor airflow. Act fast: Stop watering until the surface dries, then place sprouts in a well-ventilated area (like near an open window). If mold persists, discard the batch and start fresh with sterile seeds and containers.
Wrapping up and next steps
Growing pumpkin seeds indoors is a rewarding journey that brings a taste of harvest to your windowsill—no farm needed! 🌱 With just a few supplies, patience, and a little sunlight, you can nurture tiny sprouts into thriving plants in just 14 days.
Whether you’re a beginner or a seasoned gardener, this method proves that big results start small.
Now that you’re armed with tips and tricks, it’s time to take action. Grab those seeds, prep your containers, and watch your green thumbs grow!
Ready for the next step? Transplant your seedlings outdoors (when the weather warms up) or explore creative ways to grow pumpkins in containers—your garden adventure is just beginning! 🚀