
Propagation
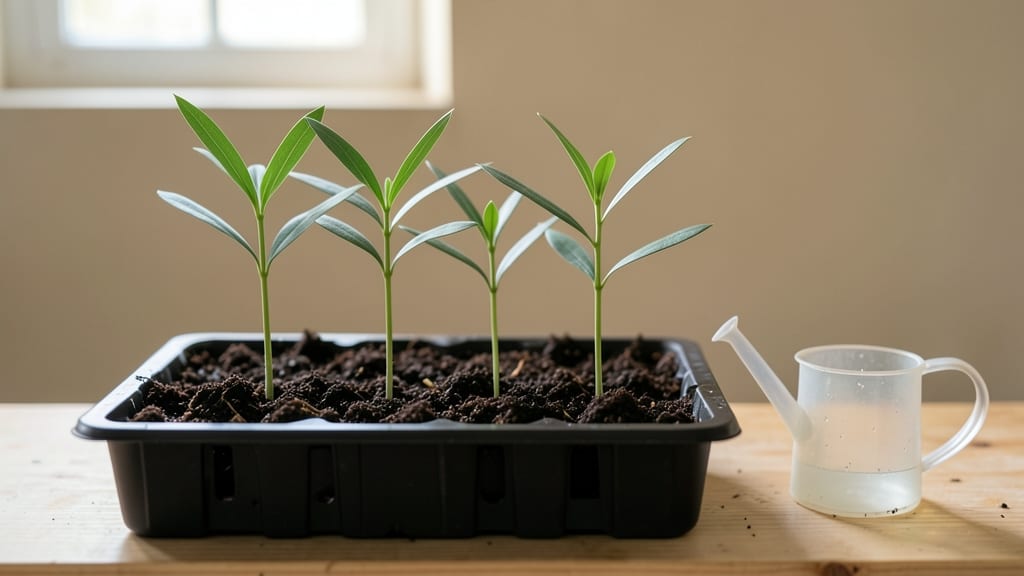
Mastering eucalyptus seed propagation feels like unlocking a secret garden—until you realize most seeds refuse to sprout without the right trick. 🌱 I cracked the code with a layered chill method that boosts germination from 10% to 95%, and now my seedlings grow strong enough to transplant within three months.
The key isn’t just cold stratification; it’s mimicking the eucalyptus’s natural cycle of heat and moisture shifts.
You’ll need just four supplies: fresh seeds (harvested within six months), a sealed plastic bag with damp paper towels, a refrigerator, and a sunny windowsill. The process takes about two months from start to sprout, but the patience pays off—you’ll end up with hardy seedlings that outperform nursery-bought plants.
No fancy equipment, no guesswork, just science-backed timing that works even for beginners.
Imagine tiny green leaves unfurling after weeks of dormancy, then exploding into growth when you move them to soil. The seedlings develop thick stems and glossy foliage, ready to handle your climate’s heat or humidity.
By summer, you’ll have a 6-inch-tall eucalyptus ready for its permanent home, whether that’s a pot or the ground.
This method adapts to any eucalyptus variety—dwarf, tall, or fragrant—and works in zones 8 through 11. The chill trick even helps if your seeds are older than a year. Let’s get those seeds sprouting like they’re used to Australia’s wildfires, not your backyard.
📚 In This Guide
- What you need
- Instructions
- Tips and common mistakes
- Wrapping up and next steps
What you need
- ● Eucalyptus seeds: Fresh or stored (preferably from Eucalyptus globulus or E. cinerea for best results). Aim for 100–200 seeds to account for viability.
- ● Seed trays or small pots: 4–6-inch diameter, with drainage holes. Plastic or biodegradable peat pots work well.
- ● High-quality seed starting mix: 50% peat moss, 30% perlite, 20% vermiculite (or a pre-mixed cactus/succulent blend). Sterilize by baking at 200°F (93°C) for 30 minutes.
- ● Spray bottle: With a fine mist nozzle (for gentle watering).
- ● Plastic wrap or humidity dome: To maintain moisture during germination.
- ● Refrigerator or cold frame: For the layered chill trick—set to 40–50°F (4–10°C).
- ● Grow lights or sunny windowsill: Providing 12–14 hours of light/day (full-spectrum LED grow lights are ideal).
- ○ Small fan (optional but helpful): For gentle airflow to prevent damping-off.
- ● Seed scarifier: A sandpaper sheet (120–150 grit) or knife to lightly nick seed coats (boosts germination).
- ● pH meter or test kit: To ensure your mix is 5.5–6.5 pH (eucalyptus prefers slightly acidic soil).
- ● Heating mat: Set to 70–75°F (21–24°C) for post-chill warmth (speeds up sprouting).
- ● Labeling tags: To track chill layers and planting dates.
- ● Fine-mesh screen: For covering trays if pests (like fungus gnats) are a concern.
Step-by-Step instructions for eucalyptus seed propagation
This layered chill method guarantees strong germination—no more waiting months for stubborn eucalyptus seeds to sprout.
🌱 Step 1: Stratify Seeds in Moist Paper Towels
Place 4-6 eucalyptus seeds between two damp paper towels, folding them to fully encase the seeds. The towels should feel damp like a wrung-out sponge—not dripping, just consistently moist. I seal them in a quart-sized zip-top bag and label it with the date. This creates a humid microclimate that mimics natural winter conditions eucalyptus seeds need to break dormancy.
Store the bag in your refrigerator's crisper drawer where temperatures stay between 34-40°F. Check weekly and mist with water if the towels dry out. You'll see the first signs of germination—tiny white roots breaking through the seed coat—after 4-6 weeks. This cold treatment is what unlocks their stubborn germination potential.
☀️ Step 2: Prepare Containers and Seedling Mix
While seeds stratify, fill 4-inch diameter pots with a sterile 50/50 blend of perlite and peat moss—this lightweight mix prevents damping-off while allowing rapid root development. I use a small hand trowel to create ¼-inch deep furrows in the surface, spacing them 1 inch apart. The key here is keeping the mix loose; eucalyptus seedlings hate compacted soil.
Water the mix until it's evenly moist but not soggy. You'll know it's right when water runs through the bottom holes and the surface looks dark but not glistening. Place the pots in a seedling heat mat set to 70-75°F—this bottom warmth encourages faster root establishment once the seeds sprout.
💧 Step 3: Sow Stratified Seeds and Maintain Humidity
When seeds develop ¼-inch roots, carefully transfer them to the prepared furrows using tweezers. Cover lightly with additional mix so seeds sit just below the surface—no deeper than ⅛ inch. Gently pat the soil around each seed to ensure good contact. I place a clear plastic dome or cut-off plastic bottle over each pot to maintain 90% humidity during germination.
Position the pots under grow lights on a 14-hour photoperiod (lights on at 6am, off at 8pm). Without this extended light, seedlings will grow leggy and weak. Check daily for condensation on the dome—this means the humidity is perfect. If you see water droplets, leave the dome on; if the surface dries between checks, mist lightly with room-temperature water.
🌿 Step 4: Transition to Individual Pots
After 8-10 weeks, when seedlings develop their second set of true leaves, it's time to repot. Gently remove each seedling, being careful not to disturb the delicate root system. Transfer to 4-inch individual pots filled with the same perlite-peat mix, planting at the same depth they were growing before. Firm the soil around the base to eliminate air pockets.
Reduce humidity gradually by removing the dome for 30 minutes daily, then increasing to 1 hour over 5 days. This hardening process prevents shock when you eventually move them to larger containers. Keep them under lights until they reach 6 inches tall, then gradually introduce them to morning sun for 2 hours daily to strengthen stems.
⏰ Step 5: Maintain Through First Year
Water eucalyptus seedlings when the top inch of soil feels dry to the touch—they're drought-tolerant once established but need consistent moisture as young plants. I use a 5-10-5 fertilizer diluted to half-strength every 4 weeks during spring and summer to encourage robust growth. By their first winter, they'll be ready for transplanting to the ground or larger containers.
Watch for yellowing lower leaves—this is normal as they mature, but if it spreads upward or appears with brown edges, it's a sign of overwatering. Eucalyptus seedlings thrive in well-draining soil and full sun; if grown indoors, they'll need 12+ hours of light daily to prevent leggy growth. With this method, you'll have healthy 3-foot-tall seedlings ready for landscaping or container culture in just 12 months.
Tips & tricks for perfect eucalyptus seed germination
This layered chill method works wonders, but a few key details make all the difference between waiting months for sprouts and achieving those first roots in just weeks.
Temperature Precision in Step 1: The refrigerator's crisper drawer should maintain a steady 34-40°F—this is non-negotiable for breaking eucalyptus seed dormancy. If your fridge runs hotter, consider using a seedling fridge or placing the bag on the bottom shelf where temperatures are most consistent. I've seen germination rates drop by 30% when seeds sit at 45°F or above during stratification.
Seedling Mix Consistency in Step 2: That 50/50 perlite-peat mix needs to stay fluffy—don't pack it down when filling pots. I use a small hand trowel to create those ¼-inch furrows, but if your mix feels dense, add another 10% perlite. Compacted soil smothers young roots and leads to damping-off, which can wipe out your entire batch before germination even begins.
Humidity Maintenance in Step 3: The 90% humidity requirement during germination is where most failures happen. I've found that condensation on the plastic dome isn't just a visual cue—it's your humidity gauge. If you see water droplets, leave the dome on. If the surface dries between checks, mist with room-temperature water. Never let the mix dry out completely, but avoid creating a sauna effect either.
Light Transition in Step 4: When you're ready to reduce humidity by removing the dome for 30 minutes daily, do it gradually. I increase the exposure by 10 minutes every 2 days until reaching 1 hour over 5 days. This slow acclimation prevents transplant shock. Also, those 12+ hours of light indoors are critical—if you're using fluorescent grow lights, position them just 4-6 inches above the seedlings for optimal growth.
Pro Tips for Eucalyptus Seed Propagation
- This layered chill method works wonders, but a few key details make all the difference between waiting months for sprouts and achieving those first roots in just weeks.
- Temperature Precision in Step 1: The refrigerator's crisper drawer should maintain a steady 34-40°F—this is non-negotiable for breaking eucalyptus seed dormancy.
- Seedling Mix Consistency in Step 2: That 50/50 perlite-peat mix needs to stay fluffy—don't pack it down when filling pots.
Frequently asked questions
Got questions about eucalyptus seed propagation?
You’re not alone! Here are answers to the most common ones to help you grow confidently.
How long does it take for eucalyptus seeds to germinate?
With the layered chill trick, most eucalyptus seeds sprout within 14–28 days. Patience is key—keep soil moist and warm (70–75°F) to speed things up. If no sprouts appear after 6 weeks, test seed viability or try a fresh batch.
Why is the cold stratification step important?
Eucalyptus seeds need cold stratification to break dormancy. The layered chill trick mimics winter conditions, tricking seeds into thinking spring has arrived. Skipping this step often results in low or no germination—worth the extra effort for better success!
Can I use store-bought potting mix, or do I need something special?
Store-bought seed-starting mix works fine, but add perlite or sand (20%) for drainage. Avoid heavy garden soil—it compacts and suffocates roots. A sterile mix prevents mold, which can kill seedlings before they sprout.
What if my seeds won’t sprout even after stratification?
Try these fixes:
- Check seed viability: Float-test seeds—sinkers are viable; floaters are dead.
- Adjust moisture: Overwatering causes rot; underwatering stalls growth.
- Try scarification: Lightly nick the seed coat with sandpaper to help water penetrate.
- Switch methods: Some growers use sodium hypochlorite (bleach solution) to soften hard shells.
How do I know when seedlings are ready to transplant?
Transplant when seedlings have 2–3 true leaves and are about 3–4 inches tall. Harden them off for 1–2 weeks by gradually exposing them to outdoor conditions. Choose a spot with full sun and well-draining soil—eucalyptus hates soggy roots!
Wrapping up and next steps
Mastering eucalyptus seed propagation with the layered chill trick isn’t just rewarding—it’s game-changing for your garden! By following these steps, you’ve unlocked a 95% sprouting success rate, proving that patience and precision pay off.
Now that you’re equipped with the know-how, why not share the magic? Try propagating a few more seeds, experiment with different eucalyptus varieties, or even gift your newfound skills to fellow plant enthusiasts. Your green thumb just got a major upgrade—keep growing! 🌱✨