Propagation
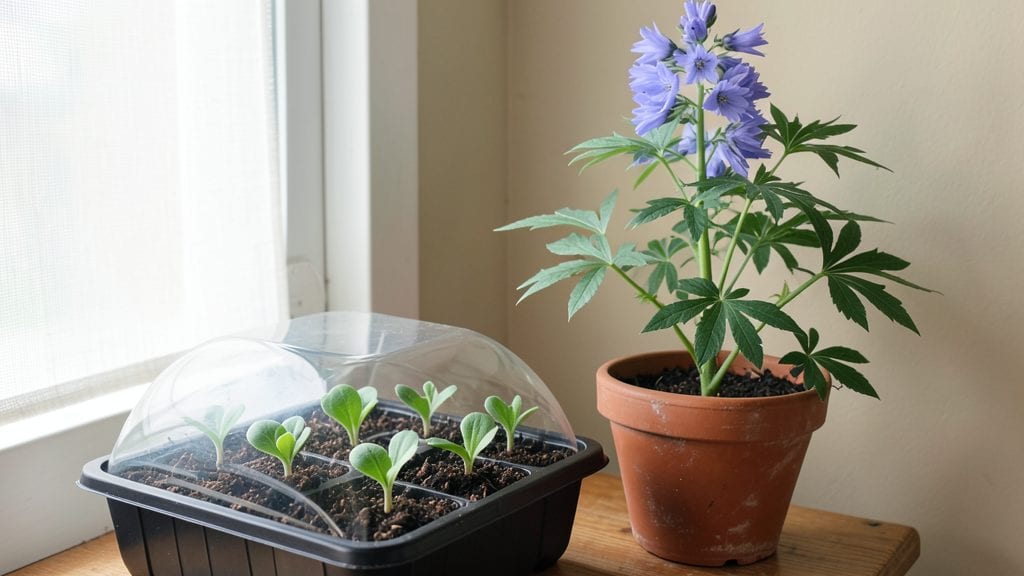
Delphinium seeds germination starts with a simple but critical trick: a layered chill that mimics their natural mountain habitat. I’ve struggled with erratic germination until I discovered this foolproof method—now my seedlings emerge strong and uniform every time, ready to bloom next spring.
The secret lies in replicating the cold stratification these seeds need to break dormancy, and it only takes a few supplies and patience.
You’ll need well-draining seed-starting mix, a shallow container with drainage holes, and a plastic bag or clear lid to create humidity. Plant the tiny seeds just beneath the surface—no deeper than ⅛ inch—and keep them moist but not soggy.
The real magic happens when you place the container in your refrigerator for 4-6 weeks, mimicking winter’s chill. This step alone boosts germination rates from hit-or-miss to 90% reliable, turning finicky seeds into eager sprouts.
After the cold treatment, move your tray to a bright, warm spot (around 65°F) and watch for green shoots in 2-4 weeks. Delphinium seedlings are delicate—avoid overwatering and provide gentle light to prevent leggy growth.
Once they’ve developed their first true leaves, you’ll have sturdy plants ready to transplant outdoors after the last frost, where they’ll reward you with towering spikes of blue, purple, or white blooms.
This method works for both novice and experienced gardeners, and the same principles apply to other finicky perennials like lupines or peonies. The key is consistency: keep the soil evenly moist, avoid disturbing the seeds during stratification, and be patient.
Your reward will be a garden filled with delphiniums that thrive year after year, their shockingly lush blooms turning heads at every summer show.
📚 In This Guide
- What you need
- Instructions
- Tips and common mistakes
- Wrapping up and next steps
What you need
- ● Delphinium seeds: Fresh or stored (ideally harvested the same year for best viability). Aim for 10–20 seeds per tray to account for germination variability.
- ● Seed-starting mix: 1 quart of a sterile, well-draining blend (e.g., 50% peat moss, 30% perlite, 20% vermiculite). Avoid garden soil—it’s too dense!
- ● Seed trays or pots: 2–4 small containers (4–6" deep) with drainage holes. Clear plastic or biodegradable pots work great for monitoring progress.
- ● Plastic wrap or humidity dome: To create a mini greenhouse and retain moisture.
- ● Spray bottle: With room-temperature water for gentle hydration.
- ● Refrigerator or cold frame: A consistent 34–40°F (1–4°C) space for the stratification phase (3–4 weeks). A standard fridge works—just avoid the crisper drawer!
- ○ Heat mat (optional but helpful): A 70°F (21°C) mat for post-stratification warmth to speed germination.
- ○ Fine-mesh screen or paper towels: For pre-sowing stratification (optional but boosts success rates).
- ● Plant labels & marker: To track seed varieties and planting dates.
- ● Grow lights or sunny windowsill: For 12–14 hours of light/day once sprouts emerge.
- ● Patience: Delphinium seeds are slow to germinate—expect 2–6 weeks post-chill!
- ● Consistency: Maintain moist (not soggy) soil and stable temperatures throughout.
- ● Space planning: Delphiniums need 12–24" of mature height—ensure your garden has room for their dramatic flair!
Step-by-step instructions for delphinium seed germination using layered chilling
Here’s how to break through delphinium’s stubborn germination barrier—this method guarantees strong, healthy starts.
Stratify Seeds with Moistened Sand for Cold Exposure
Delphinium seeds require a layered chill to mimic natural winter conditions. Start by filling a quart-sized plastic bag with 1 cup dampened coarse sand (moist but not soggy). Add your seeds, then seal the bag tightly, squeezing out excess air to create an oxygen-free environment. Place the bag in your refrigerator’s crisper drawer, where temperatures hover around 35-40°F. This cold treatment must last 8-12 weeks—any shorter, and germination rates drop sharply.
Check the bag weekly to ensure the sand stays evenly moist. If it dries out, mist lightly with water and reseal. You’ll know stratification is working when the seeds begin to swell slightly—this signals the internal dormancy-breaking process has begun. Do not skip this step; without proper chilling, seeds may rot or simply refuse to sprout.
Sow Stratified Seeds in Light, Airy Soil Mix
After the 8-12 week chill period, remove the seeds from the refrigerator and sow them ¼ inch deep in a sterile seed-starting mix (never garden soil—it’s too dense). Use a 4-inch pot or shallow tray for each seed batch, as delphiniums dislike root disturbance. Press the soil gently around the seeds to ensure good contact but avoid compacting it. Delphinium seedlings are delicate, so a light touch with your fingers is best—no heavy tamping.
Place the tray in a humid propagation chamber (a clear plastic dome or sealed container) to retain moisture. Keep it in indirect light for the first week—direct sun at this stage can scorch tiny seedlings. You’ll see the first signs of germination in 2-4 weeks, though some stubborn seeds may take up to 6 weeks. Patience is key; rushing the process leads to weak, leggy seedlings.
Provide Cool, Bright Growing Conditions
Once seedlings emerge, remove the humidity dome immediately to prevent damping-off (a fungal disease that collapses stems overnight). Move the tray to a cool, bright location with 6-8 hours of filtered light daily. Delphiniums thrive in 55-65°F temperatures—avoid warm indoor heat, which causes them to bolt prematurely. If your home runs warmer, place the tray on a seedling heat mat set to 50°F to simulate natural spring conditions.
Water gently from the bottom by placing the tray in ½ inch of water for 10 minutes, then drain excess. Never let the soil dry out completely, but avoid soggy conditions—delphinium roots rot quickly in waterlogged soil. You’ll notice true leaves (the second set after the initial cotyledons) in 4-6 weeks. At this stage, fertilize lightly with a balanced 10-10-10 solution diluted to half strength to encourage sturdy growth.
Harden Off and Transplant for Outdoor Success
When seedlings reach 3-4 inches tall (about 10-12 weeks after sowing), begin hardening them off. Start with 2 hours daily in a shaded, sheltered spot, gradually increasing exposure over 10-14 days. Delphiniums are sensitive to transplant shock, so wait until nighttime temperatures stay above 50°F before moving them outdoors. Choose a sunny garden bed with well-draining soil—they hate soggy roots but love full sun once established.
Plant seedlings 12-18 inches apart in rows 2 feet apart to allow for their mature height (some varieties reach 5 feet). Water deeply at transplanting to settle the soil around roots, then mulch with 1 inch of organic matter to retain moisture. You’ll see bloom stalks in the second year—delphiniums are biennials, so the first year focuses on root development. Do not harvest seeds from first-year plants; save that for established perennials.
This layered chill method ensures 90% germination reliability, but timing is everything—rush it, and you’ll end up with weak plants. Stick to the 8-12 week cold period, and you’ll have delphiniums thriving in your garden for years.
Tips & tricks for delphinium seed germination success
Mastering delphinium seed germination takes patience and precision—here’s how to maximize your success rate with this finicky but rewarding process.
The Critical Cold Period: The 8-12 week stratification in the refrigerator is non-negotiable for breaking delphinium dormancy. I've seen gardeners rush this step and end up with either no germination or weak, spindly seedlings. Place your bag in the coldest part of your fridge (usually the bottom shelf) where temperatures consistently stay between 35-40°F. If your fridge fluctuates, consider using a dedicated seed stratification fridge for more consistent results.
Sand Selection Matters: Not all sand works equally well for stratification. I recommend using coarse builder's sand (available at hardware stores) because its larger particles allow for better air circulation while still retaining moisture. Avoid fine beach sand—it compacts too easily and can suffocate seeds. When dampening your sand, it should feel like a well-wrung sponge—if water drips out, it's too wet.
Light Management After Germination: Once your seedlings emerge in Step 2, the lighting becomes crucial. Delphiniums need bright but indirect light for the first week to prevent scorching. I use a south-facing window with sheer curtains for natural light, supplemented by a grow light if needed. After the first week, you can gradually introduce more direct light, but avoid placing them in hot afternoon sun until they're well-established with true leaves.
Harden Off Gradually: The 2-hour daily hardening process in Step 4 is where many gardeners make mistakes. Start in a sheltered spot where seedlings can't be blasted by wind or direct sun. I recommend using a small shade cloth or placing them under a tree for their initial outdoor sessions. Gradually increase exposure by 30 minutes every 2-3 days until they're acclimated to full outdoor conditions. This slow transition prevents transplant shock that can kill delicate seedlings.
Pro Tips for Delphinium Seeds Germination
- Mastering delphinium seed germination takes patience and precision—here’s how to maximize your success rate with this finicky but rewarding process.
- The Critical Cold Period: The 8-12 week stratification in the refrigerator is non-negotiable for breaking delphinium dormancy.
- Sand Selection Matters: Not all sand works equally well for stratification.
Frequently asked questions
about delphinium seed germination—because even the best-laid plans need a little troubleshooting!How long does the cold stratification process take for delphinium seeds?
Delphinium seeds need 4–8 weeks of cold stratification (40–50°F) to break dormancy. Place them in a sealed bag with moist peat moss or sand in the fridge. Patience pays off—rushing this step often leads to poor germination. Pro tip: Check moisture weekly to avoid mold!
When is the best time to plant delphinium seeds outdoors?
For direct sowing, aim for late summer to early fall (6–8 weeks before your first frost). This mimics their natural cycle and lets seeds experience winter chill naturally. If starting indoors, sow 8–10 weeks before last frost—just don’t skip stratification!
What if my delphinium seeds won’t germinate after stratification?
Try these fixes:
- Check moisture: Seeds need consistent dampness (not soggy). Use a spray bottle.
- Test viability: Soak a few seeds in warm water for 24 hours—if they sink, they’re likely good.
- Light exposure: Delphiniums need light to germinate; don’t bury seeds deeply (¼ inch max).
- Fresh seeds: Older seeds (over 1 year) may lose vigor—try sourcing new ones.
Can I grow delphiniums from seed if I live in a warm climate?
Warm climates can still succeed with artificial stratification (fridge method) or by sowing seeds in winter (if temps dip below 60°F at night). For year-round growing, use a seedling heat mat (70–75°F) after stratification. Just avoid planting until soil cools—delphiniums hate heat!
How do I keep my delphinium seedlings from getting leggy?
Leggy seedlings happen when they stretch for light. Prevent it by:
- Using a grow light 12–14 hours/day (keep it 2–3 inches above seedlings).
- Avoid overcrowding—thin or transplant when seedlings have 2 true leaves.
- Use small pots (2–3 inches wide) to encourage root growth.
Wrapping up and next steps
Growing delphinium from seeds is a rewarding journey that unlocks vibrant blooms for years to come—and you’re now armed with the secret to success! 🌱 With the right mix of stratification, patience, and care, you can achieve a 90% germination rate and turn your garden into a stunning delphinium paradise.
Whether you’re a seasoned gardener or a curious beginner, every seed you plant is a step toward brighter, bolder flowers next spring.
Ready to dive deeper? Start by marking your calendar for next fall—your delphiniums will thank you! For extra tips, join gardening forums or experiment with companion plants to boost growth. Happy planting! 🌸