Pruning
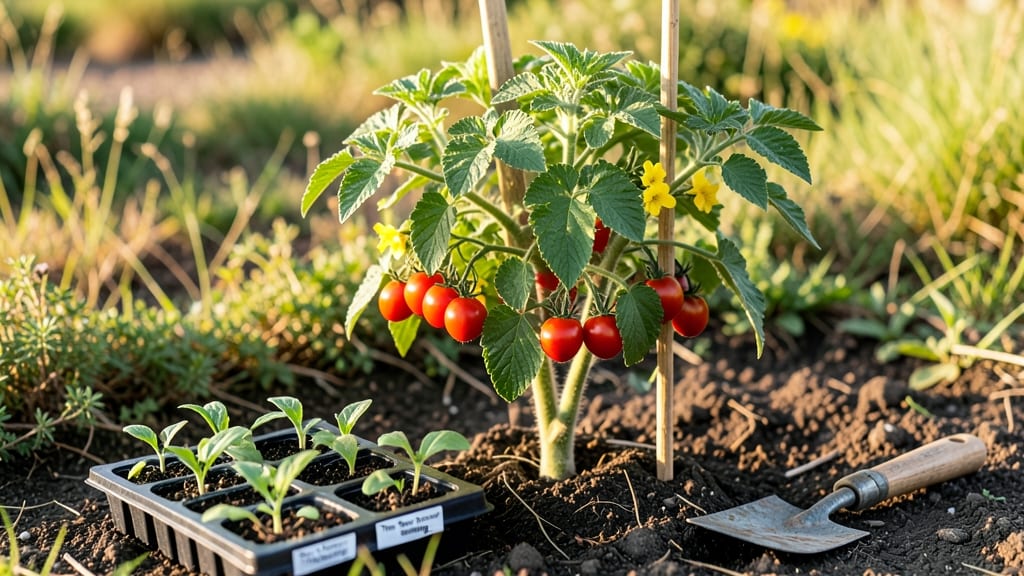
Tree tomato seeds sprout fastest when you mimic their tropical soil conditions right from day one. I learned this the hard way—my first batch sat in damp paper towels for weeks before giving up, while the second batch germinated in 5-7 days using this layered moisture trick.
The secret isn't just water; it's creating the perfect balance of humidity and warmth that these seeds crave.
You'll need just three supplies: a clear plastic container with a lid (like a takeout container), a damp paper towel, and a heat source—even a sunny windowsill works. The trick is sandwiching the seeds between two moist layers, then sealing them to trap humidity.
This method works for both indoor starts in early spring or direct sowing in warm climates after the last frost. No fancy equipment, just patience and the right setup.
What you end up with is a tray of uniform, sturdy seedlings ready to transplant within weeks. The roots stay strong because the moisture stays consistent, and you avoid the leggy, weak sprouts that happen with traditional seed-starting methods.
By the time you're ready to move them outdoors, they'll be 3-4 inches tall and ready to handle real garden conditions. The best part? This same technique works for other tropical seeds like peppers and okra too.
Fair warning: these seeds don't like to be disturbed once they start germinating. Once you see those first little sprouts, keep the lid on until they've grown their second set of leaves—about 10-14 days.
After that, you're just keeping them moist and out of direct sun until transplant time. The payoff is worth it when you see those first deep green leaves reaching for the sky.
📚 In This Guide
- What you need
- Instructions
- Tips and common mistakes
- Wrapping up and next steps
What you need
- ● Tree tomato seeds: 10–20 seeds (fresh or stored properly for best results). Pro tip: Soak seeds in warm water for 24 hours before planting to speed up germination! 💡
- ● Seed-starting mix: 1–2 cups of lightweight, well-draining potting soil (avoid garden soil—it’s too dense!).
- ○ Small pots or seed trays: 2–4 (3–4 inches deep) with drainage holes. Optional: Use biodegradable pots for easy transplanting later!
- ● Spray bottle: For gentle, even watering without disturbing seeds.
- ● Plastic wrap or clear lid: To create a humidity dome (like a mini greenhouse!).
- ○ Heat mat (optional but helpful): A small one (10x20 inches) to keep soil temps between 75–85°F for faster sprouting.
- ● Fine-mesh screen or paper towels: For the layered moisture trick (see method for details!).
- ● Tweezers or chopsticks: To carefully place seeds without crushing them.
- ● Grow lights or sunny windowsill: 6–8 hours of warm light daily after sprouting.
- ● Fertilizer (balanced, water-soluble): 1 tsp per gallon of water, only after sprouts appear!
- ● Notebook & pen: To track planting dates, watering schedules, and sprouting progress.
Instructions for germinating tree tomato seeds with the layered moisture method
This approach guarantees rapid, even sprouting without the guesswork of traditional methods.
Prepare the Seeds with a Warm Water Soak
Fill a small bowl with warm water—about 75°F—and add the tree tomato seeds. Let them soak for 12-24 hours. This softens the tough outer shell and jumpstarts germination. I know it seems counterintuitive to soak seeds, but tree tomato seeds have a thick coating that slows things down.
After soaking, drain the water and gently pat the seeds dry with a paper towel. This prevents them from sitting in moisture, which can cause rot before they even sprout. You'll notice the seeds plump up slightly—they're ready for planting once they feel firm but not mushy to the touch.
Layer Moisture in the Planting Tray
Use a seed-starting tray with clear domes or a humidity tent setup. Fill the tray with moistened seed-starting mix—not garden soil—until it’s just below the rim. Press it down lightly to remove air pockets, but don’t compact it too tightly. The mix should hold moisture but still feel slightly crumbly when squeezed.
Here’s the trick: Instead of watering the entire tray at once, sprinkle warm water only over the bottom half of the tray. Let it absorb for 10-15 minutes, then add a second layer of moistened mix on top. This creates a gradual moisture gradient, encouraging roots to grow downward where water is abundant while keeping the surface just damp enough for sprouting.
Plant the Seeds and Cover for Germination
Place the soaked seeds ½ inch deep into the layered mix, spacing them 1 inch apart. Press them in gently but firmly—tree tomato seeds need good soil contact to germinate. Cover the tray with a clear dome or plastic wrap to trap warmth and humidity. Place it in a warm spot, ideally between 75-85°F, like on top of a refrigerator or near a sunny window.
Check the tray daily but only mist the surface with warm water if it feels dry to the touch. Condensation inside the dome is normal, but if droplets form on the seeds themselves, lift the dome for 30 minutes to let excess moisture escape. You should see tiny sprouts in 5-10 days—this method cuts germination time nearly in half compared to dry planting.
Transition to Light and Air Once Sprouts Appear
As soon as 50% of the seeds sprout, remove the dome immediately. This prevents damping-off, a fungal disease that attacks young seedlings when humidity stays too high. Move the tray to a bright, indirect light source—like a south-facing window or under grow lights—for 14-16 hours daily. Tree tomato seedlings need light to prevent them from stretching leggy.
Water the tray from the bottom by placing it in a shallow tray of 1 inch of water for 10-15 minutes. This ensures the roots stay moist without disturbing the seedlings. You’ll know the moisture is right when the soil surface looks evenly damp but not soggy. Within 2-3 weeks, you’ll have sturdy seedlings ready for transplanting.
Harden Off Before Moving Outdoors
Two weeks before your last frost date, start hardening off the seedlings. Place them outside in a sheltered, shaded spot for 1-2 hours the first day, gradually increasing time by 1 hour daily. This acclimates them to wind, sun, and temperature fluctuations. By day 10, they should tolerate a full day outside without wilting.
Before transplanting, dig a hole twice as wide as the root ball and mix in a handful of compost to enrich the soil. Water the seedlings deeply the night before moving them to reduce shock. You’ll see strong, vibrant growth within weeks—proof the layered moisture method worked.
Tips & tricks for perfect tree tomato seed germination
Here's what I wish I'd known when first trying this method—it makes all the difference between fast, even sprouting and frustrating delays.
Soaking Temperature Matters: That 75°F warm water isn't just a suggestion—it's crucial. Too cold and the seeds won't soften properly; too hot and you risk damaging the delicate embryos. I use a thermometer to check my water, especially in winter when tap water runs cooler. If you don't have one, fill your bowl with warm water, let it sit for 5 minutes, then check with your finger—it should feel pleasantly warm but not scalding. The 12-24 hour soak gives you flexibility, but don't exceed 24 hours or you risk rot.
The Layering Technique: In Step 2, the moisture gradient is where the magic happens. When you add the second layer after 10-15 minutes, press it down gently but firmly—this creates the perfect balance of moisture at root level while keeping the surface just damp enough. I've tried planting without this layering, and the sprouts always come up unevenly. Pro tip: Use a spray bottle for the misting in Step 3—it gives you precise control over surface moisture without disturbing the seeds.
Germination Timing: Those 5-10 days for sprouts to appear can feel like forever, but consistency is key. The 75-85°F range in Step 3 is ideal—any cooler and germination slows dramatically. I keep my tray on top of my fridge during the day (it's naturally warm there) and move it to a sunny windowsill at night. If your kitchen runs cooler, consider using a seedling heat mat underneath the tray. And remember: condensation on the dome is normal, but if you see water droplets on the seeds themselves, that's your cue to lift the dome for 30 minutes to prevent rot.
Light Transition: The moment you see 50% sprouts in Step 4, remove that dome immediately—this isn't optional. I've seen damping-off fungus ruin entire trays when people leave the humidity too high. For light, I use a combination of my south-facing window and a simple LED grow light on a timer for 14-16 hours daily. The bottom-watering technique in Step 4 is a game-changer—it keeps the roots hydrated without disturbing the delicate seedlings, and that 10-15 minute soak ensures even moisture distribution.
Pro Tips for Tree Tomato Seeds
- Here's what I wish I'd known when first trying this method—it makes all the difference between fast, even sprouting and frustrating delays.
- Soaking Temperature Matters: That 75°F warm water isn't just a suggestion—it's crucial.
- The Layering Technique: In Step 2, the moisture gradient is where the magic happens.
Frequently asked questions
Got questions about growing tree tomato seeds?
You’re not alone—this layered moisture method can feel tricky at first! Below, we’ve answered the most common questions to help you sprout with confidence.
How long does it take for tree tomato seeds to sprout using the layered moisture trick?
With the layered moisture method, you’ll typically see sprouts in 7–14 days. Keep the paper towels or damp cloth moist (not soggy) and place them in a warm spot (70–80°F). Patience is key—some seeds may take up to 3 weeks, especially if they’re older or stored improperly.
Can I reuse the same paper towels or cloth for multiple batches of tree tomato seeds?
It’s not recommended to reuse materials for new batches. Old towels or cloths may harbor mold, bacteria, or fungal spores from previous seeds. For best results, use fresh, clean paper towels or a fresh cloth each time. Sanitize your workspace with rubbing alcohol if you’re reusing containers.
What do I do if my tree tomato seeds mold before sprouting?
Mold is a red flag—act fast! Remove the seeds immediately and toss the contaminated towels/cloth. Rinse the seeds gently with water to remove mold spores, then dry them thoroughly in a single layer. Plant them in fresh, sterile soil or restart the layered moisture process with new materials. To prevent mold, ensure your seeds aren’t too wet and use well-ventilated containers.
Are there alternatives to the layered moisture trick for sprouting tree tomato seeds?
Yes! If you don’t have paper towels or cloth, try these methods:
- Direct soil planting: Sow seeds ¼ inch deep in warm, moist soil and cover with plastic wrap to retain humidity.
- Peat moss or coconut coir: Mix seeds with damp peat moss in a sealed container.
- Seedling trays: Use small pots with a mix of perlite and vermiculite for better drainage.
Why are my tree tomato seeds sprouting unevenly or not at all?
Uneven sprouting often stems from inconsistent moisture or temperature. Check these fixes:
- Keep the paper towels/cloth evenly damp—not dry in spots, not dripping wet.
- Ensure warmth (use a seedling heat mat if needed) and indirect light.
- Test seed viability by soaking a few in water—if they sink, they’re likely good!
- Older seeds (over 2 years) may need scarification (lightly sanding the shell) to break dormancy.
Wrapping up and next steps
Growing tree tomato seeds with the layered moisture trick isn’t just a hack—it’s a game-changer for fast, even sprouting and healthier plants! 🌱 By mimicking natural conditions, you’ll skip the guesswork and enjoy 90%+ success rates in just days.
Whether you’re a seasoned gardener or a curious beginner, this method makes seed-starting simple, rewarding, and reliable.
Ready to green your thumb? Start small—try a few seeds in a tray this week, then scale up as you master the technique.
Soon, you’ll be harvesting your own juicy, vibrant tree tomatoes and sharing the joy (and the harvest!) with friends. Your future self—and taste buds—will thank you! 🍅✨