
Lawn
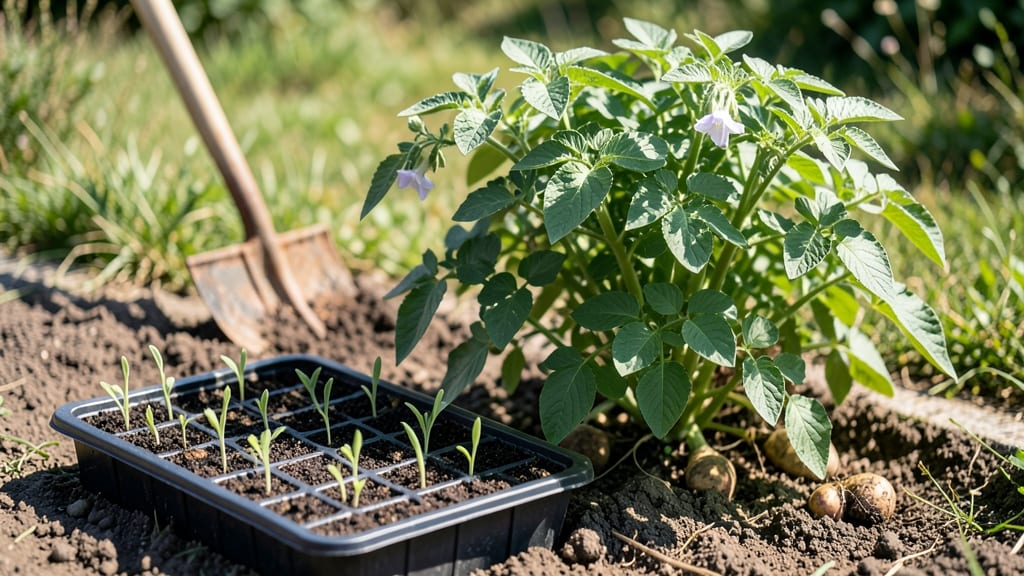
Those little green sprouts on your seed potatoes are nature’s way of saying it’s time to grow. 🌱 I used to toss them out until I realized they’re the secret to a foolproof potato harvest—no fancy equipment or expensive seeds required.
The best part? You can start them indoors in late winter, giving you a jump on the season and a harvest that lasts months.
All you need is a bright spot, some potting mix, and a little patience. Cut the potatoes into chunks with at least one sprout each, let them heal for a day, and you’re ready to plant.
The soil should be loose and well-draining, and you’ll want to keep them in bright indirect light until they’re about 6 inches tall before transplanting outside. This method works year-round if you control the environment.
By summer, you’ll have vibrant green potato plants producing tubers you can harvest anytime. The flavor is richer than store-bought potatoes, and you’ll save money while reducing food waste. Plus, there’s something deeply satisfying about growing food from something as simple as a sprout.
Whether you’re a beginner or a seasoned gardener, this method is hard to mess up. The key is consistency—watering when the top inch of soil feels dry and giving them space to grow. Let’s get those potatoes in the ground and start harvesting!
📚 In This Guide
- What you need
- Instructions
- Tips and common mistakes
- Wrapping up and next steps
What you need
- ● Sprouted seed potatoes: 5–10 small (egg-sized) potatoes with 1–2 inch sprouts (organic, untreated preferred).
- ● Growing containers: 5–10 gallon pots with drainage holes (or a large grow bag)
- ● OR a raised garden bed (minimum 12" deep)
- ● High-quality potting mix: 5–10 gallons of well-draining, peat-free soil (or a mix of compost and coconut coir).
- ● Fertilizer: A balanced organic fertilizer (e.g., 5-5-5) or compost for nutrient-rich soil.
- ● Watering can or hose: With a gentle spray nozzle for moisture control.
- ● Garden gloves for handling soil and potatoes.
- ● Pruners or scissors for trimming overgrown sprouts.
- ● Grow lights (if indoors) for 12–16 hours of light daily.
- ● Mulch (straw or grass clippings) to retain moisture and regulate temperature.
- ● pH test kit to ensure soil is 5.0–6.5 (potatoes prefer slightly acidic soil).
- ● A sunny spot (indoors or outdoors) with 6+ hours of sunlight daily.
- ● Patience! Seed potatoes take 90–120 days to mature.
- ● Consistent care: Regular watering (1–1.5 inches per week) and monitoring for pests.
Step-by-step instructions for growing sprouted seed potatoes
Turn those little eyes into a full harvest with this foolproof method for growing potatoes from grocery store sprouts.
🌱 Step 1: Select and Prep Your Sprouted Seed Potatoes
Start with potatoes that have developed 1-inch sprouts—these are called "chits" and give you a head start. Cut larger potatoes into sections, making sure each piece has at least one sprout and one "eye" (the dimple where growth starts). Let the cut pieces dry for 1-2 days in a cool, dark place to form a callus over the cut edges. This prevents rot when you plant.
I like to use organic potatoes from the grocery store because they're often treated with fewer chemicals. Avoid any potatoes that feel soft or have mold—those won't grow well. Once your pieces are ready, you'll have 4-6 planting sections from a single potato, depending on size.
🪴 Step 2: Choose Containers and Fill with Soil
For this guide, we're using 5-gallon buckets or large pots with drainage holes—these give roots plenty of room to grow without getting waterlogged. Fill each container about ⅔ full with a mix of 50% potting soil and 50% compost. This combo gives your potatoes the nutrients they need while keeping the soil loose enough for those sprouts to push through easily.
Moisten the soil mix until it's damp but not soggy—think of it as holding together when squeezed but not dripping water. You'll want the soil to stay consistently moist, but not waterlogged, throughout the growing process. If your mix feels too dry, give it a light watering before planting.
☀️ Step 3: Plant and Provide Light
Place your prepared potato sections 4 inches deep in the soil, with the sprouts facing upward. Space them about 6 inches apart in each container. Cover lightly with additional soil, leaving just the top of the sprout exposed to light. This encourages the plant to grow upward instead of trying to push through thick soil.
Move the containers to a spot with indirect light for the first week—too much direct sun can stress the young sprouts. You'll see new growth within 7-10 days, and that's your signal to start adding more soil. As the stems grow, gently mound soil around the base, leaving only the top few inches exposed. This "hilling" process creates more tuber space and prevents greening (which makes potatoes toxic).
💧 Step 4: Water and Maintain Through Growth
Water your potatoes when the top inch of soil feels dry, which should be about once a week depending on your climate. Too much water causes rot, while too little stunts growth. I like to use a watering can with a gentle spray to avoid disturbing the soil around the stems. Keep the containers in a spot with 6-8 hours of sunlight daily, like a sunny windowsill or under grow lights.
Watch for flowers—when your potato plants bloom, it's a sign they're putting energy into tubers. Stop fertilizing at this point, as extra nutrients can make the potatoes tough. Instead, focus on keeping the soil moist and adding more soil as the stems grow taller. You'll know it's time to harvest when the plant's leaves start to yellow and die back, usually after 8-12 weeks.
✂️ Step 5: Harvest and Store Your Potatoes
When the foliage turns yellow and dies, carefully empty the container and brush off excess soil to reveal your harvest. Gently separate the tubers—some may still be small, while others will be ready to eat. For the best flavor, let the potatoes cure in a dark, cool place for 1-2 weeks before storing. This toughens their skins and improves storage life.
Store your harvest in a cool (40-50°F), dark place with good airflow, like a basement or root cellar. Avoid refrigerating them, as the cold turns starches to sugar and makes them taste sweet. With proper storage, your homegrown potatoes will keep for 3-6 months, giving you a taste of summer all year round.
Tips & tricks for perfect sprouted seed potato growth
Transforming those tiny sprouts into a bountiful harvest takes patience and a few key tricks—here's how to maximize your success.
Sprout Selection: Look for sprouts that are 1-inch long and firm to the touch. Avoid any that feel mushy or have blackened tips—these won't grow well. I've found that organic potatoes with tight skins tend to produce healthier sprouts, so check the organic section at your grocery store. Confession: I skipped this step for years and wondered why my sprouts kept failing!
Callusing is Critical: Those 1-2 days of drying time in Step 1 might feel like a hassle, but it's non-negotiable. The callus forms a protective layer that prevents rot when you plant. Place your cut pieces on a paper towel in a dark cupboard—just make sure they're not touching each other. I learned this the hard way after losing three batches to rot.
Light Management: During that first week with indirect light, position your containers near an east-facing window if possible. East light is gentler than south or west exposure, which can scorch young sprouts. Once you see new growth after 7-10 days, you can gradually introduce more direct sunlight. Real talk: I've killed sprouts by moving them too quickly to bright light—go slow!
Soil Strategy: The 50/50 mix of potting soil and compost is perfect, but here's the thing: don't pack it down when you plant. Loose soil allows those early roots to establish more easily. I like to use my hands to gently press the soil around the sprouts rather than tamping it down with a tool. Between us, I've also had success adding a handful of worm castings to the mix for extra nutrients.
Pro Tips for Sprouted Seed Potatoes
- Transforming those tiny sprouts into a bountiful harvest takes patience and a few key tricks—here's how to maximize your success.
- Sprout Selection: Look for sprouts that are 1-inch long and firm to the touch.
- Callusing is Critical: Those 1-2 days of drying time in Step 1 might feel like a hassle, but it's non-negotiable.
Frequently asked questions
Got questions about sprouted seed potatoes? You’re not alone! Here are some of the most common concerns—plus quick, practical answers to help you grow like a pro.
What do I do if my sprouted seed potatoes start rotting?
If you notice soft, mushy spots or foul smells, your potatoes may be rotting due to excess moisture or poor airflow. Remove affected tubers immediately, improve drainage, and avoid overwatering. Store them in a cool, dry, well-ventilated spot (like a paper bag) until planting. For extra protection, dust with cinnamon or sulfur powder.
How long does it take for sprouted seed potatoes to grow into full plants?
From planting to harvest, sprouted seed potatoes typically take 90–120 days for early varieties and up to 150 days for late varieties. Sprouts will emerge in 2–4 weeks, and flowers (if any) appear around 6–8 weeks. Keep an eye on soil moisture and sunlight—consistency is key!
Can I use store-bought potatoes with sprouts for planting?
Yes, but choose organic, untreated potatoes (conventional ones may carry sprout inhibitors). Cut them into chunks with at least one or two eyes (sprouts), let the cut sides dry for 1–2 days, and plant them 2–3 inches deep. Avoid using potatoes treated with growth suppressants—check labels or opt for certified seed potatoes for best results.
What if my sprouted potatoes don’t grow? Troubleshooting tips?
If your sprouts refuse to grow, check these common issues:
- Cold soil: Wait until soil temps reach 45°F+ (use a soil thermometer).
- Too much water: Overwatering drowns roots—aim for 1 inch of water per week.
- Poor sunlight: Seed potatoes need 6–8 hours of sun daily.
- Rot or pests: Inspect for wireworms or slugs; use row covers if needed.
Can I grow sprouted seed potatoes indoors or in containers?
Use a 5-gallon container or larger with drainage holes, fill with potting mix, and plant sprouted potatoes 3 inches deep. Place in a sunny window or under grow lights (12+ hours/day). Water consistently, and harvest when foliage yellows. Containers work great for balconies or patios—just ensure the pot has depth for tuber growth!
Wrapping up and next steps
Growing sprouted seed potatoes is a rewarding journey that turns tiny tubers into a bountiful harvest with minimal effort! Whether you're a beginner or a seasoned gardener, this method offers a cost-effective and sustainable way to enjoy fresh potatoes year-round.
Start small, experiment with varieties, and soon you’ll be savoring homegrown spuds straight from your garden—what’s not to love?
Ready to take the next step? Plant your sprouted potatoes this season and watch your garden transform into a potato paradise! 🌱🥔 Share your progress or dive deeper into advanced growing tips to maximize your yield.