
Flowers
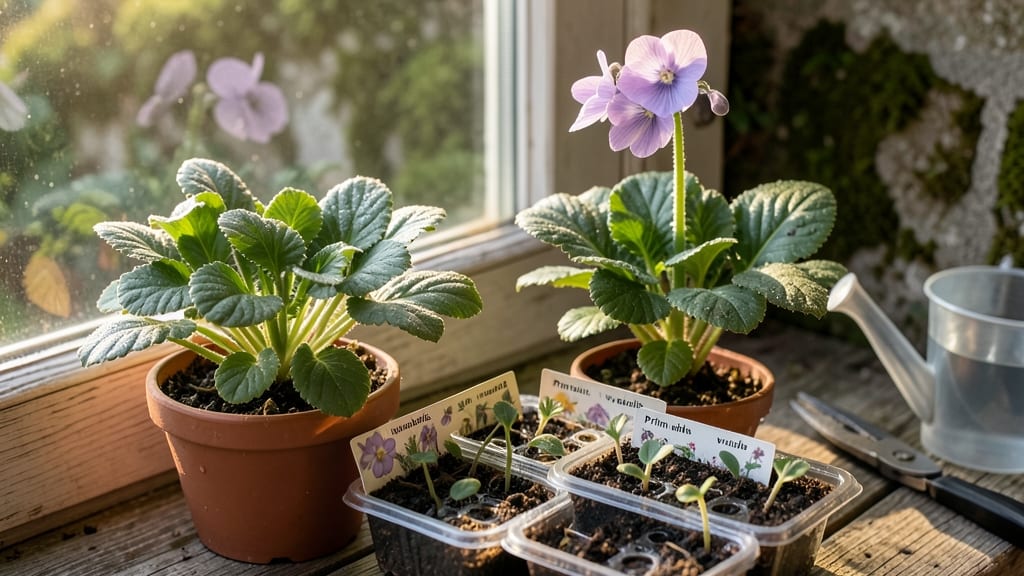
Sowing primula flower seeds with the layered chill hack cuts germination time in half—no more waiting months for those delicate blooms to appear. 🌱 I’ve struggled with slow primula sprouts before, but this method transforms weak seedlings into sturdy plants ready for transplant in just 4-6 weeks.
The secret lies in mimicking their natural alpine growing cycle, and it works for varieties like Primula denticulata or Primula vulgaris.
You’ll need a seed-starting tray, well-draining potting mix, and a way to provide 40-50°F temperatures—a fridge shelf or cold frame does the trick. Plant seeds shallowly, keep the soil consistently moist (not soggy), and avoid direct sunlight until sprouts emerge.
Most gardeners overlook the chill requirement, which is why so many seeds fail to break dormancy.
Once germinated, your seedlings will develop bold, deep-green leaves and compact growth habits. Transplant them into individual pots when they have 2-3 true leaves, and keep them in bright, indirect light until hardening off.
The payoff? Primulas that bloom earlier and more prolifically than store-bought plants, with vibrant colors that last from spring into early summer.
This method works for both spring and fall sowing, adapting to your climate zone. Whether you’re growing in a greenhouse or a sunny windowsill, the layered chill hack ensures your primulas thrive. Ready to skip the guesswork and get those seeds sprouting fast?
📚 In This Guide
- What you need
- Instructions
- Tips and common mistakes
- Wrapping up and next steps
What you need
- ● Primula flower seeds – Choose high-quality, fresh seeds (e.g., Primula vulgaris or Primula denticulata). Aim for 10-20 seeds per tray or container.
- ● Seed-starting mix – A lightweight, well-draining blend (e.g., 50% peat moss, 30% perlite, 20% vermiculite). Use 1-2 cups per 10-inch tray.
- ● Small containers or seed trays – 2-4 inch pots or flat trays with drainage holes (1-2 seeds per container).
- ● Plastic wrap or humidity dome – To maintain moisture during germination.
- ● Spray bottle – For gentle watering (10-15 sprays per session).
- ● Refrigerator (or cold frame) – Set to 35–40°F (2–4°C) for stratification.
- ● Plastic bag with air holes – To keep seeds moist during cold treatment (seal loosely around containers).
- ● Timer or calendar – Track 4–8 weeks of cold stratification.
- ● Grow lights – 12–16 hours/day after germination (LED or fluorescent, 5000K color temp).
- ● Heating mat – 70–75°F (21–24°C) for faster germination post-chill.
- ● pH meter or test kit – Ideal soil pH: 6.0–7.0.
- ● Fertilizer (diluted) – Balanced 10-10-10 or fish emulsion (½ strength) after sprouts appear.
Instructions for primula flower seeds: layered chill hack for faster germination
Here's how to break dormancy and trigger rapid, vigorous sprouts using a simple cold stratification method.
🌱 Step 1: Prepare Seeds with Moisture and Cold Exposure
Primula seeds need a layered chill hack to mimic their natural alpine growing conditions. Start by placing the seeds in a sealed plastic bag with 2 tablespoons of damp sand (just moist enough to hold together when squeezed). Seal the bag tightly to maintain humidity and prevent drying.
Place the bag in your refrigerator's crisper drawer where temperatures hover around 35-40°F. This cold, moist environment tricks the seeds into thinking winter has passed and spring is coming. Leave them for 4-6 weeks—this is critical for breaking dormancy. Check occasionally to ensure the sand remains damp; if it dries, mist lightly with water.
⏰ Step 2: Monitor for Germination Cues
After 4-6 weeks, remove the bag and inspect the seeds. You’ll notice some may have swollen slightly or developed a tiny white root—this means the cold treatment worked. If seeds remain unchanged, extend the cold period by another 2 weeks before proceeding.
Once you see signs of life, transfer the seeds to small seed-starting trays filled with sterile seed-starting mix. Press each seed ¼ inch deep into the soil, spacing them ½ inch apart to avoid overcrowding. Water gently with a spray bottle until the soil is evenly moist but not soggy.
☀️ Step 3: Provide Warmth and Light for Sprouting
Place the trays in a warm, bright location with temperatures between 65-70°F. A seedling heat mat set to 70°F accelerates germination significantly. Keep the soil consistently moist—not wet—by misting daily or using a humidity dome until sprouts appear.
Germination typically occurs within 7-14 days after removing the seeds from cold. You’ll see tiny green shoots push through the soil first, followed by first true leaves in another 10-14 days. Once seedlings emerge, remove any humidity dome immediately to prevent fungal issues.
🌿 Step 4: Thicken and Harden Off Seedlings
When seedlings reach 2 inches tall with 2-3 sets of true leaves, it’s time to thin. Use small scissors to snip the weakest seedlings at soil level, leaving the strongest 4 inches apart. This reduces competition and encourages robust growth.
Begin hardening off seedlings 2 weeks before transplanting by placing them outdoors in a shaded, sheltered spot for 1-2 hours the first day. Gradually increase exposure over 10-14 days, ending with full sun. Watch for wilting or yellowing leaves—these are signs they’re not ready for full outdoor conditions yet.
🪴 Step 5: Transplant to Final Growing Spots
Transplant seedlings into their permanent location once they’ve hardened off and outdoor temperatures stay above 50°F at night. Dig holes twice as wide as the root ball and same depth, then gently place each seedling in, firming soil around the base. Water deeply to settle roots and reduce transplant shock.
Primulas thrive in partial shade with moist, well-draining soil. Mulch with 1-2 inches of organic matter to retain moisture and regulate soil temperature. You’ll see blooms in 8-12 weeks—faster than standard methods because of the layered chill hack!
Tips & tricks for perfect primula flower seed germination
This layered chill hack isn't just about patience—it's about creating the exact conditions primula seeds need to break dormancy quickly. Here's how to optimize every step for the fastest, strongest sprouts possible.
Cold Stratification Precision: The 4-6 week cold period at 35-40°F is non-negotiable for primula seeds, but consistency matters more than the clock. I place my seeds in a sealed bag with damp sand and store them in the refrigerator's crisper drawer—not the freezer section—where temperatures stay steady. Check weekly to ensure the sand remains just moist enough to hold together when squeezed. If it dries out, mist lightly with water and reseal immediately. This mimics the natural alpine freeze-thaw cycles that trigger germination.
Germination Cue Recognition: After those critical 4-6 weeks, don't rush to plant! Look for subtle signs like slightly swollen seeds or tiny white roots—these indicate the cold treatment worked. If seeds remain unchanged, extend the cold period by another 2 weeks before proceeding. I've learned the hard way that pushing through this stage too quickly leads to weak, slow-growing seedlings. Trust the process: primulas won't rush, and neither should you.
Warmth Transition Strategy: When moving seeds to warm conditions (65-70°F), I use a seedling heat mat set to exactly 70°F to accelerate germination. The key is consistency—fluctuating temperatures can shock delicate seedlings. Place trays under grow lights or in a south-facing window where they'll receive 12-14 hours of light daily. Once sprouts appear (typically within 7-14 days), remove any humidity dome immediately to prevent fungal issues. This might seem counterintuitive after keeping everything moist, but primulas need airflow as they grow.
Thinning Technique: When seedlings reach 2 inches tall with 2-3 sets of true leaves, thinning becomes crucial. Use small scissors to snip weak seedlings at soil level rather than pulling them out—this prevents disturbing the roots of your keepers. Leave the strongest seedlings 4 inches apart to give them room to grow. I've found that seedlings left too close compete for nutrients, resulting in leggy, weak plants that struggle to bloom. This step might seem harsh, but it pays off when you see robust plants ready for transplanting.
Pro Tips for Primula Flower Seeds
- This layered chill hack isn't just about patience—it's about creating the exact conditions primula seeds need to break dormancy quickly.
- Cold Stratification Precision: The 4-6 week cold period at 35-40°F is non-negotiable for primula seeds, but consistency matters more than the clock.
- Germination Cue Recognition: After those critical 4-6 weeks, don't rush to plant!
Frequently asked questions
Got questions about growing primula flower seeds with the layered chill method? You’re not alone! Here are answers to the most common queries to help you succeed.
What does "layered chill" mean for primula seeds?
The layered chill method mimics natural winter conditions by exposing seeds to alternating warm and cold periods. For primula, this breaks dormancy faster—think of it like giving your seeds a gentle wake-up call! Start with 2–4 weeks at 60–70°F (15–21°C), then move to 35–45°F (2–7°C) for 2–3 weeks. Repeat if needed.
How long does it take for primula seeds to germinate?
Patience is key! With the layered chill method, germination typically takes 4–12 weeks. Some varieties (like Primula vulgaris) may sprout in as little as 3 weeks, while others need up to 3 months. Keep soil consistently moist but not soggy—bottom watering helps avoid mold.
Can I use regular fridge storage for the cold phase?
Yes! A standard fridge (set to 35–45°F / 2–7°C) works perfectly for the cold phase. Place seeds in a sealed container with damp paper towels or peat moss to prevent drying. Avoid freezer temps—primula seeds hate extreme cold (<32°F / 0°C). For extra humidity, try a Ziploc bag with tiny holes.
What if my primula seeds won’t sprout?
Try these troubleshooting steps:
- Check moisture: Dry soil = no germination. Use a spray bottle to keep seeds hydrated.
- Verify chill cycles: Some seeds need 3+ cold/warm repeats. Log your progress!
- Test seed viability: Soak a few seeds in water for 24 hours—if they sink, they’re likely good.
- Light needs: Primula seeds prefer bright, indirect light (no direct sun during germination).
Can I direct-sow primula seeds outdoors?
Direct sowing is possible but risky—primula seeds thrive with controlled conditions. If you must sow outdoors, wait until late fall (so seeds experience natural winter chill). Choose a shady, moist spot (they hate drought) and cover seeds lightly with soil (no deeper than ¼ inch). Success rates drop without stratification, so start indoors for best results!
Pro Tip:
Label your seed trays! Primula varieties vary wildly in color and size—you’ll thank yourself later when those pink, purple, or yellow blooms pop up unexpectedly.
Wrapping up and next steps
Growing primula flower seeds with the layered chill method is your secret weapon for vibrant, hardy blooms! 🌱 By mimicking nature’s cycles, you’ll unlock faster germination and stronger seedlings—no green thumb required. Whether you’re a seasoned gardener or a curious beginner, this technique makes success feel effortless.
Ready to bloom with confidence? Grab your seeds, follow the steps, and watch your garden transform. Next up: Share your primula progress with fellow plant lovers or experiment with other cold-treated favorites like pansies or snapdragons! 🌸