Transplanting
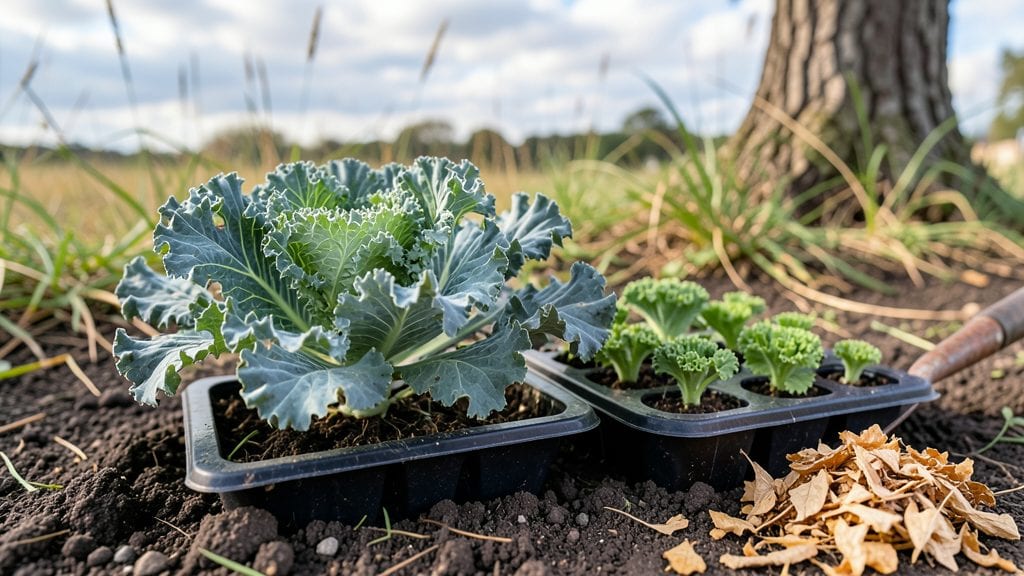
Planting kale seedlings is where the real magic happens—those tough little plants transform into the most vibrant green powerhouses in your garden. 🌱 I’ve learned that the difference between wilted kale and the kind that keeps producing through frost comes down to how you handle the first few days after transplanting.
It’s not just about sticking them in the ground; it’s about giving them the perfect start so they take off like weeds in the right conditions.
The secret isn’t complicated: loose, nutrient-rich soil, 12-18 inches of space between plants, and a deep watering right after planting. Kale thrives in cooler weather, so aim for full sun to partial shade—morning sun and afternoon shade works best in hotter climates.
I’ve found that adding a handful of compost to each hole gives them the boost they need to establish strong roots fast. And here’s the thing—don’t rush hardening off. If your seedlings look stressed, give them another week or two under shade cloth.
Once planted, you’ll see those broad leaves unfurl into bold, slightly crinkled greens within weeks. The key is keeping the soil consistently moist but not soggy—kale hates wet feet.
Mulch helps retain moisture and keeps weeds at bay, so I always spread a 2-inch layer of straw or grass clippings after planting. By mid-season, you’ll be harvesting leaves regularly, and the plants will keep producing well into fall and even winter in many climates.
Here’s where it gets interesting—companion planting with herbs like dill or onions deters pests like cabbage worms, and a light row cover can extend the harvest even longer. The first few weeks are critical, but once your kale gets established, it’s one of the most foolproof crops in the garden.
Ready to get those seedlings in the ground and watch them grow?
📚 In This Guide
- What you need
- Instructions
- Tips and common mistakes
- Wrapping up and next steps
What you need
- ● Kale seedlings: 6–12 hardened-off seedlings (check for sturdy stems and vibrant leaves).
- ● Garden space: Full sun to partial shade (4–6 hours of sunlight daily).
- ● Well-draining soil (pH 6.0–7.0).
- ● Spacious beds or containers (12–18 inches apart in rows, 24 inches apart in containers).
- ● Transplanting tools: Trowel or small shovel (for digging holes).
- ● Watering can or hose with a gentle spray nozzle.
- ● Fertilizer: Balanced organic fertilizer (5-5-5 or compost) to enrich the soil.
- ● Mulch: Straw, shredded leaves, or grass clippings (1–2 inches thick) to retain moisture.
- ● Plant markers: Small stakes or labels to track varieties (especially useful if growing multiple types).
- ● Row covers: Lightweight fabric to protect seedlings from pests or frost in early spring/fall.
- ● Epsom salt: A spoonful dissolved in water (1 tablespoon per gallon) for magnesium boost.
- ● Companion plants: Onions, garlic, or herbs like dill to deter pests naturally.
- ● Gloves & knee pads: For comfort during planting (trust us, your back will thank you!).
Step-by-Step instructions for planting kale seedlings
Here’s how I prepare hardened-off kale seedlings for a thriving outdoor life—no guesswork, just proven results.
🌱 Step 1: Prepare the Planting Site
Kale thrives in cool weather and rich soil, so choose a spot with at least 6 hours of sunlight daily. I always test the soil pH first—kale prefers 6.0-7.0. If your soil is heavy clay, mix in 2-3 inches of compost and work it into the top 12 inches of soil to improve drainage and fertility.
Loosen the soil to a depth of 8-10 inches with a garden fork, breaking up any compacted layers. Kale’s roots need room to spread, so avoid tilling too deeply—just enough to create a soft, crumbly bed. If planting in raised beds, ensure they’re at least 12 inches deep to accommodate kale’s robust root system.
🪴 Step 2: Space Seedlings Correctly
Kale seedlings need space to grow into sturdy plants, so space them 12-18 inches apart in rows that are 24 inches apart. For a tighter arrangement (like in raised beds), you can reduce spacing to 10-12 inches, but this may limit airflow and increase disease risk. I like to use a simple string-and-stake method to mark rows—just tie a line between two stakes and measure evenly along it.
Dig a hole for each seedling slightly larger than the root ball. Gently remove the seedling from its container, loosen the roots if they’re circling, and place it in the hole so the top of the root ball sits even with the soil surface. Kale hates being buried too deep—this ensures strong stem growth without rot.
💧 Step 3: Water Deeply and Mulch
After planting, water each seedling deeply to settle the soil around the roots. Use 1-2 gallons of water per plant to encourage roots to spread outward. I always water in the early morning so the soil has time to absorb moisture before evening heat. Avoid overhead watering—it can spread disease, so water at the base instead.
Once the soil is moist, apply a 2-3 inch layer of organic mulch around each plant, keeping it 2 inches away from the stem. Straw or shredded leaves work well—they retain moisture, suppress weeds, and keep soil temperatures stable. Mulch also protects young kale from temperature swings, which can stress seedlings.
☀️ Step 4: Provide Support and Monitor Growth
Kale can get top-heavy as it matures, so I like to set up low cages or stakes (18-24 inches tall)> around each plant early on. This prevents stems from snapping under the weight of large leaves. If you’re growing a loose-leaf variety, you can skip support, but for curly kale or larger varieties, it’s a must.
Watch for signs of stress—yellowing leaves often mean too much water, while crispy edges signal underwatering. Kale is hardy but benefits from 1 inch of water per week, especially during dry spells. If pests appear (like cabbage worms), I use row covers or organic sprays to protect the plants without harming beneficial insects.
⏰ Step 5: Maintain Through Harvest
Kale grows best in cool weather, so if temperatures rise above 80°F, provide afternoon shade to prevent bolting. Harvest outer leaves when they reach 6-8 inches long, leaving the inner leaves to keep growing. This method ensures a continuous supply without sacrificing plant health.
Fertilize lightly every 4-6 weeks with a balanced organic fertilizer to keep the soil rich. Kale is a heavy feeder, but too much nitrogen will produce lots of leaves with poor flavor. I prefer a 5-5-5 ratio**> to balance growth and taste. With proper care, your kale will thrive for months—ready for salads, sautés, or storage.
Tips & tricks for planting kale seedlings
Here's what I've learned the hard way about giving kale seedlings the best possible start in your garden.
Soil Preparation Secret: Before amending your soil with compost in Step 1, I recommend doing a simple "squeeze test" to check moisture levels. Grab a handful of soil—if it crumbles easily when dry but holds shape when moist, you're good to go. If it stays clumped, add more compost to improve structure. Kale roots need that perfect balance of aeration and moisture retention, and this test ensures you're not over-amending. The goal is that 8-10 inch loosened bed should feel like a well-aerated sponge, not compacted clay.
Spacing Strategy: When marking your rows in Step 2, I use a simple trick to ensure perfect spacing: after tying your string line, I place a small rock or marker every 12-18 inches along the line. This visual guide prevents me from eyeballing measurements, which can lead to inconsistent spacing. For the 24 inch row spacing, I use a different color string or marker to avoid confusion. This method has saved me from replanting crowded seedlings that compete for nutrients.
Watering Wisdom: The 1-2 gallons per plant recommendation in Step 3 might seem like a lot, but trust me—it's worth it. I use a watering wand with a gentle spray to deliver this amount evenly without disturbing the soil. The key is to water until you see moisture emerge from the bottom of the planting hole. This deep watering encourages roots to grow downward rather than staying shallow, which is crucial for kale's long-term stability. I also make it a habit to check soil moisture by sticking my finger about 2 inches deep between plants—if it's dry, it's time to water again.
Pest Prevention: In Step 4, when monitoring growth, I've found that the best defense against cabbage worms is to apply a thin layer of diatomaceous earth around each plant's base after watering. The moisture helps activate its natural insect-killing properties. For extra protection, I plant a few rows of radishes or nasturtiums nearby—these act as trap crops, drawing pests away from your kale. The 1 inch per week watering guideline helps maintain the diatomaceous earth's effectiveness while keeping your plants hydrated.
Pro Tips for Planting Kale Seedlings
- Here's what I've learned the hard way about giving kale seedlings the best possible start in your garden.
- Soil Preparation Secret: Before amending your soil with compost in Step 1, I recommend doing a simple "squeeze test" to check moisture levels.
- Spacing Strategy: When marking your rows in Step 2, I use a simple trick to ensure perfect spacing: after tying your string line, I place a small rock or marker every 12-18 inches along the line.
Frequently asked questions
Got questions about planting your kale seedlings? You’re not alone! Here are answers to the most common queries to help you grow a thriving, leafy harvest.
When is the best time to plant kale seedlings outdoors?
Plant hardened-off kale seedlings after the last frost when soil temps are at least 45°F (7°C). For cooler climates, aim for early spring or late summer—kale actually prefers mild weather! Avoid extreme heat (above 80°F/27°C), as it can cause bolting. Check your local frost dates for precision.
How long does it take for kale seedlings to establish after transplanting?
Kale seedlings typically take 1–2 weeks to recover from transplant shock and 4–6 weeks to reach harvest size. Water deeply 2–3 times weekly (1–1.5 inches total) and mulch to retain moisture. Patience pays off—young plants may look wilted at first but bounce back with care!
What pests should I watch for after planting kale seedlings?
Kale is a magnet for cabbage worms, aphids, and flea beetles. Inspect leaves daily for holes or sticky residue. Use row covers early on or spray with neem oil or insecticidal soap. Handpick larger pests (like worms) for an organic fix. Companion plants like basil or thyme can deter some critters too!
Can I plant kale seedlings in containers or raised beds?
Kale thrives in 5-gallon containers or raised beds with 12+ inches of depth. Use well-draining soil and space seedlings 12–18 inches apart. Containers dry faster, so water more frequently. Just ensure they get 6+ hours of sunlight daily—partial shade is fine in hot climates.
What if my kale seedlings bolt or turn bitter after planting?
Bolting (premature flowering) happens when temps spike or days lengthen. To prevent it:
- Harvest outer leaves young (before heads form).
- Choose late-summer varieties (e.g., ‘Winterbor’ kale).
- Avoid over-fertilizing with nitrogen—it speeds growth.
- Use shade cloth (30–50%) in peak summer.
Pro Tip: Label your seedlings!
Kale varieties look similar, but flavors and growth habits vary. Use biodegradable plant markers to track types like curly, flat-leaf, or red Russian. This ensures you harvest the right plant at the perfect time for the best texture and taste!
Wrapping up and next steps
Planting kale seedlings is a rewarding step toward a thriving, homegrown harvest—especially when you’ve taken the time to harden them off properly! 🌱 With the right tools, spacing, and care, your seedlings will grow into robust, nutrient-packed plants ready to brighten your garden and table.
Now that you’re equipped with the know-how, there’s only one thing left to do:
Your Next Step: Plant and Watch Them Grow!
Roll up your sleeves, dig in, and give your kale seedlings the love they deserve. Before you know it, you’ll be harvesting crisp, flavorful leaves straight from your garden. Happy planting—and enjoy the delicious (and healthy!) rewards! 🥬✨