Trees
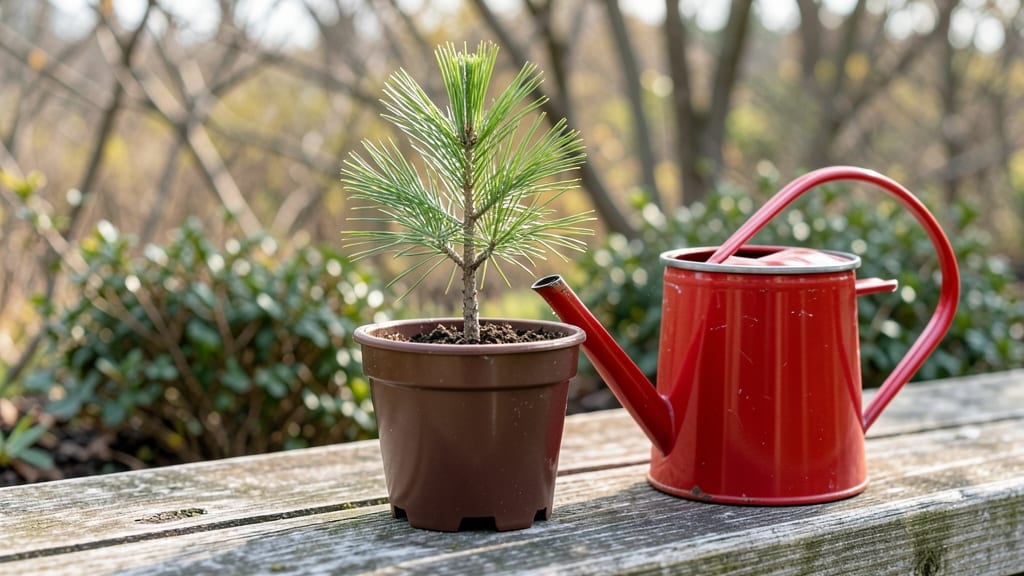
Caring for pine seedlings isn’t just about planting and forgetting—it’s the year-round survival blueprint that turns scraggly saplings into sturdy, healthy trees. 🌲 I’ve nursed more than my share of pine seedlings from floppy stems to 6-foot giants, and the secret lies in mimicking their natural forest habitat: well-draining soil, consistent moisture, and just the right amount of sunlight.
Most people overwater or plant them too deep, which is a fast track to root rot or stunted growth.
The right setup starts with acidic, sandy soil mixed with peat moss—think of it as a sponge that drains fast but holds enough moisture to keep roots happy. A 5-gallon container works for the first year, and spacing seedlings 3-4 feet apart gives their roots room to spread without competing.
Young pines hate soggy feet, so raise containers slightly off the ground or add perlite to prevent waterlogging. This alone cuts down on the most common early-stage failures.
By summer’s end, you’ll see bright green needles that stay plump and vibrant, not yellowing or dropping. The key is watering deeply once a week (twice in peak heat) and fertilizing lightly with a slow-release pine formula in early spring.
Prune only to remove broken branches—never trim healthy needles, as pines grow new ones only at the tips. The payoff? A tree that thrives through winters and grows strong enough to outlast deer, droughts, and curious kids.
This works for white pine, red pine, or Scotch pine seedlings, whether you’re growing in containers or planting directly in the ground. The same principles apply whether you’re in the Pacific Northwest or the Southeast—just adjust watering for your local climate.
Let’s get those seedlings on the fast track to forest-worthy strength.
📚 In This Guide
- What you need
- Instructions
- Tips and common mistakes
- Wrapping up and next steps
What you need
- ● Pine seeds: High-quality, fresh seeds (preferably from a trusted supplier or your own harvested cones). Aim for at least 10-20 seeds to increase germination success.
- ● Seedling pots or trays: Small, biodegradable or plastic pots (3-4 inches in diameter) or seedling trays with drainage holes. You’ll need one per seedling (or a tray with individual cells).
- ● Well-draining potting mix: A blend of 50% peat moss or coconut coir, 30% perlite or vermiculite, and 20% sand (for aeration). Avoid heavy garden soil—it can suffocate roots!
- ● Grow lights or sunlight access: A full-spectrum LED grow light (12-16 hours/day) or a south-facing window with bright, indirect light. Pines love light!
- ● Misting bottle or spray nozzle: For gentle watering—avoid soaking to prevent fungal issues.
- ● Humidity dome or plastic wrap: To retain moisture during germination (remove once sprouts appear).
- ○ Fertilizer (optional but helpful): A balanced, slow-release fertilizer (10-10-10 or 5-5-5) or a pine-specific nutrient mix. Start with half-strength applications.
- ● Pruning shears: Small, sharp shears for trimming dead branches or overgrowth as your seedling matures.
- ● Heat mat: Keeps soil warm (70-80°F) to speed up germination (great for slow starters!).
- ● pH testing kit: Pines prefer acidic soil (pH 4.5-6.0). Adjust with sulfur if needed.
- ● Epsom salt: A magnesium boost (1 tsp per gallon of water) can enhance early growth.
- ● Mulch (pine bark or straw): Helps retain moisture and mimic forest floor conditions once seedlings are outdoors.
- ● Label markers: To track seed varieties and planting dates (trust us, you’ll forget!).
Step-by-Step guide to nurturing healthy pine seedlings
Here's how I've kept pine seedlings thriving through every season—no guesswork, just science-backed care.
🌱 Step 1: Establish Proper Planting Conditions
Pine seedlings need well-draining soil to prevent root rot, so I always mix 2 parts peat moss with 1 part perlite and 1 part coarse sand. This creates an airy medium that mimics their natural forest floor habitat. Plant seeds ¼ inch deep in individual 3-inch pots—crowding stresses young roots and slows growth.
Place pots in a shaded area for the first 2 weeks while seedlings establish. Too much sun at this stage causes moisture loss and weakens stems. Water gently but thoroughly until water runs through the drainage holes—this ensures roots develop downward instead of sitting in soggy soil. Let the top inch dry between waterings to prevent fungal issues.
💧 Step 2: Master Watering Without Overdoing It
Pines hate soggy roots, so I water only when the top 2 inches of soil feel dry to the touch. Use a moisture meter or stick your finger in—if it's damp below the surface, wait another day. Overwatering is the #1 killer of young pines, causing yellow needles and stunted growth.
During the first growing season, I reduce watering in late summer to every 5-7 days to encourage deeper root development. You'll see stronger seedlings with thicker stems when you handle them—this is your sign they're building resilience. Always water at the base, never overhead, to prevent needle diseases.
☀️ Step 3: Provide Gradual Sun Exposure
Pine seedlings need full sun eventually, but I harden them off slowly. Start with 3-4 hours of morning sun for the first week, then increase by 1 hour daily until they reach 6+ hours. Sudden full sun causes needle scorch—you'll spot it as brown tips or crispy edges on needles.
After 4-6 weeks, move seedlings to a south-facing location with afternoon shade if temperatures exceed 85°F. Mature pines handle heat better, but young ones need protection. Watch for new growth at the tips—this confirms they're adapting well to increased light.
✂️ Step 4: Prune and Fertilize Strategically
Remove any dead, broken, or crossing branches with clean pruners in early spring. I never cut more than ¼ inch above a healthy bud—this prevents dieback. Thin crowded branches to improve airflow, which reduces fungal risks. Healthy seedlings should have 3-5 main branches spreading evenly.
Fertilize lightly in spring with a balanced 10-10-10 formula (½ teaspoon per pot). Over-fertilizing burns roots and causes needle drop. Water immediately after applying fertilizer to distribute nutrients evenly. You'll notice darker green needles and faster growth within 2-3 weeks if the feeding is correct.
🪴 Step 5: Prepare for Year-Round Survival
In fall, reduce watering by 50% as temperatures drop. Pines go semi-dormant in cooler months, so let the soil dry slightly between waterings. Move pots to a protected location (like a garage or under eaves) if winter temps drop below 20°F—young seedlings can't handle freezing soil.
Before winter, I mulch with 1 inch of pine bark around the base (but not touching the trunk) to insulate roots. In spring, remove old mulch and refresh with new. Healthy pines will show new candle growth (the tall shoot at the tip) by early spring—this is your sign they survived winter strong.
Tips & tricks for perfect pine seedling care
Real talk: Growing healthy pine seedlings requires patience and precision, but these pro tips will help you avoid the most common pitfalls and nurture resilient trees.
The Soil Secret: When mixing your 2 parts peat moss, 1 part perlite, and 1 part coarse sand, sift the components together first to eliminate clumps. Compacted soil prevents proper drainage, which is critical for preventing root rot—the silent killer of young pines. After planting, gently press the soil around each seedling to eliminate air pockets, ensuring consistent moisture distribution.
Sunlight Transition Strategy: During the gradual sun exposure in Step 3, watch for subtle color changes in the needles. Healthy seedlings will develop a deeper green hue as they adapt, while brown or crispy tips signal stress. If temperatures exceed 85°F, provide afternoon shade using a sheer curtain—direct afternoon sun at these temperatures can cause irreversible damage. Remember, the goal is to mimic their natural forest understory environment where young pines gradually acclimate to full sun.
Fertilizer Timing is Everything: The ½ teaspoon of 10-10-10 fertilizer per pot should only be applied in early spring when you see new growth emerging. This timing ensures the seedlings aren't stressed by nutrients when they're dormant. I've learned this the hard way—applying fertilizer in fall can actually encourage late-season growth that gets damaged by frost. Always water immediately after applying to prevent root burn, and never fertilize when the soil is dry.
Winter Protection Pro Tip: When moving pots to protected locations below 20°F, place them on a layer of straw or bubble wrap to provide additional insulation. This creates a microclimate that maintains slightly warmer root zone temperatures. In spring, gradually reintroduce the seedlings to outdoor conditions over 7-10 days to prevent transplant shock from sudden temperature changes. You'll know you've done it right when you see that first new candle growth in early spring.
Pro Tips for Pine Seedling Care
- Real talk: Growing healthy pine seedlings requires patience and precision, but these pro tips will help you avoid the...
- The Soil Secret: When mixing your 2 parts peat moss, 1 part perlite, and 1 part coarse sand, sift the components toge...
- Sunlight Transition Strategy: During the gradual sun exposure in Step 3, watch for subtle color changes in the needle...
Frequently asked questions
Got questions about nurturing your pine seedlings? You’re not alone!
Here are answers to the most common concerns—from timing tricks to troubleshooting tips—to keep your young pines thriving year-round.
How often should I water pine seedlings, and how will I know if I’m overdoing it?
Water pine seedlings deeply but infrequently—about once a week (adjust for climate/drainage). Overwatering is the #1 killer! Check soil moisture by sticking your finger 2 inches down; if it’s dry, water. Yellow needles or mushy stems? You’re likely overwatering. Drainage is key—use pots with holes or well-draining soil mixes.
When is the best time to plant pine seedlings outdoors?
Plant in early spring or fall (avoid summer heat or winter frost). Seedlings need 6–8 weeks to establish roots before harsh weather. If planting in summer, opt for morning shade and mulch to retain moisture. Pro tip: Acclimate seedlings to outdoor conditions over 7–10 days before transplanting (called "hardening off").
What pests or diseases should I watch for in pine seedlings, and how do I treat them?
Common threats include:
- Pine needle scale: Sticky residue on needles? Scrape off pests with a soft brush or use neem oil.
- White pine weevil: Chewed leader tips? Prune damaged growth and apply burlap collars around the trunk.
- Fungal diseases (e.g., needle cast): Remove infected needles and improve airflow. Copper fungicides can help in severe cases.
Can pine seedlings survive winter, and how do I protect them?
Most pine seedlings are hardy, but young ones need help in freezing temps. Mulch heavily (3–4 inches of straw or wood chips) around the base, and wrap the trunk with burlap if winds are fierce. Evergreen seedlings don’t need snow removal—let it act as insulation! Watch for winter burn (brown needles) and water lightly if soil is frozen.
Are there low-maintenance alternatives to traditional pine seedlings?
Yes! Consider:
- Container-grown pines: Skip transplant shock by buying 1–3 gallon pots with established root systems.
- Dwarf varieties (e.g., Pinus mugo): Perfect for small spaces and need less pruning.
- Native pine species: Choose varieties adapted to your climate (e.g., Pinus strobus for cooler regions).
Wrapping up and next steps
Caring for pine seedlings is all about patience, consistency, and a little green thumb love! 🌱 With the right balance of water, sunlight, and soil—plus a watchful eye for pests—your young pines will thrive into strong, towering trees.
Remember, every expert gardener started with a single seedling, so don’t hesitate to roll up your sleeves and give it your best shot.
Ready to take the next step? Plant your seedlings this season and watch them grow into a lush, shady haven for years to come. Happy gardening! 🌲