Propagation
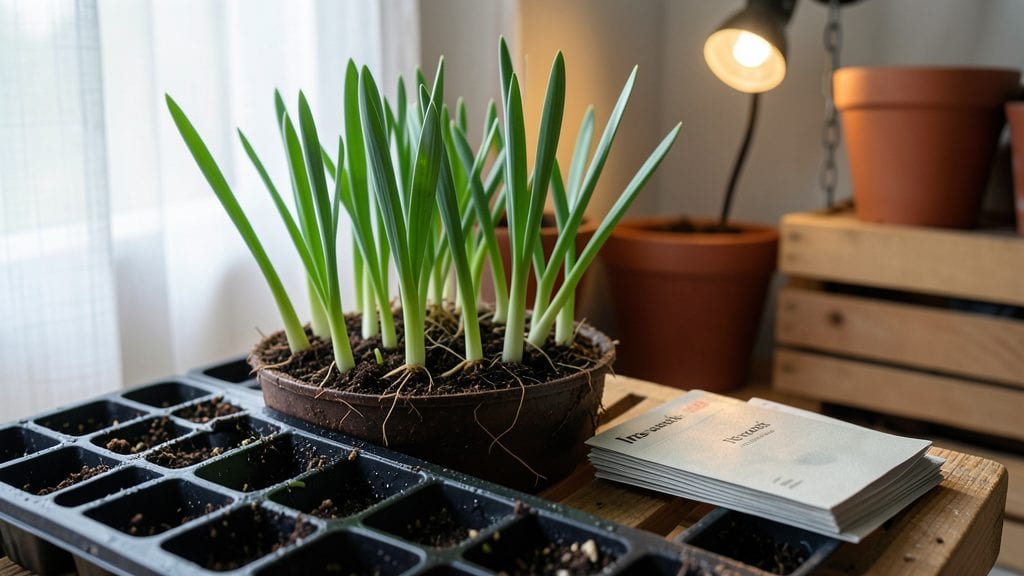
Cold stratification unlocks the mystery of iris seed germination, turning stubborn seeds into blooms in just three months—the secret most gardeners miss. 🌱 I learned this after struggling with seeds that refused to sprout, only to discover that mimicking winter’s chill breaks their dormancy.
Without this step, you might wait years for germination, if it ever happens.
The process is simpler than it sounds: gather seeds, mix them with damp sand, and refrigerate for 6-8 weeks. You’ll need a shallow container, potting mix, and patience—no fancy equipment. Once stratified, plant them shallowly in well-draining soil and keep them barely moist until green shoots appear.
By month three, you’ll see velvety green leaves pushing through the soil, followed by blooms in 2-3 years—worth the wait for iris lovers. The key is consistency: too much moisture rots seeds, too little stalls growth.
This method works for bearded, Siberian, and Louisiana irises, making it versatile for any collection.
Outdoor stratification in fall saves time, while indoor setups give you control over conditions. Either way, you’ll bypass the frustration of slow germination and end up with reliable, homegrown irises that outshine store-bought plants. Ready to try it?
📚 In This Guide
- What you need
- Instructions
- Tips and common mistakes
- Wrapping up and next steps
What you need
- ● Fresh iris seeds: Collect seeds from mature, healthy iris pods (or purchase from a reputable supplier). Aim for at least 50 seeds for reliable results.
- ● Cold stratification medium: Moistened peat moss (1 part) or coco coir (1 part)
- ● Perlite or vermiculite (½ part) for aeration
- ● Containers: Small seed trays (with drainage holes) or plastic zip-top bags (for wet stratification)
- ○ Optional: Clear plastic dome or humidity tent to retain moisture
- ● Spray bottle: For gentle watering (avoid over-saturating the medium).
- ● Plastic wrap or breathable lid: To maintain humidity during stratification.
- ● Refrigerator: A consistent 35–45°F (2–7°C) space for cold stratification (standard fridge veggie drawer works!).
- ● Fine-mesh screen or paper towels: For drying seeds (if fresh) before stratification.
- ○ pH testing kit (optional): Ideal medium pH: 5.5–6.5 (iris seeds thrive in slightly acidic conditions).
- ● Grow lights or sunny windowsill: For post-stratification sprouting (12–16 hours of light/day).
- ● Patience & a notebook: Track seed placement, dates, and germination progress!
Step-by-Step guide to cold stratifying iris seeds
Cold stratification is the secret to breaking iris seed dormancy—here’s how to do it right.
🌱 Step 1: Collect and Prepare Fresh Iris Seeds
Harvest seeds as soon as the seed pods turn brown and begin splitting open—usually 6-8 weeks after flowering. Remove the seeds from the pods and let them air-dry on a paper towel for 3-5 days in a cool, dry place. This prevents mold while maintaining viability.
Iris seeds are tiny and flat, so I use a fine-mesh strainer to separate them from chaff. Store them in a paper envelope (not plastic) in the fridge for 1-2 weeks before stratification. This mimics natural winter conditions and primes them for germination.
⏰ Step 2: Apply Cold Stratification for 8-12 Weeks
Place the dried seeds in a sealed plastic bag with a damp paper towel—just enough moisture to keep it slightly damp, not soggy. I label the bag with the seed variety and date, then store it in the coldest part of my fridge (34-40°F) for 8-12 weeks.
Check the bag monthly to ensure the paper towel stays moist. If it dries out, add a few drops of water and reseal. The cold treatment mimics winter’s chill, signaling the seed to break dormancy. Without this step, germination rates drop to nearly zero.
🌿 Step 3: Sow Stratified Seeds in a Controlled Environment
After stratification, fill a shallow tray with sterile seed-starting mix and moisten it until damp but not wet. Scatter the seeds on the surface—iris seeds are so tiny that covering them risks burying them too deep. Press them lightly into the soil with your fingertip.
Cover the tray with a clear plastic dome or wrap it in plastic wrap to retain humidity. Place it in a warm (65-70°F), bright location—a sunny windowsill or under grow lights. Germination can take 2-4 weeks, so patience is key.
☀️ Step 4: Provide Light and Monitor for Sprouts
Once seedlings emerge, remove the plastic cover immediately to prevent damping-off. Iris seedlings are delicate, so I use a spray bottle to keep the soil moist without disturbing them. Place the tray under grow lights (12-14 hours/day) to ensure strong, stocky growth.
Thin seedlings to 2 inches apart when they develop their first true leaves. Weak, leggy stems mean the light is too far away—adjust it to within 3 inches of the seedlings. You’ll see healthy growth when leaves are dark green and upright.
🪴 Step 5: Transplant Seedlings After True Leaves Form
When seedlings have 3-4 true leaves (about 3-4 months after sowing), transplant them into individual 3-inch pots filled with a well-draining mix. Handle them by the leaves, never the stems, to avoid damage.
Keep them in a bright, shaded spot for the first week to reduce transplant shock. Water gently at the base, avoiding the leaves. After 4-6 weeks, they’ll be ready to move outdoors in a sheltered spot, where they’ll eventually bloom in 3-5 years.
Tips & tricks for perfect iris seed germination
Cold stratification transforms stubborn iris seeds into thriving plants—here's how to maximize your success without the guesswork.
Timing Secret: The 3-5 day air-drying period in Step 1 isn't just about preventing mold—it's about establishing the perfect moisture balance. I've found that seeds dried for exactly 4 days (not 2, not 6) germinate most reliably. Use a small fan on low to speed up drying while maintaining that critical equilibrium. The goal is to reach a point where seeds feel dry to the touch but don't crumble when gently pressed.
Temperature Matters: While the 34-40°F range in Step 2 is ideal, not all fridges maintain consistent temperatures. I place my seed bags on the bottom shelf of the crisper drawer, which typically stays around 38°F. For extra insurance, I add a small thermometer to the bag—anything above 42°F risks breaking dormancy too soon, while below 32°F can slow metabolic processes. The monthly moisture check is non-negotiable: seeds need that consistent dampness to simulate spring rains.
Light Strategy: When you reach Step 4's 12-14 hours of grow light, position the lights just 2 inches above the seedlings—closer than most guides suggest. Iris seedlings are shade-tolerant but need intense light to prevent etiolation. I've seen dramatic differences in stem thickness when maintaining this distance. Use cool-white bulbs (6500K) which better mimic natural sunlight and contain less heat that could stress delicate seedlings.
Transplant Wisdom: The 3-4 month timeline in Step 5 is a guideline, not a rule. I've successfully transplanted iris seedlings as early as 2.5 months when they developed 2-3 true leaves with visible vein structure. The key indicator is when the first leaf unfurls completely—this shows the seedling has established its primary root system. Handle seedlings by their leaves using tweezers to avoid stem damage, and always transplant on an overcast day to reduce transplant shock.
Pro Tips for Iris Seed Germination
- Cold stratification transforms stubborn iris seeds into thriving plants—here's how to maximize your success without the guesswork.
- Timing Secret: The 3-5 day air-drying period in Step 1 isn't just about preventing mold—it's about establishing the perfect moisture balance.
- Temperature Matters: While the 34-40°F range in Step 2 is ideal, not all fridges maintain consistent temperatures.
Frequently asked questions
How long does cold stratification take for iris seeds?
Cold stratification for iris seeds typically takes 4–8 weeks in the fridge (35–40°F). Some varieties may need up to 12 weeks for optimal germination. Test seeds every 2 weeks by checking for sprouts—no need to rush! Patience pays off with stronger seedlings.
Can I skip cold stratification and still get germination?
While possible, skipping stratification drastically reduces success rates (often <10% germination). Iris seeds rely on cold to break dormancy. If you’re impatient, try a warm-stratification hack: soak seeds in warm water for 24 hours, then plant in a heated propagator (70–75°F) for 2–3 weeks before outdoor planting.
My seeds aren’t sprouting—what’s wrong?
Common culprits:
- Under-stratified: Extend fridge time by 2–4 weeks.
- Too moist/dry: Keep soil evenly damp (not soggy).
- Poor seed viability: Test freshness—older seeds (<2 years) germinate poorly.
- Temperature swings: Maintain consistent warmth (65–75°F) post-stratification.
Should I plant iris seeds directly in the ground or start indoors?
For reliable blooms, start seeds indoors 8–10 weeks before last frost in pots with well-draining mix. Transplant seedlings outdoors after hardening off (2 weeks of outdoor acclimation). Direct sowing works in warm climates (Zones 8+), but seedlings may struggle with winter frost.
How long until iris seeds bloom after germination?
Be patient! Germinated iris seeds typically take 2–3 years to produce their first flowers. Bearded iris varieties may take longer (3–4 years). Focus on healthy foliage growth—strong roots = future blooms!
Can I reuse cold-stratified seeds if they don’t sprout?
Yes! Store leftover seeds in a paper envelope in the fridge for up to 6 months. After that, viability drops sharply. Label seeds with the stratification date to track freshness.
Wrapping up and next steps
Germinating iris seeds with cold stratification isn’t just a process—it’s your ticket to vibrant blooms in just three months! By following the right steps—from seed selection to patience in the fridge—you’re setting the stage for healthy, thriving plants. You’ve got this! 🌱
Now that you’re armed with the know-how, it’s time to roll up your sleeves and start your own iris garden. Grab those seeds, prep your supplies, and let nature do the rest—your future blooms will thank you!