
Size
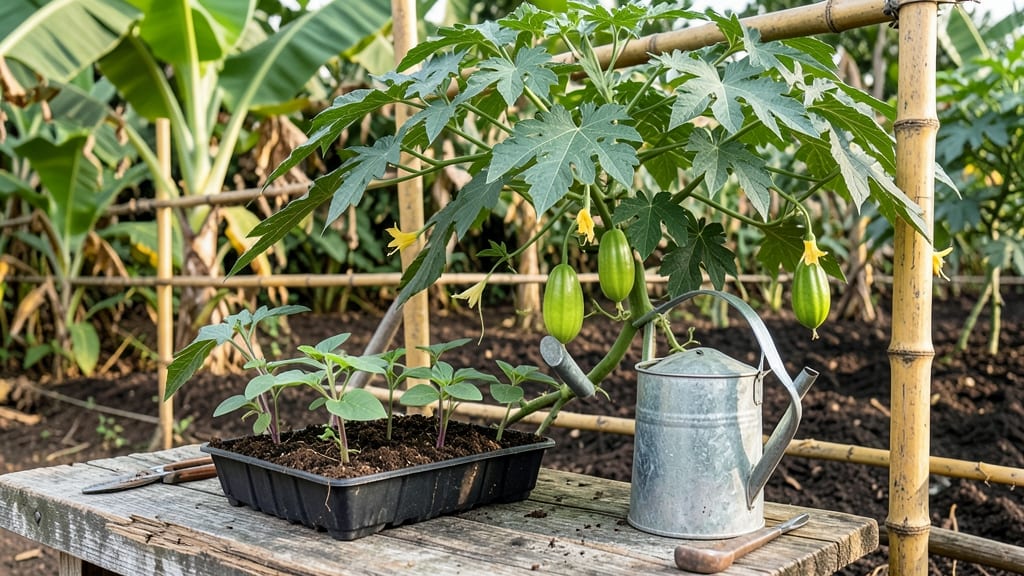
Growing ampalaya seeds fast means beating the heat and humidity with a 7-day germination trick—no more waiting weeks for those first tiny sprouts. 🌱 I’ve grown bitter melon in Florida’s summer heat, and this method cuts germination time in half while keeping seedlings strong from day one.
The secret? Pre-soaking seeds overnight in warm water and planting them in a cozy, moist environment that mimics the tropical conditions they crave.
You’ll need just a few supplies: biodegradable seedling pots, a mix of coconut coir and perlite for drainage, and a heat mat set to 80°F if your home runs cooler than 75°F. Ampalaya thrives in warm soil, so if your climate dips below 60°F at night, start seeds indoors under grow lights.
Once sprouted, keep them in bright, indirect light until they’re ready to transplant—usually within 2-3 weeks. The key is consistency: too much water drowns the seeds, but letting them dry out kills germination before it starts.
By day 7, you’ll have sturdy seedlings with their first true leaves, ready to handle the outdoors. The plants grow fast once established, climbing or trailing with jagged, vibrant green leaves that turn into those prized bitter melons by mid-summer.
Just watch for spider mites in dry heat—they love ampalaya as much as we do—and give vines something to climb or spread over if you want bigger harvests.
This method works in zones 10-12 year-round, but in cooler climates, treat ampalaya as an annual—it won’t survive frost, but you’ll get a full harvest before winter arrives.
Start early, and you’ll be picking fruit by July. The first bite is an acquired taste, but the satisfaction of growing it yourself? That’s the real reward.
📚 In This Guide
- What you need
- Instructions
- Tips and common mistakes
- Wrapping up and next steps
What you need
- ● Fresh ampalaya seeds: 5–10 seeds (harvest from ripe, organic fruit for best results).
- ● Seed-starting mix: 2–3 cups of lightweight, well-draining potting soil (avoid garden soil—it’s too dense!).
- ● Small pots or seed trays: 2–4 biodegradable pots (3–4 inches deep) or a seed tray with drainage holes.
- ● Watering can or spray bottle: With a fine mist nozzle for gentle hydration.
- ● Clear plastic wrap or humidity dome: To create a mini greenhouse effect.
- ● Grow lights or sunny windowsill: A warm spot (70–85°F) with 6+ hours of indirect light daily.
- ● Seedling heat mat: Speeds up germination if your space is chilly.
- ● Fertilizer (balanced 10-10-10 or compost tea): For post-germination nourishment.
- ● Twine or bamboo stakes: To support vines as they grow (4–6 inches tall).
- ● pH test kit: Ensures soil pH is 6.0–6.8 (ideal for ampalaya).
Step-by-step instructions for growing ampalaya seeds
Here's my proven method for coaxing ampalaya seeds to sprout in just 7 days—no waiting months.
🌱 Step 1: Soak Seeds Overnight for Faster Germination
Place the 4 ampalaya seeds in a small bowl and cover them with warm water (about 80°F). Soaking softens the tough outer shell, which is key for fast germination. Let them soak for 12 hours—I like to do this right before bed so they're ready in the morning.
After soaking, gently rub the seeds between your fingers to remove any remaining slimy coating. This step ensures they make contact with the soil more easily. You'll see them swell slightly—they're ready to plant when they feel slightly plump to the touch.
💧 Step 2: Plant in Warm, Moist Seedling Mix
Fill a small pot (at least 3 inches deep) with a mix of equal parts potting soil and coconut coir. This blend stays moist longer and gives young roots the air they need. Water the mix until it's damp but not soggy—think of a wrung-out sponge.
Plant the soaked seeds ½ inch deep, spacing them about 2 inches apart. Cover them lightly with soil, then mist the surface with water until it looks evenly damp. Ampalaya seeds need warmth to germinate, so place the pot in a spot where the soil stays at least 75°F. A sunny windowsill or under a grow light works best.
☀️ Step 3: Keep Warm and Humid Until Sprouts Appear
Cover the pot with a clear plastic bag or humidity dome to trap warmth and moisture. Check daily for condensation on the inside—this means the environment is just right. If the soil feels dry to the touch, mist it lightly again, but avoid soaking it.
Germination should happen in 5-7 days. You'll know it's working when you see tiny green sprouts pushing through the soil. Once they appear, remove the plastic immediately—too much humidity now can cause the stems to rot. Keep the soil consistently moist but not waterlogged.
🌿 Step 4: Provide Bright Light and Gradual Care
Move the seedlings to a spot with bright, indirect light as soon as they sprout. Direct sunlight can scorch young leaves, so a grow light 4-6 inches away is ideal. You'll see the seedlings grow faster and develop stronger stems when they get enough light.
After 2 weeks, when the seedlings have 2-3 true leaves, you can transplant them into larger pots or the garden. Ampalaya plants love warmth, so wait until nighttime temperatures stay above 60°F before moving them outdoors. This prevents shock and ensures steady growth.
Tips & tricks for perfect ampalaya seed germination
Fast germination is all about creating the right conditions—and avoiding these common pitfalls will make all the difference.
Soaking Secret: The 12-hour soak at 80°F is non-negotiable for breaking the tough outer shell of ampalaya seeds. I've tried shorter soaks, and they just don't work as well. Use a thermometer to check your water temperature—lukewarm tap water usually hits this mark perfectly. If your seeds aren't plump after soaking, give them an extra 2-3 hours.
Soil Temperature Matters: Ampalaya seeds need that consistent 75°F soil temperature to germinate. If your home stays cooler than that, place the pot on a seedling heat mat (set to 75°F) or nestle it inside a larger pot filled with warm water. I've seen germination times double when seeds get too cold—don't let that happen to you!
Humidity Management: That plastic cover creates a greenhouse effect, but it's a delicate balance. Check for condensation daily—if you see water droplets on the inside, you're doing it right. If the soil feels dry at the surface, mist lightly with room-temperature water. The moment you see sprouts, remove the cover immediately to prevent fungal growth. I've lost seedlings to over-humidity more times than I can count!
Light Transition Strategy: When moving seedlings to bright light after sprouting, do it gradually over 3-4 days. Start with 2 hours of indirect light daily and increase by 1 hour each day. Sudden bright light can shock tender seedlings—think of it like sunbathing after winter. A grow light on a timer makes this easy and consistent.
Pro Tips for Grow Ampalaya Seeds
- Fast germination is all about creating the right conditions—and avoiding these common pitfalls will make all the difference.
- Soaking Secret: The 12-hour soak at 80°F is non-negotiable for breaking the tough outer shell of ampalaya seeds.
- Soil Temperature Matters: Ampalaya seeds need that consistent 75°F soil temperature to germinate.
Frequently asked questions
Got questions about growing ampalaya from seeds?
You’re not alone! Here are answers to the most common concerns—from impatient gardeners to troubleshooters—so you can grow bitter melon like a pro.
How long does it take for ampalaya seeds to germinate?
Ampalaya seeds typically sprout in 5–7 days under ideal conditions (warmth, moisture, and indirect light). If you’re impatient, soak seeds in warm water for 4–6 hours before planting to speed up germination. Pro tip: Keep soil consistently moist but not soggy—overwatering can drown seeds!
Can I grow ampalaya indoors?
Yes! Ampalaya thrives indoors with 6+ hours of sunlight daily (use grow lights if natural light is limited). Choose a pot with drainage holes, and keep temperatures above 70°F (21°C). Just watch for pests like aphids—spray with neem oil if needed. Bonus: Prune vines to control growth in small spaces!
What if my ampalaya seeds don’t sprout?
Try these fixes:
- Check seed viability: Soak seeds in warm water for 24 hours—if they sink, they’re likely good. Floaters may be old or dead.
- Adjust soil temp: Ampalaya loves warmth (75–85°F / 24–29°C). Use a heat mat if your home runs cool.
- Replant: Bury seeds only ½ inch deep—deeper planting can suffocate them.
Can I grow ampalaya from store-bought bitter melon?
Technically yes, but it’s not recommended—store-bought melons are often treated with fungicides or wax coatings that inhibit germination. If you try, scoop seeds from organic, untreated fruit, rinse them well, and dry for 24 hours before planting. For best results, use seeds from a trusted nursery!
How do I protect ampalaya from pests?
Ampalaya attracts pests like aphids, whiteflies, and spider mites. Prevent issues with:
- Neem oil spray (weekly preventive treatment).
- Yellow sticky traps for flying insects.
- Companion planting with marigolds or basil to repel pests.
Wrapping up and next steps
Growing ampalaya from seeds is a rewarding journey that delivers fresh, nutrient-packed produce in just seven days! With the right soil, moisture, and sunlight, you’ll enjoy a thriving harvest—whether for cooking, health benefits, or sharing with loved ones. 🌱
Now that you’re equipped with the know-how, roll up your sleeves and start planting! Keep an eye on your seedlings, and soon, you’ll be reaping the fruits (or veggies) of your labor. Happy growing! 🌿
Next step: Share your progress or ask questions in the comments—we’d love to hear how your ampalaya garden grows!